Want to buy or sell something? Check the classifieds
  • The Fedora Lounge is supported in part by commission earning affiliate links sitewide. Please support us by using them. You may learn more here.

Skills For "Living The Era"

Big Man

My Mail is Forwarded Here
Messages
3,781
Location
Nebo, NC
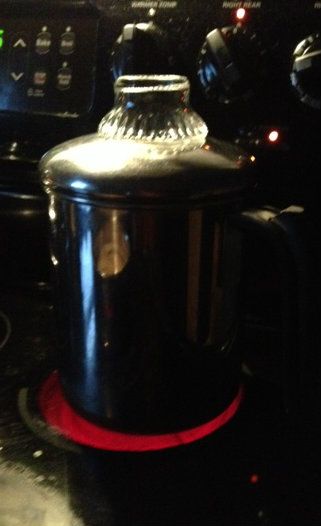
... If you aren't using an ironing bottle, you should be -- it's a Coke bottle with a special stopper perforated with holes, used to sprinkle water on your cottons before ironing. Creates the same effect as a steam iron.

I remember one year during Vacation Bible School (of all places), we made ironing bottles as an activity. We used a Coke bottle and somehow had different colors of paint swirled inside the bottle. I guess it was a tie in with "Joseph's coat of many colors." I remember well that big sprinkler head that went on the bottle. My Mother used that bottle for many, many years. That was sometime pre-1960 when we did that project.
 

Big Man

My Mail is Forwarded Here
Messages
3,781
Location
Nebo, NC
I recall my mom talking about the wood stove used for heating, cooking and hot water. She used to have to fill the hot water with water from the pump in the back yard to take a sitzbad.

For the first couple years I was married, we cooked on a wood stove. We used kerosene lamps for lighting, too. It was the 1970's and we were into the "back to the land" kind of lifestyle. That was a lot of fun, but I'm glad it was then and not now.

Cooking on wood stove is not all that difficult, it just takes a little practice to know where the "hot spots" are, and how to keep the pans moving around to cook evenly.
 

dnjan

One Too Many
Messages
1,687
Location
Seattle
I recall my mom talking about the wood stove used for heating, cooking and hot water. She used to have to fill the hot water with water from the pump in the back yard to take a sitzbad.
I grew up with a "combo" cook stove. One end was wood-fired, had a flat top for cooking, and also heated the oven and the kitchen. The other end had gas burners (powered by the gas tanks - about a foot in diameter and four feet high, delivered regularly). The oven also had gas heat so you could bake in summer without dieing from the wood-fired heat.

Though it was wood-burning, we generally used corncobs. One of my chores was to bring in fresh buckets of corncobs from the corncrib. (interestingly enough, another of my chores was to produce those corncobs by running ears of corn through the hand-cranked corn sheller so I had corn to feed the chickens and pigs.)
 

LizzieMaine

Bartender
Messages
32,926
Location
Where The Tourists Meet The Sea
I recall my mom talking about the wood stove used for heating, cooking and hot water. She used to have to fill the hot water with water from the pump in the back yard to take a sitzbad.

Ours was kerosene for heating and Pyrofax for cooking, but otherwise it was the same kind of deal. There was a big copper coil inside the kerosene section of the stove where the hot water was heated, and this was connected to a pipe that ran across the kitchen ceiling and thru the wall into the bathroom, where there was a huge copper storage tank for the heated water. A primitive system to look at, but it worked extremely well -- much better, and much cheaper than an electric heater. I had a furnace heater such as Vitanola described until it was ruined by a plumber who didn't know what he was doing. The landlord replaced it with an electric water tank and my light bill immediately doubled. Progress.

The trick with kerosene stoves was getting them lit -- but once lit they'd burn until you shut the valve off. We kept the one in the kitchen burning all the time, but shut the one in the living room off at night -- and lighting it first thing in the morning involved pumping a valve, adjusting the damper, and tossing rolled up pieces of lit newspaper in thru the access door at the front. If you were lucky it caught on the first try, but if you didn't get the paper in just right you had to keep trying until it caught.
 

dnjan

One Too Many
Messages
1,687
Location
Seattle
The trick with kerosene stoves was getting them lit -- but once lit they'd burn until you shut the valve off. We kept the one in the kitchen burning all the time, but shut the one in the living room off at night -- and lighting it first thing in the morning involved pumping a valve, adjusting the damper, and tossing rolled up pieces of lit newspaper in thru the access door at the front. If you were lucky it caught on the first try, but if you didn't get the paper in just right you had to keep trying until it caught.
You are bringing back long-repressed memories. Our heater was fuel oil instead of kerosene, but the lighting process was similar.
 

LizzieMaine

Bartender
Messages
32,926
Location
Where The Tourists Meet The Sea
I love this thread. It's making me think about all sorts of possibilities. I'm hopelessly unhandy and assumed I would have no idea how to use or care for some of these tools, but now I am beginning to feel confident that I might be able to master them

I meant to respond to this comment earlier, but better late than never. I think the very *essence* of Golden Era living is not style, is not fashion, is not decor. It's the willingness to Do Things Yourself Wherever Possible.

Most Golden Era technology was accessible at least at some level to the owner -- "No User Serviceable Parts Inside" was not any part of the ethos of the time. Just about any housewife in 1939 knew how to operate and maintain and understood the mechanical principles behind a sewing machine, knew how to light and maintain a kitchen range, knew how to shake the grates and bank the fire in a furnace, and knew how to check and set the beat in a mechanical clock -- all tasks that would baffle most of her descendants today, and just a small cross section of the mechanical aptitude that was taken for granted in daily life. It was a far more hands-on era than today, and one of the purposes of this thread is to preserve and pass on as many of those skills as we can -- along with the sense of accomplishment that comes with knowing that you are the master of your technology, it's not the master of you.
 

LizzieMaine

Bartender
Messages
32,926
Location
Where The Tourists Meet The Sea
How to Take Snapshots with a Box Brownie

The Kodak Brownie camera made photography a peoples' hobby around the turn of the century, and various versions of the simple box camera were used by millions around the world for over sixty years. Using a Brownie today isn't hard to do -- if you choose your camera wisely.

The main obstacle for the latter-day Brownie user is film. Many of the Brownies that appeal most to Golden Era enthusiasts are the deco-styled cameras of the 1930s and 1940s -- but many of these cameras use type 116, 127, 616 or 620 roll film, which sizes were discontinued by the 1980s. It's possible to adapt other types of film for these cameras, but this can be an expensive and frustrating proposition for someone who just wants to take snapshots without a lot of bother. For this reason, you should find yourself a Brownie that uses still-widely-available type 120 roll film. The most common examples of these are the No. 2 Brownie, which was the most popular snapshot camera in the world during the 1910s and 1920s, the No. 2 Beau Brownie, which was a stylish upgrade of the original No. 2, popular in the early 1930s, and the Brownie Cresta, which was popular in the late fifties. Avoid the common Brownie Hawkeye cameras of the late 1940s or 1950s -- these were made for 620 film. These instructions are based on the No. 2 Brownie, which is still the most common 120 Brownie out there.

No_2_Brownie_Camera_Model_C.jpg


First, familiarize yourself with the camera -- it's an extremely simple device. There is a fixed focus lens in the front, a trip lever on the lower right hand front for the shutter, and a knob on the side to turn the film. There are tabs at the top to set the aperture and time exposure. And there's a little red celluloid window at the back to view the exposure number on the film. The back of the camera snaps open to load and unload the film. That's all there is to it.

To load the camera, snap open the door at the back of the camera -- there's no lever or knob to fiddle with, it's held closed by a spring steel tab that snaps over a notch on the camera body. Just snap it open and the door will fall open.

Then, grasp the film winding knob and pull it straight out. It'll come out about a quarter of an inch, unlocking the metal film carrier assembly inside the camera. Reach inside and pull the film carrier straight out. You'll probably find an empty film spool clipped into the bottom front of this carrier.

IN SUBDUED LIGHT open the film box, tear open the protective foil on the roll of film, and undo the tab holding the end of the film closed. Clip the spool of film into the top of the film carrier, and then pull the end of the protective paper across the top, back, and bottom of the film carrier and down to the empty spool, where you'll tuck the end into the spool's slot. Slide the film carrier back into the camera, snap shut the film door, and push in the film-advance knob to engage the empty reel. Then wind the film until the numeral "1" appears in the red celluloid window. You are now ready to take pictures.

The Brownie is best used outdoors in natural light, so position your subject with the sun behind you, not with the camera looking into the sun. Be sure both of the little tabs on the top front of the camera are pushed all the way in. Position the camera against your natural waistline -- if you're wearing a belt, use the buckle to steady the camera. Look into the little window at the top front of the camera and you'll see a reflection of the image you'll be photographing. Hold your breath and flip the shutter lever either up or down -- if it's up, flip it down, if it's down, snap it up. Then wind the film knob until the numeral "2" appears in the window, and you're ready to take your next picture.

The exposure lever, the wide tab centered over the lens at the top of the camera, allows you to use three different stops. The first stop is used for most photography, the middle stop can be used only when bright, direct sunlight is shining on your subject, or for interior time exposures. The third stop is used only for outdoor time exposures on cloudy days.

Time exposures are made by placing the camera on a steady brace, either a tabletop or a tripod. Select either the middle or third stop by pulling out the exposure lever, and then pull the time exposure lever fully out. Compose your shot and then snap the shutter. Count one to five seconds depending on light level, and then push the shutter lever in the opposite direction to close it.

When you've exposed the entire roll of film, IN SUBDUED LIGHT remove the film carrier as above, and secure the end of the roll with the gummed strip at the end. Send it in to your favorite processor, specifying 120 film on the envelope, and in a week or so enjoy the results. Or, you can develop the film yourself -- which will be a topic for a future post.
 
Last edited:

RBH

Bartender
Can someone explain how to use a standard, stovetop coffee percolator?

I cant help you Scott... but I can well remember my grandfather telling me to 'slice' * me off some coffee when I would run up to their house before school when I was a teenager.


* meaning it had perked** for awhile before I got there!


** this is the type Pyrex pot that my grandparents always used.

catphoto.jpg
 
Last edited:

sheeplady

I'll Lock Up
Bartender
Messages
4,479
Location
Shenandoah Valley, Virginia, USA
I'm not a coffee drinker, and it's been years since I have made it last for my grandfather at 14, but... here goes:

1. Take your coffee percolator, take out the basket, and fill it with water. I believe it is about 8-10 ounces per cup. Percolated coffee is one of the best coffees in the world, so make plenty!

2. Put in the basket. Add about 2 teaspoons of coarse ground coffee to the basket per cup. If it's finely ground, it's just gonna fall through the basket. Or taste bad.

3. Place on your heat source, set on medium. (You want it to boil after all). Once it is "perking" (boiling) you'll see the coffee spout up into the glass knob. Look for a deep/rich brown color- it will start out barely colored and eventually go to black (if you leave it too long). Don't do it too long- only a few minutes. Maybe 2-3 minutes, but up to 5. Some of this is to taste. If you let it go too long it gets acidic tasting. Everyone seems to have their personal preference for what color they like depending on the strength. If it is too acidic tasting when you try it, next batch make it weaker by boiling it for less time to a less dark color. It also depends upon how hard your percolator is boiling. So the key is to look for the color!

4. Enjoy the smell.

5. Take off heat and pour. Turn off burner.

I know that there are certain coffees that are much better for percolators than for others. I know my grandparents had only one they would drink. Percolated coffee works by a different mechanism than drip coffee makers, it needs a coarser ground (not the dust-like stuff you put in drip coffee makers). Someone else here can advise on brands.
 
Last edited:

rue

Messages
13,319
Location
California native living in Arizona.
I'm not a coffee drinker, and it's been years since I have made it last for my grandfather at 14, but... here goes:

1. Take your coffee percolator, take out the basket, and fill it with water. I believe it is about 8-10 ounces per cup. Percolated coffee is one of the best coffees in the world, so make plenty!

2. Put in the basket. Add about 2 teaspoons of coarse ground coffee to the basket per cup. If it's finely ground, it's just gonna fall through the basket. Or taste bad.

3. Place on your heat source, set on high. (You want it to boil after all). Once it is "perking" (boiling) you'll see the coffee spout up into the glass knob. Look for a deep/rich brown color- it will start out barely colored and eventually go to black (if you leave it too long). Don't do it too long- only a few minutes. Maybe 2-3 minutes. Some of this is to taste. If you let it go too long it gets acidic tasting. Everyone seems to have their personal preference for what color they like depending on the strength. If it is too acidic tasting when you try it, next batch make it weaker by boiling it for less time to a less dark color. It also depends upon how hard your percolator is boiling. So the key is to look for the color!

4. Enjoy the smell.

5. Take off heat and pour. Turn off burner.

I know that there are certain coffees that are much better for percolators than for others. I know my grandparents had only one they would drink. Percolated coffee works by a different mechanism than drip coffee makers, it needs a coarser ground (not the dust-like stuff you put in drip coffee makers). Someone else here can advise on brands.

Yup. Basically the same as the plug in kind :)

I like 8 o'clock coffee myself.
 

Big Man

My Mail is Forwarded Here
Messages
3,781
Location
Nebo, NC
I still use the same old peculator that's been around here for years and years. One thing I do is to "recycle" the coffee. I will make a pot (same as the directions previously mentioned in other posts), and when we are through drinking coffee for the day just put it in the refrigerator pot and all (after it's cooled, of course). Next morning just add some more water and start perking away. When the coffee begins to get a little weak, just add a little extra coffee in the basket. I can stretch a pound of coffee a long way like this.
 
Messages
11,579
Location
Covina, Califonia 91722
Instructions
1 - Fill the percolator with water to the desired level using the markings on the side wall of the coffee pot.

2 - Put the coffee pot basket onto the pump stem, and insert into the percolator. If you want to use a paper filter with your percolator, place it into the basket before adding the coffee grounds.

3 - Add one tablespoon coarsely ground coffee per cup into the basket.

4 - Place the basket cover on top of the basket, then put the percolator top on making sure that it closes securely.

5 - Set the percolator onto the stove and cook over medium heat. The coffee is brewed when you see the desired coffee color in the clear glass knob on the top of the percolator cover.

6 - Remove the percolator from the stove and serve the coffee.

The amount of coffee may vary and the question is the time for the perc, you'll have the experiment to get the results you like.

Read more: How to Use a Coffee Percolator | eHow.com http://www.ehow.com/how_2098950_use-coffee-percolator.html#ixzz2HhNzgtO9
 

Tango Yankee

Call Me a Cab
Messages
2,433
Location
Lucasville, OH
How To Shoot 8mm Home Movies

Boy, this brings back memories. When I was in High School in the '70s I took "Photo Production", which was an extended class (started about 40 minutes before the rest of school started) and covered more advanced photography techniques and shot photos for the school paper and yearbook. We also were tasked with filming the varsity and junior varsity football games from a platform in the stands next to the press box. For the JV we used an 8mm camera as you described, and for the V we used a Super8 camera. That one was shot in color and had a zoom lens!

We thought we were pretty cool until we played against Beverly Hills and they were filming the game using a video camera, which they said was color, with the number 4 on it. All part of the same LA School District, but of course some schools were more equal than others.
 

Forum statistics

Threads
106,934
Messages
3,024,690
Members
52,470
Latest member
GokhanB
Top