Want to buy or sell something? Check the classifieds
  • The Fedora Lounge is supported in part by commission earning affiliate links sitewide. Please support us by using them. You may learn more here.

Skills For "Living The Era"

rue

Messages
13,319
Location
California native living in Arizona.
Question:

This timer worked for about two days after I purchased it and then stopped working.

IMG_2015.jpg


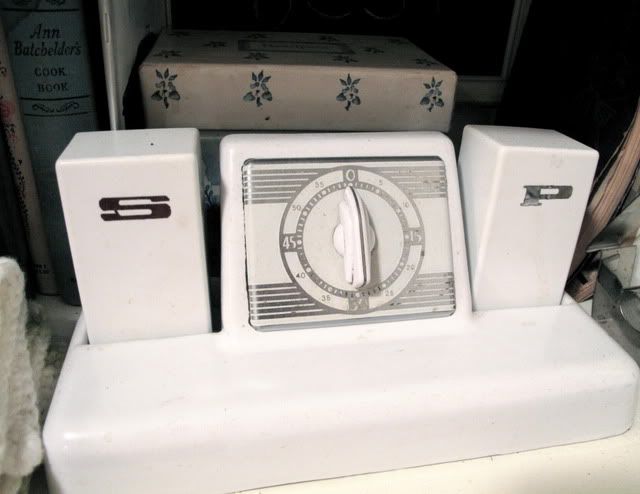
Any idea how to make it work again? I won't touch it until I know how to fix it for fear I'll make it worse.
 

LizzieMaine

Bartender
Messages
32,926
Location
Where The Tourists Meet The Sea
You didn't feel any "kerchunk" as though the mainspring had broken when winding? If not, that's a good sign.

Basically a timer is similar to a cheap alarm clock movement, but is much less complicated. Probably what's happened is that it's gotten gunged up or dirty inside. You need to get the gunk out of it -- the first thing to try, and the simplest, is a "Ronsonol Flush," which is to take out the movement and flush it out with Ronsonol lighter fluid, the same stuff I recommended for Brownie camera shutters -- it's a few dollars a bottle at your closest drug or cigar store. WARNING: BE SURE YOU USE THE RONSONOL IN A WELL-VENTILATED ROOM. And for gawd's sake, don't smoke while working with it.

Just remove the movement from the casing -- it might be held in place by screws or simple tabs bent into place, if the latter carefully undo the tabs with needlenose pliers, and look over the works. Be sure you remember how you took the movement out, because you'll need to fit it back in. If in doubt, draw a sketch.

You'll probably find cooking grease, crumbs, nicotine residue, and maybe some bits and pieces of bugs. Shake all the stuff out that will shake out onto a piece of paper towel and check to make sure no loose parts fall out. If not, throw away the paper, and hold the movement over the kitchen sink. Run some Ronsonol over the moving parts, flow it into the innards, and let it drip thru. Take your time, let the stuff work, and while you wait sort of work the gears with your fingers and see if it starts working. If it's really cruddy you can put some Ronsonol in a cup and let the thing sit for a while.

If you get it working this way, let the Ronsonol evaporate, and carefully pat it down. If you have some very light household oil you can apply a tiny droplet to the exposed pivot points, the axles the gears rotate on, and that should hold you for a while.

If the Ronsonol doesn't work, fill a pail with some ammonia-based cleaning solution and soak it in that for a while, and then flush again with the Ronsonol to drive off any water from the solution. You want to be careful that any water is dried out completely because cheap clockwork parts don't like rust.

After all this, nine times out of ten it ought to be working again. Good luck!
 
We always used our local Van Roy "Hotel Blend" which was about 50-50 Robusta/Arabica. American coffee was generally an Arabica/Robusta belnd until the immediate post-war period, when the mass market manufacturers needed to increase margin. During the 1950's the proportion of Arabica beans in canned coffees like Hills Brothers and Maxwell House dwindled. Savarin went years, until the 197o's, I think, with their old blend, but they too succumbed to commercial pressures.

With a really cheap coffee, like the $2.50/lb Great Value or Clover Valley stuff I perk, but with a reasonably nice blend, like Van Roy (a local Cleveland blend) prefer to use a Silex or a Sunbeam Coffeemaster. The fully automatic Coffeemaster makes splendid coffee, far better than either Mr. Coffee type drip (which uses water not sufficiently hot to fully extract alll of the flavor in the grounds) or a percolator, which can burn the coffee, making it a bit overly acidic, and the coffeemanster is easy to set up and to clean. A simple Drip-O-Lator as described by miss Maine can also make absolutely perfect coffee when managed properly, filled with REALLY HOT water.

thefirst vacuum pots were made in the late 1850's or early 1860's, but this method did not become popular here in the 'States until the early 1930's.

I have a Drip-o-lator just like this one:
l_AKYZvintage-enterprise-aluminum-18-cup-drip-o-lator-drip-c.jpg

It makes great coffee but I had to learn how to put it together right several years ago when I first started using it. lol lol A friend came over a week or two ago and got it wrong. lol lol He put the grounds on top instead of in the middle--not taking notice that the top of the pot won't fit on it that way for a reason. :p We redid the coffee. It came out better in the right order. I know of no better way to get 18 cups of coffee through a machine without burning the dang stuff. :p
Did I mention that I also found a can of coffee that my grandmother had salted away for about fifty years? It tasted fine considering it was never opened so the coffee didn't have any active air exchange with the environment for all those years. It did have a different taste than that which you get nowadays in cans. :p
 

LizzieMaine

Bartender
Messages
32,926
Location
Where The Tourists Meet The Sea
I have the two-cup version of that very same Drip-O-Lator -- mine was unsold store stock, c. 1939, and still has the orignal paper band around the top part, and had the instructions in the basket. The label screams DRIP-O-LATOR MAKES HEALTHFUL COFFEE, suggesting that even in the Era there was criticism of the acidity of perked or boiled coffee.
 
You didn't feel any "kerchunk" as though the mainspring had broken when winding? If not, that's a good sign.

Basically a timer is similar to a cheap alarm clock movement, but is much less complicated. Probably what's happened is that it's gotten gunged up or dirty inside. You need to get the gunk out of it -- the first thing to try, and the simplest, is a "Ronsonol Flush," which is to take out the movement and flush it out with Ronsonol lighter fluid, the same stuff I recommended for Brownie camera shutters -- it's a few dollars a bottle at your closest drug or cigar store. WARNING: BE SURE YOU USE THE RONSONOL IN A WELL-VENTILATED ROOM. And for gawd's sake, don't smoke while working with it.

Just remove the movement from the casing -- it might be held in place by screws or simple tabs bent into place, if the latter carefully undo the tabs with needlenose pliers, and look over the works. Be sure you remember how you took the movement out, because you'll need to fit it back in. If in doubt, draw a sketch.

You'll probably find cooking grease, crumbs, nicotine residue, and maybe some bits and pieces of bugs. Shake all the stuff out that will shake out onto a piece of paper towel and check to make sure no loose parts fall out. If not, throw away the paper, and hold the movement over the kitchen sink. Run some Ronsonol over the moving parts, flow it into the innards, and let it drip thru. Take your time, let the stuff work, and while you wait sort of work the gears with your fingers and see if it starts working. If it's really cruddy you can put some Ronsonol in a cup and let the thing sit for a while.

If you get it working this way, let the Ronsonol evaporate, and carefully pat it down. If you have some very light household oil you can apply a tiny droplet to the exposed pivot points, the axles the gears rotate on, and that should hold you for a while.

If the Ronsonol doesn't work, fill a pail with some ammonia-based cleaning solution and soak it in that for a while, and then flush again with the Ronsonol to drive off any water from the solution. You want to be careful that any water is dried out completely because cheap clockwork parts don't like rust.

After all this, nine times out of ten it ought to be working again. Good luck!

This has worked for me many times. I have had to fix numerous ones through out the years. :p
The only thing I have to add is that some canned air will help blow out the cleaning solution and get out the gunk that might have accumulated over time more than just the solution alone. It is more important to use if you use a water based cleaning solution because of a possiblity of rust.
The can looks like this:
dust_off_canned_air.jpg

It ain't a vintage can but I find them indispensable for cleaning and dusting work with electronics and gear driven motors. You would be surprised that a little piece of lint will stop a gear like you had a brick in it---especially with clocks and watches. :p
 
I have the two-cup version of that very same Drip-O-Lator -- mine was unsold store stock, c. 1939, and still has the orignal paper band around the top part, and had the instructions in the basket. The label screams DRIP-O-LATOR MAKES HEALTHFUL COFFEE, suggesting that even in the Era there was criticism of the acidity of perked or boiled coffee.

I am sure mine is later than that as my grandmother moved in my current abode in 1952 and that was likely around when they bought it. :D I wish I had the instructions from the beginning but I went about it the hard way. Then I found the internet and knew for sure I had it right. :p That patent search function of google really helps. I looked up the patent number and there was a very indepth explanation of how it worked with technical drawings. All that for a coffee pot. lol lol
I should also mention that my wife picked up a cermaic model a few years ago at a garage sale too. That makes about five cups.
 

rue

Messages
13,319
Location
California native living in Arizona.
You didn't feel any "kerchunk" as though the mainspring had broken when winding? If not, that's a good sign.

Basically a timer is similar to a cheap alarm clock movement, but is much less complicated. Probably what's happened is that it's gotten gunged up or dirty inside. You need to get the gunk out of it -- the first thing to try, and the simplest, is a "Ronsonol Flush," which is to take out the movement and flush it out with Ronsonol lighter fluid, the same stuff I recommended for Brownie camera shutters -- it's a few dollars a bottle at your closest drug or cigar store. WARNING: BE SURE YOU USE THE RONSONOL IN A WELL-VENTILATED ROOM. And for gawd's sake, don't smoke while working with it.

Just remove the movement from the casing -- it might be held in place by screws or simple tabs bent into place, if the latter carefully undo the tabs with needlenose pliers, and look over the works. Be sure you remember how you took the movement out, because you'll need to fit it back in. If in doubt, draw a sketch.

You'll probably find cooking grease, crumbs, nicotine residue, and maybe some bits and pieces of bugs. Shake all the stuff out that will shake out onto a piece of paper towel and check to make sure no loose parts fall out. If not, throw away the paper, and hold the movement over the kitchen sink. Run some Ronsonol over the moving parts, flow it into the innards, and let it drip thru. Take your time, let the stuff work, and while you wait sort of work the gears with your fingers and see if it starts working. If it's really cruddy you can put some Ronsonol in a cup and let the thing sit for a while.

If you get it working this way, let the Ronsonol evaporate, and carefully pat it down. If you have some very light household oil you can apply a tiny droplet to the exposed pivot points, the axles the gears rotate on, and that should hold you for a while.

If the Ronsonol doesn't work, fill a pail with some ammonia-based cleaning solution and soak it in that for a while, and then flush again with the Ronsonol to drive off any water from the solution. You want to be careful that any water is dried out completely because cheap clockwork parts don't like rust.

After all this, nine times out of ten it ought to be working again. Good luck!

You're a lifesaver Lizzie! Thank you. I'll try it and let you know how it turns out :)
 

LizzieMaine

Bartender
Messages
32,926
Location
Where The Tourists Meet The Sea
You're welcome -- I've seen few clogged works that wouldn't fix. You should run it often to keep it working smoothly, and avoid putting it in the direct path of cooking fumes. With those precautions it'll run for a good many years yet.
 

Weston

A-List Customer
Messages
303
I'm so glad it works. I know it sounds ridiculous, but each time I click this thread and see that timer, I think anxiously "But did it work? DID IT WORK!?!" LOL.

Glad it helped out.
 

plain old dave

A-List Customer
Messages
474
Location
East TN
How to Start A Vintage Car

This article applies to a typical, conventional American car of the 1930-1955 period with a manual transmission and a manual choke. Most cars from the mid-1950s forward are little different from modern cars in the basic operational respects. Many cars at the earlier end of this range may have model-specific differences -- if in doubt, see your owner's manual.

Seat yourself in the car and look over the instrument panel. You'll see several gagues somewhere around the speedometer -- the most important being the ammeter, usually labeled AMPS, and the oil pressure gague. You'll also see control knobs labeled THROTTLE and CHOKE. Look on the floor to see if there's a pedal for the starter -- if there is, it'll be located just above and slightly to the right of the accelerator pedal. If there isn't a floor pedal, look on the dashboard for an obvious push button. If there is no push button there, the starter switch is part of the key ignition switch as in a modern car.

Once you're situated, insert the ignition key and turn it to the right. In most cars prior to 1950, the only thing that'll happen is that the ammeter needle will kick slightly to the left, toward the "-" symbol. This indicates that the ignition circuit is closed, and power is flowing from the battery. So good so far.

Shift the car into neutral -- the center of the standard "H" shifting pattern, and depress the clutch. Pull the choke knob all the way out. Tap on the accelerator pedal once -- do not hold it to the floor. Press the starter pedal or button and hold it until the engine catches. Immediately push in the choke knob about two-thirds of the way, and allow the engine to run for about two minutes to circulate the oil. You should see the ammeter needle move to the right of center, toward the "+" symbol, indicating that the generator is working. You should see the oil pressure gague settle at around 30. Watch these gagues carefully to make sure nothing unusual is going on.

If the engine doesn't start easily, you'll probably end up flooding the carburetor. To clear it, push the choke all the way in, floor the gas pedal and crank the starter for fifteen seconds or so. Let it rest and then crank again until the engine catches.

Once the engine has warmed up, push the choke knob all the way in, release the parking brake, shift into reverse -- the upper left of the H pattern -- and you're on your way. Keep an eye on the oil pressure gague -- it should stabilize around 40 once the car's been running for a while. The temperature gague should stabilize around 160-180 degrees when the car is fully warmed up. The ammeter gague should stay on the + side while the engine is running, although as you drive it'll move closer to the center line. If you turn on accessories, such as headlights or the radio, you should see it jump further toward the + side. If the ammeter moves toward the minus side while the engine is running, you may have a problem with your electrical system, and should have it checked as soon as possible.

If it's an especially cold day, it might help to pull the throttle knob out about one third before starting the engine, and then let it run for a bit -- push the throttle knob back in once the car is warmed up.

Generally speaking you'll only need to use the choke control with cold starts. Once the car's been running for a while you can usually start up again without using the choke.

Many vintage cars lock using the door handles. Pull the handle up as far as it will go to lock the doors. Many vintage cars don't have key locks on the driver's side door -- there is no way to unlock that door from the outside. You were expected to exit your car from the passenger's side -- the side nearest the curb. Lock your car by first pulling up the driver's door handle, slide across the seat and exit thru the passenger door. You may then use your key to lock that door from the outside.

Addenda: On old Buicks, the accelerator pedal= the starter pedal.

Addenda 2: 1956-65 Chryslers had a pushbutton shift mechanism for the automatic trans. You start and stop in Neutral and disengage the Park Latch via the lever marked "park".
 

LizzieMaine

Bartender
Messages
32,926
Location
Where The Tourists Meet The Sea
How To Use an Electric Ironing Mangle

In the days before permanent-press or easy-care polyester, the housewife had a lot of ironing to do -- not just clothing, but "flatwork" -- sheets, pillowcases, tablecloths and similar things, all of which had to be pressed and folded before being put away. Which is why the electric ironer or electric mangle was so popular from the 1930s into the 1960s. Many of these machines survive today and are as useful as ever for those who Live The Era. And there's nothing better than sleeping on freshly-pressed, line-dried cotton sheets. Here's how to do it.

All ironing mangles are built to the same basic design. There's a curved metal shoe containing the heating element which is lowered by a hand lever to press against a motorized revolving padded cylinder, the motion of which is controlled by either a hand lever or a knee lever. The working parts are covered when not in used by a stamped steel housing, and the unit is usually mounted on a wheeled metal stand for convenience.

Before using your mangle for the first time, inspect it -- get acquainted with the controls, and check the electrical cord for breaks or fraying. Most of these units used a heavy, asbestos-covered cord due to the high current draw, and these can be replaced with similar modern safety cords if they're damaged. If you replace the cord, be sure to use one rated for the current that will be used -- there'll be a spec plate somewhere on the machine that gives this rating.

You'll also want to inspect surface of the ironing shoe for rust or dirt -- if it isn't perfectly clean and smooth it'll mark your fabrics, and you don't want that. Also be sure the muslin covering for the roller is clean and free of tears -- it'll probably have some scorch marks, which won't cause any problems, but if it's soiled with dirt or grease wash it before using it. It's held on the roller by a drawstring at the open end.

When your mangle is ready to use, you'll need a load of washing. The key to using a mangle correctly is to damp-dry your washing -- hang it on the line until it's almost dry, but not completely. It shouldn't be *wet* but it should be slightly damp to the touch.

Plug in the mangle to an outlet that'll handle the load -- I use the outlet on my stove. You don't want to risk blowing a fuse or tripping a breaker.

Set the heat level for the ironing shoe using the slider or knob usually found on top of the shoe or near the hinge where it attaches to the mechanism. Every machine is different, but for ironing sheets it's generally best to set it somewhere slightly to the right of the medium-heat mark. You don't want it so hot that it'll scorch, but if it's too cool the fabric will bunch up and you don't want that either. Setting around the midpoint gives you a good start and you can make further adjustments if needed.

Snap on the power switch -- usually a toggle on the roller arm. A pilot lamp will light to show you the power is on. Let the machine heat up for five minutes or so to reach operating temperature.

While you're heating the machine, fold your damp sheets lengthwise twice. You should end up with a folded sheet about eighteen inches wide, or just less than the length of the roller. Make sure your folds are as even as possible. Pillowcases can be folded once lengthwise or fed thru the roller full width. I find that folding them gives a better surface.

When the shoe is fully heated, pull up a kitchen chair and sit down at the mangle. Take your first sheet and place the top end on the roller, under the shoe. Lower the shoe into position by pulling the lever down, and then push it to the right to engage the roller motor. Or use the knee lever to start the motor, if your machine is so equipped. The roller will carry the folded sheet under the ironing shoe. Hold the sides of the sheet as it feeds in to keep it as even as possible as it feeds thru. It will come around the roller and out from underneath and should form a neat bundle in your lap as it emerges. If your shoe is the right temperature, expect a bit of steam as the moisture is pressed out.

Once the sheet has gone thru, turn it over and feed thru the other side in the same way. Then unfold the sheet and refold it so that the ironed surface is on the inside and the not-yet-ironed surfaces are on the outside, and repeat until the sheet is flat, folded lengthwise, and dry. Fold it over on itself long end down, fold it again lengthwise, and it's ready to put away.

The process for tablecloths and pillowcases is the same, with perhaps less folding.

You can do a full load of sheets and pillowcases on a mangle in about half an hour, and they'll be the best bedding you ever slept on. If you've never used "vintage" sheets, I recommend Pequot Plus-Service brand for their durability and their fine surface when ironed. They're higher quality, and will last much longer, than anything you can buy in a store today.
 

St. Louis

Practically Family
Messages
613
Location
St. Louis, MO
This is really intriguing. I see electric mangles around in flea markets, and they're always pretty cheap because people are scared of them. I've put together a good set of plain percale cotton sheets from the 1920s-1950s over the years, and they wash and wear like a dream, but I haven't had the gumption / energy to iron them. I do find that they feel a little rough to the skin if they're not ironed. So now of course I'm obsessed with the idea of finding a mangle.

I'm always a little nervous about tripping my breakers, by the way. When I first acquired my flap toaster I was so cowardly I took it to work and plugged it into the office outlet. (I know, I know) I don't have an outlet on my stove; is there some other way, short of risking the employer's electrical supply, of testing these appliances? Would a power strip work?

Could we possibly pin this thread? It's so useful and interesting, and I don't want it to slip down the page and get lost.
 

LizzieMaine

Bartender
Messages
32,926
Location
Where The Tourists Meet The Sea
Usually any household outlet will be fine as long as you don't have something else plugged into it that'll draw a lot of current: don't plug your mangle into the same outlet as your refrigerator, for example, or plug your toaster in at the same time you're using the mangle. I once lived in an apartment where fuses would blow whenever the toaster and coffeepot were plugged in at the same time and the refrigerator started up -- we kept a big box of fuses in the cellar, ready for instant use. (Note that you should never use a penny, a washer, or a punchout slug in place of an actual fuse, even if you have to go out in the snow in your nightgown to get replacement fuses.)
 

sheeplady

I'll Lock Up
Bartender
Messages
4,479
Location
Shenandoah Valley, Virginia, USA
I'm always a little nervous about tripping my breakers, by the way. When I first acquired my flap toaster I was so cowardly I took it to work and plugged it into the office outlet. (I know, I know) I don't have an outlet on my stove; is there some other way, short of risking the employer's electrical supply, of testing these appliances? Would a power strip work?

Could we possibly pin this thread? It's so useful and interesting, and I don't want it to slip down the page and get lost.

When was your house wired? If it was re-wired past the 1970s (late 1970s), you should have dedicated outlets in the kitchen. What this means is you have one outlet per breaker. This is, of course, assuming your wiring is done to code when it was updated. These outlets are grounded and can take much more electrical pull. If you do flip a breaker, you only flipped one.

If you did a power strip, that might prevent the breaker from an overload, but it would have to be a good one (with good surge protection) and there's a chance it won't work. You won't damage anything by tripping a breaker if you do.

Also, as a warning, wear rubber soled shoes whenever you plug something in that you are worried about it's condition. Also keep your hands off anything else to keep from completing the circuit.
 

Forum statistics

Threads
106,932
Messages
3,024,683
Members
52,470
Latest member
GokhanB
Top