- Messages
- 10,391
- Location
- vancouver, canada
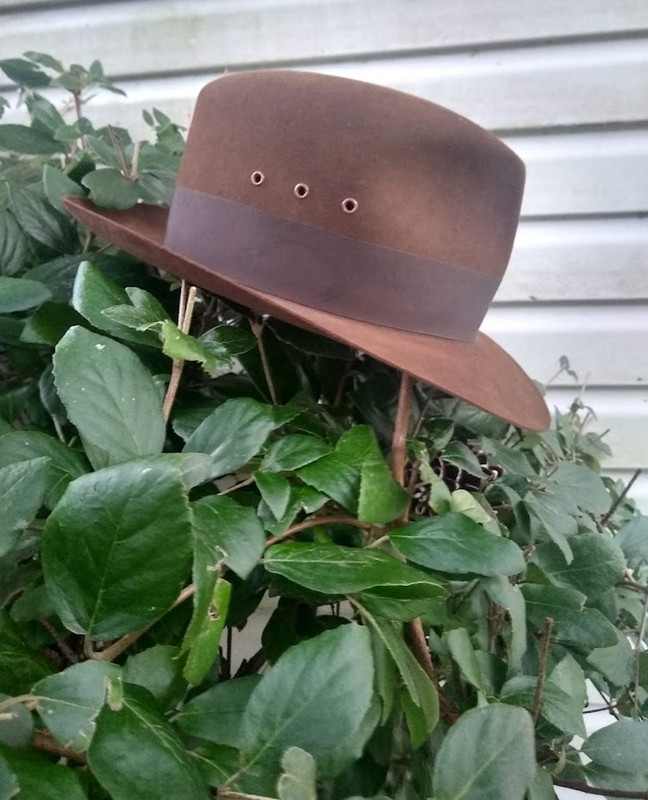
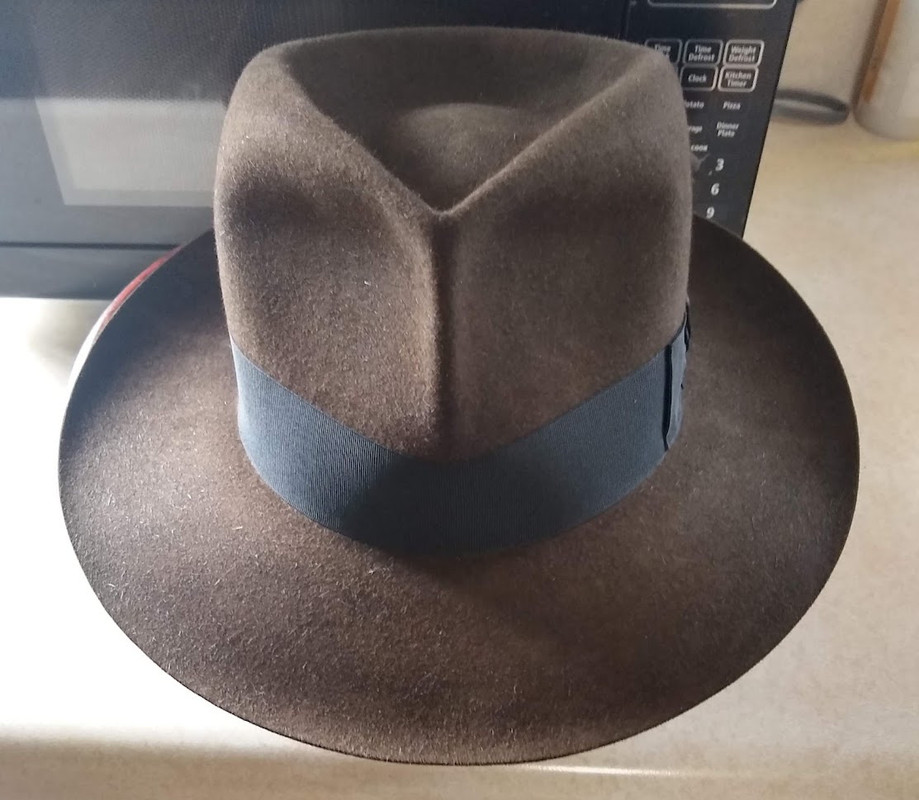
Looking at the flanging on this hat I really like the minimal cupping. Does the flange have a style number? Is it a 3" wide flange or can the felt be a touch wider than 3"?
Fine work indeed CWV!! That one truly captures the spirit of the classic American fedora.
Looking at the flanging on this hat I really like the minimal cupping. Does the flange have a style number? Is it a 3" wide flange or can the felt be a touch wider than 3"?
Perfect that is very close in style to the one I made. Now I have something specific to send to HattersSupply. Thank you.Thank you so much and that truly means a lot to me. I have been a big fan of your work for years.
That flange is a style #19 and I purchased it to support 2-7/8 inch brim, will support up to 3 inch brim easily and a 3-1/8 inch brim would work and provide an upturn almost as if putting a pencil curl with an iron.

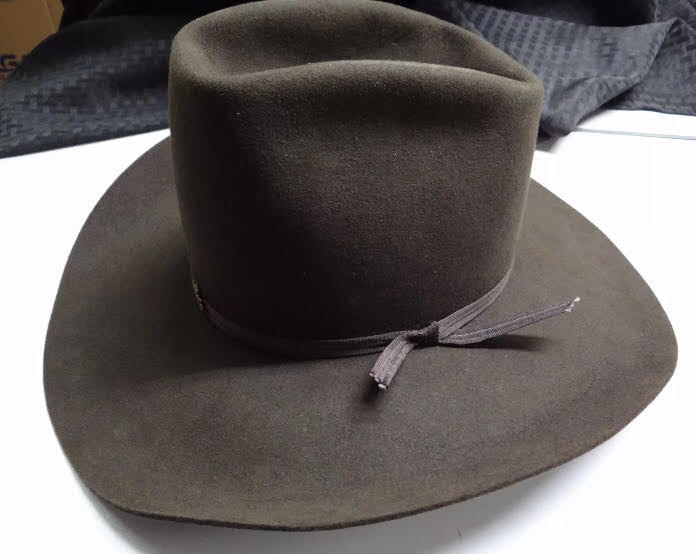
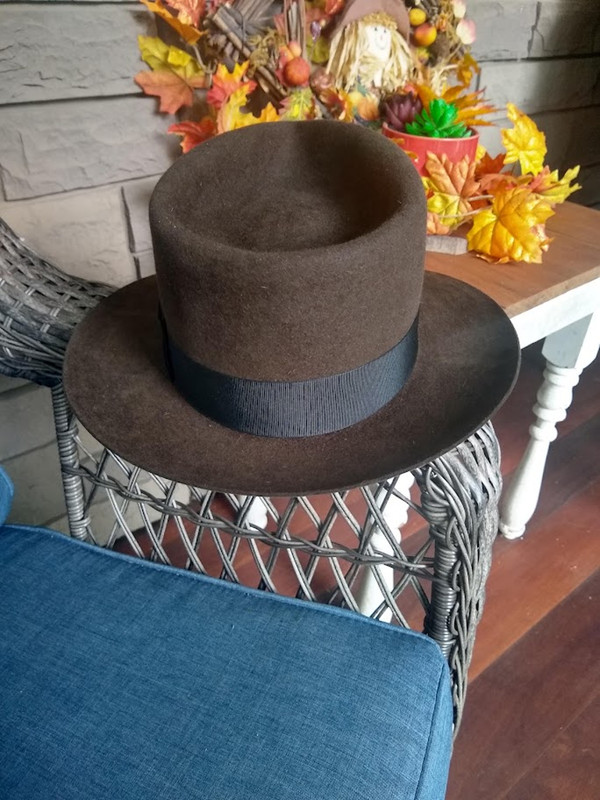
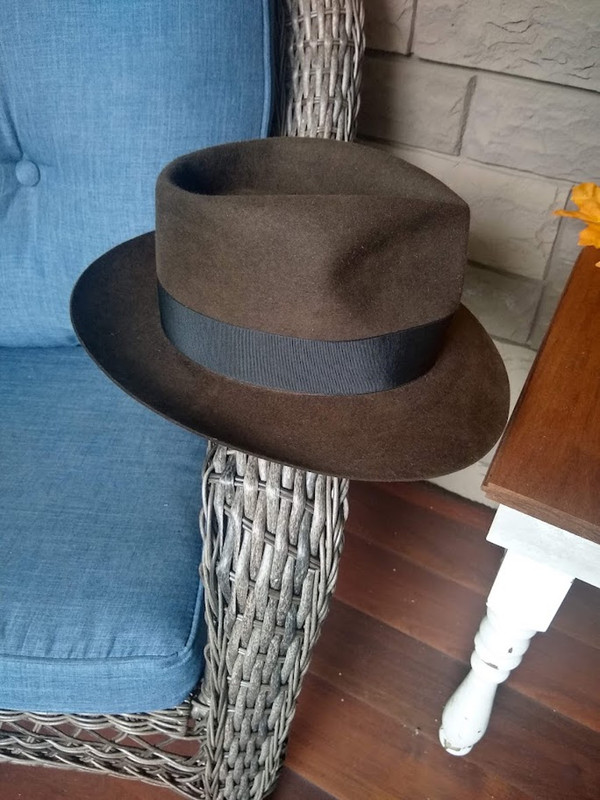
From the grey hat model called Orion, ive designed the brown hat meanwhile i wait to learn hat making, the brim is too curled? View attachment 368043 View attachment 368045
Well i made the modifications without tools but a seam machine the rest with my hand, obvius is limited. I aprecites your input and thanks forr your hopes.You’re really limited on how you can shape thicker felt. Most western hats made in the last 60 years are pretty thick and not ideally suited for a lot of fedora style creases. Let the felt guide in in the style and shape.
On the brown hat the ribbon is loose and puckered on the top edge. Most all hats have some degree of tapering and swirling the ribbon is needed. The wider the ribbon or the more tapered the crown the more this issue stands out. Check out this YouTube video:
If you don’t have a copy of scientific hat finishing and renovating you should. After that, I suspect that most would benefit from an apprenticeship with a quality hatter. Hats are simple things, but they are hard to get perfect and even small imperfections really stand out. Without knowing all the tricks it is a slow process as you’ll undoubtedly make avoidable mistakes. You also need to start with materials that won’t frustrate you.
While I have a small set of hatters tools, I’ve concluded that I’m happier having my hats made by others rather than making them myself. The expense and the attention to details aspects turned me off. My blocks, flanges, curling tool, rounding Jack, tolliker, etc. are used to shape or clean up hats, but I’m not currently interested in making my own hats. I hope your hat making journey is a success.
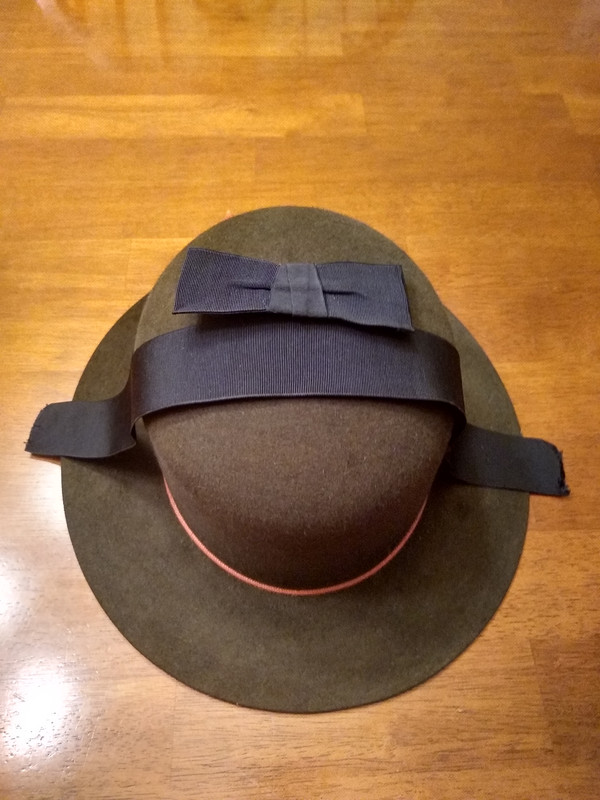
I have been unsatisfied with my liners and have tried multiple ways of doing them, multiple types of fabric none of which satisfied. They were all too full, too floppy. But today I think I have it figured out. I asked my wife to attache an iron on interfacing material to the backside of the liner material. It gives it the stiffness and structure that was missing. Any day I can overcome an (even small) hurdle is a great day.
Yes, so far so good. The prototype is holding up well.So will this keep the liner from sagging down when the hat is worn?
Getting excited now. I just blocked up a 100% beaver dress weight felt in custom color Coyote Brown using for the first time the Reimers hat steamer and the new GMB blocking springs that I just received and I can say that I have never had an easier time blocking a hat. After the steaming the felt was like working with warm putty, it molded over the block beautifully without the need to work out any puckering that can happen in the crown top. The springs performed great as well. It was easy to get the full 6 inches out of it. I expect to get 3-1/4 inch in the brim before cutting it down. Will go for 3 or 3-1/8 inch in the brim.
Will be trying something new with this hat as well. Will double block and double pounce, meaning I will finish both the outside and the inside. Trying this since Gannon gets rave reviews about the malleability of the felt and one of the last hats that @deadlyhandsome received, he confirmed that inside also was pounced. So my theory is that he is thinning it out and attacking the core from two directions, just have to proceed cautiously.
Will be letting the felt dry a week before I start pouncing the first side.
-Brent, if you're reading this. I have a block and flange in your size but I don't have long oval plates yet and I am getting a bit nervous that my supplier's health is not good. I will call him next week to see how he is doing. Also still trying to figure out hat boxes and liners.
DM sent!That sounds great to me, Kevin! I can send you an empty hat box if that helps. I can also forgo a liner and opt for a vented crown. This is exciting!
Blocking twice and sanding from the inside is how I do the thick felted Westerns that I convert. That way none of the marring shows up on the finished side. Since the outside is already finished, any pouncing I do is very light. I can get the felt to where it's really malleable and easy to crease, as with this thick felted Biltmore Western that I converted...Getting excited now. I just blocked up a 100% beaver dress weight felt in custom color Coyote Brown using for the first time the Reimers hat steamer and the new GMB blocking springs that I just received and I can say that I have never had an easier time blocking a hat. After the steaming the felt was like working with warm putty, it molded over the block beautifully without the need to work out any puckering that can happen in the crown top. The springs performed great as well. It was easy to get the full 6 inches out of it. I expect to get 3-1/4 inch in the brim before cutting it down. Will go for 3 or 3-1/8 inch in the brim.
Will be trying something new with this hat as well. Will double block and double pounce, meaning I will finish both the outside and the inside. Trying this since Gannon gets rave reviews about the malleability of the felt and one of the last hats that @deadlyhandsome received, he confirmed that inside also was pounced. So my theory is that he is thinning it out and attacking the core from two directions, just have to proceed cautiously.
Will be letting the felt dry a week before I start pouncing the first side.
-Brent, if you're reading this. I have a block and flange in your size but I don't have long oval plates yet and I am getting a bit nervous that my supplier's health is not good. I will call him next week to see how he is doing. Also still trying to figure out hat boxes and liners.
Yes, I have reached this conclusion as well. Double blocking/double pouncing really does solve the issue with Winchester and other felt's proclivity to mottle with anything other than really light pouncing. It takes the angst out of the process every time I would begin the pouncing process.Blocking twice and sanding from the inside is how I do the thick felted Westerns that I convert. That way none of the marring shows up on the finished side. Since the outside is already finished, any pouncing I do is very light. I can get the felt to where it's really malleable and easy to crease, as with this thick felted Biltmore Western that I converted...
Before:
After:
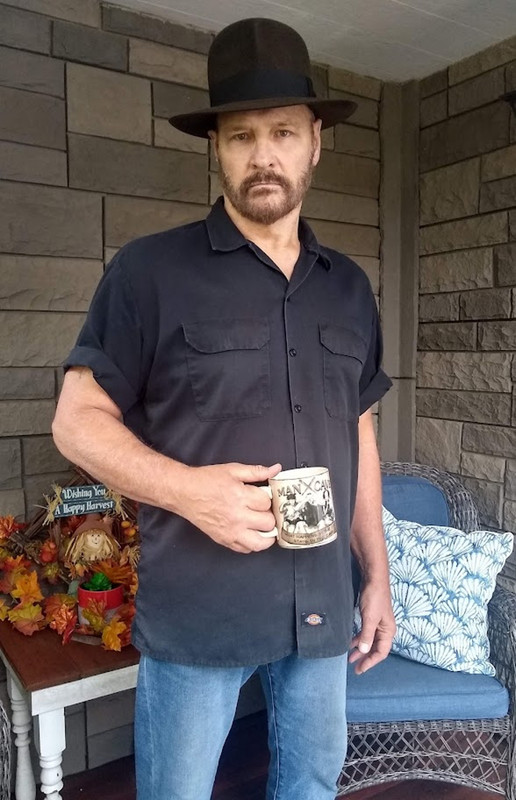
On the head:
I use my Jiffy steamer for the overall steaming of the felt and I have my hand held Rowenta steamer to give the bursts of steam in the localized areas as the finishing touch. I find I need both.I might have a steamer addiction. I just purchased another source of steam, it is one of those heavy duty steam cleaners that are multi-funcational. The plan is to use this when I need localized steam to a specific part of the hat. Like when I want to stretch only from the brim. Schedule to arrive Nov 5th, in time to try out on the hat body that I blocked up last night.
View attachment 374439
View attachment 374443
Steam I already have:
- Reimers Hat Steamer (this is awesome, very large takes up a bunch of room and lives in my garage for direct water hookup and 30amp 240v power)
- Jiffy J-1 Hat Steamer
- Reliable 4000IS Steam Iron Station with Boiler
Yep, I have a similar model. Perfect for those quick bursts of localized steam.I might have a steamer addiction. I just purchased another source of steam, it is one of those heavy duty steam cleaners that are multi-funcational. The plan is to use this when I need localized steam to a specific part of the hat. Like when I want to stretch only from the brim. Schedule to arrive Nov 5th, in time to try out on the hat body that I blocked up last night.
View attachment 374439
View attachment 374443
Steam I already have:
- Reimers Hat Steamer (this is awesome, very large takes up a bunch of room and lives in my garage for direct water hookup and 30amp 240v power)
- Jiffy J-1 Hat Steamer
- Reliable 4000IS Steam Iron Station with Boiler
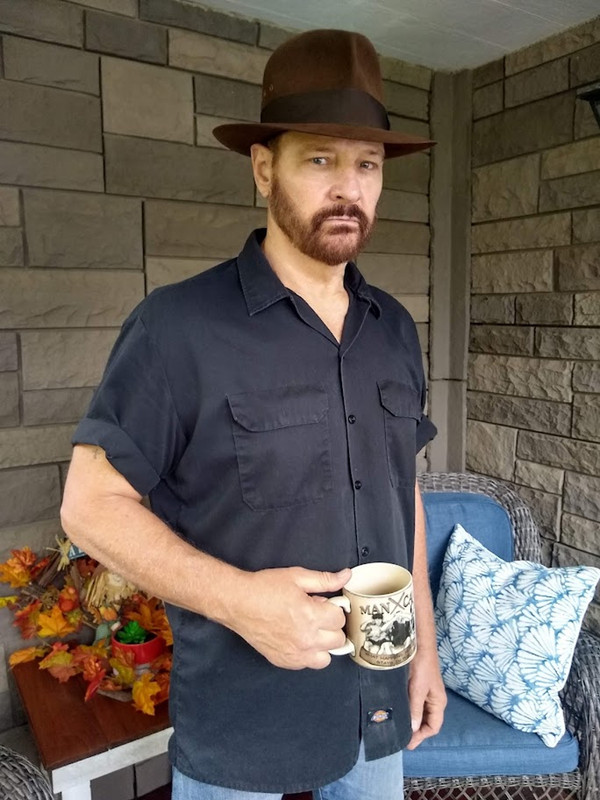
I think the proportions on this hat work really well. Not usually a fan of the tight front pinch but it looks great on this hat.My most recent conversion on this 4X Resistol was flanged on a #19 flange. The brim on this one is 2 5/8. It's flatter than the #810 and #510 I usually use. Here's an idea of how the #19 looks with the brim snapped down...
On the head:
The flanging's a tad flatter than I prefer but I think it works in relation to the crown profile.