Want to buy or sell something? Check the classifieds
  • The Fedora Lounge is supported in part by commission earning affiliate links sitewide. Please support us by using them. You may learn more here.

Darrell2688

One of the Regulars
Messages
297
Location
Piner, Kentucky
Hello Everyone,

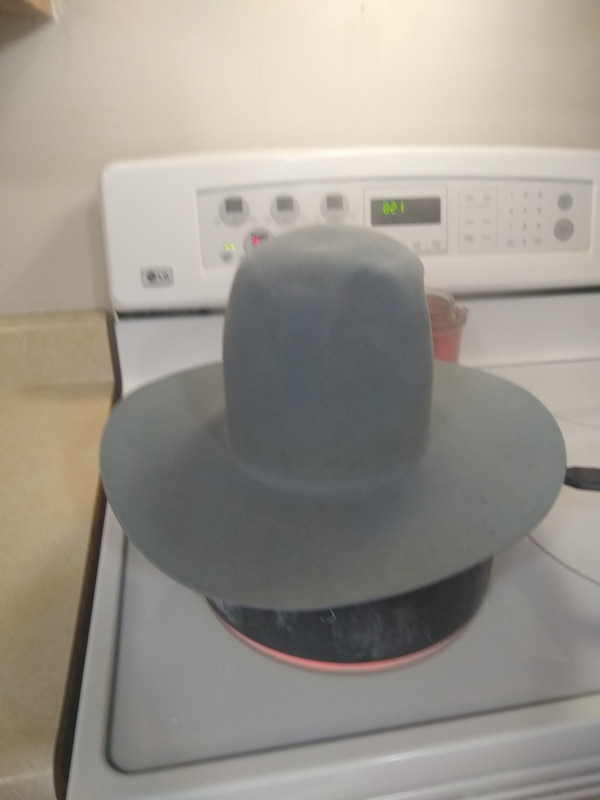
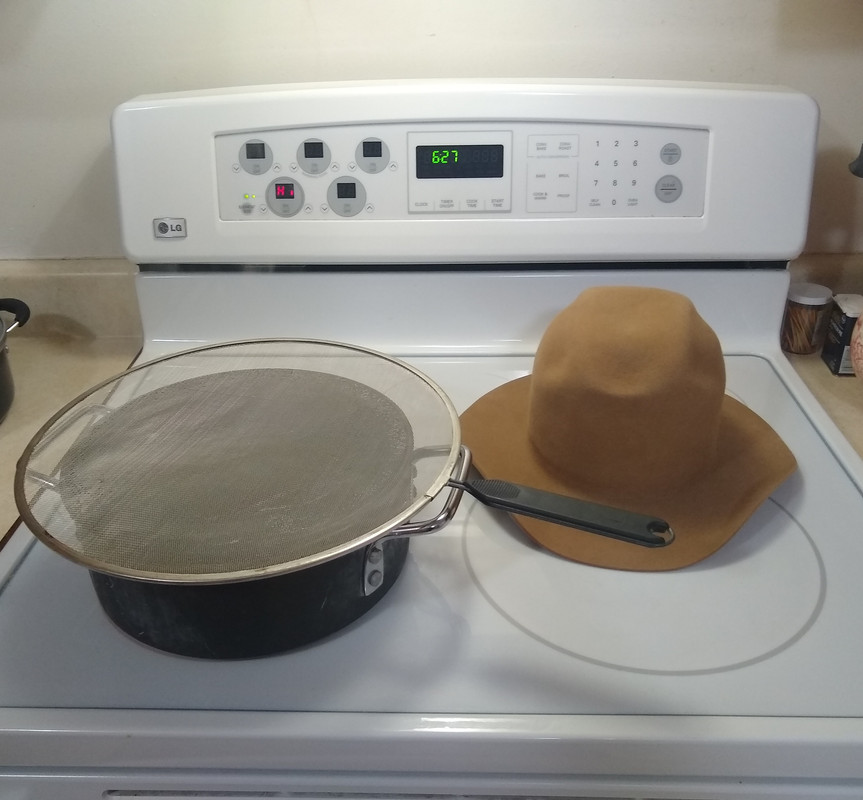
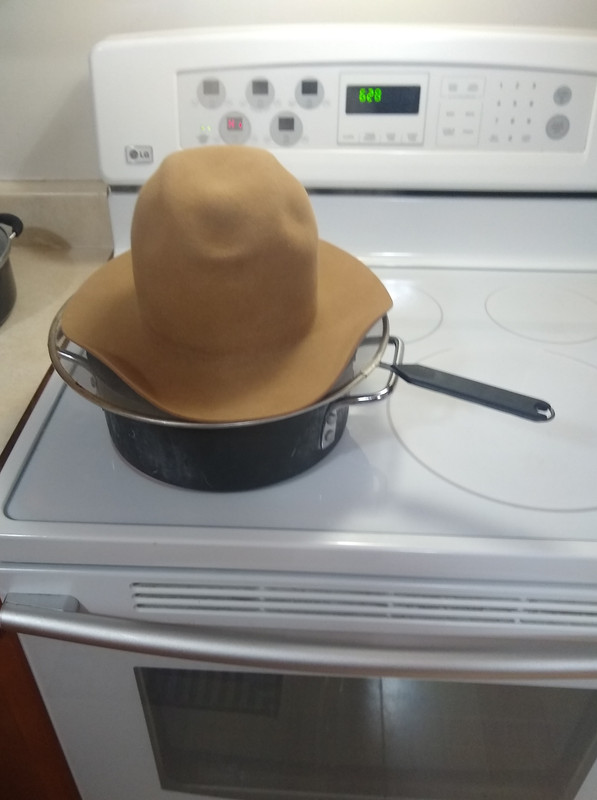
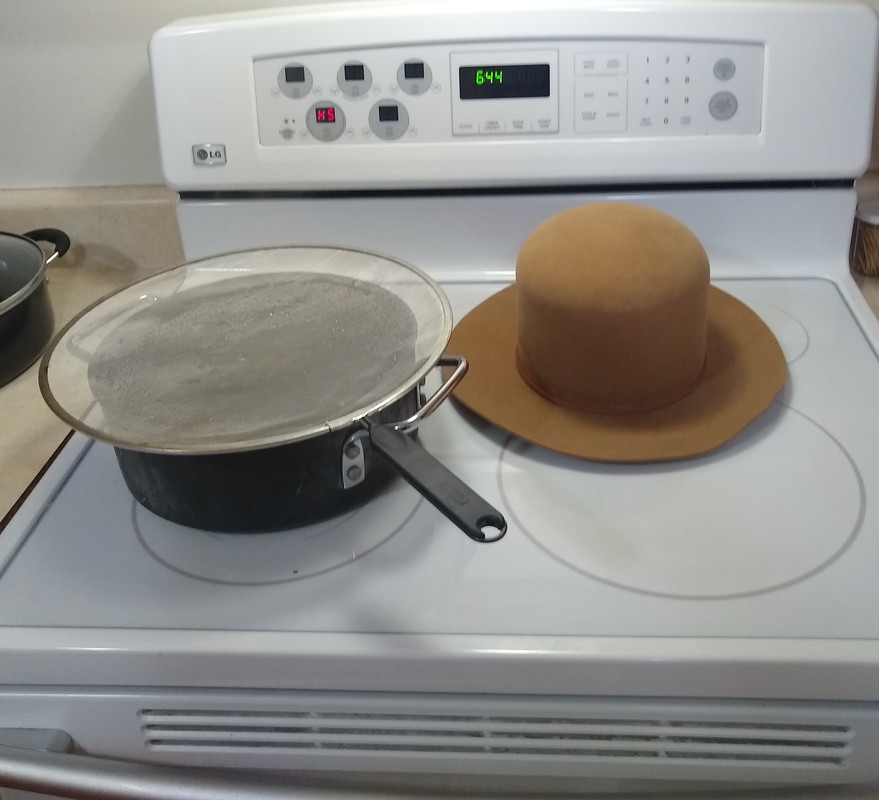
Yesterday evening I soaked the brim and bottom part of the crown, then plugged in
the antiques iron and started working on the wrinkles, as I ironed the wrinkles I pulled
the brim out some and used the thumb tacks to anchor the brim edge. I put the tacks
as close to the edge of the brim as I could. I ironed the brim two times using the same
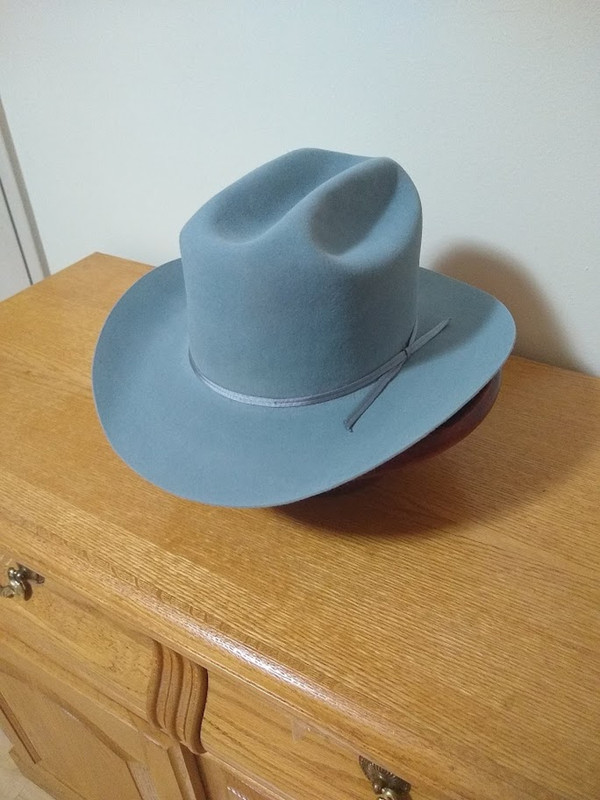
process, I was able to increase the size of the brim some, I moved the hat and blocks
to the back room to let it dry out, I looked at the hat today and most of the wrinkles
are gone now, there is a dark outline of a wrinkle in the front. After the hat is dry I will
check it out and if I have to, I will use the same process again. I use a slip knot, it
seems to hold better than a haters knot, or I am not tying the haters knot correctly??

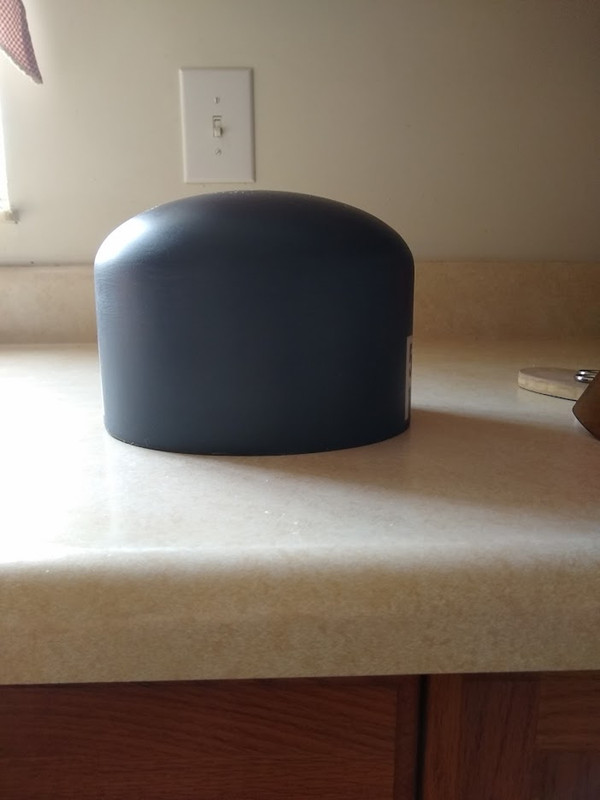
I have the Art Fawcett YouTube video make as a favorite so now I can watch it several
times. The dark grey in the video looks a lot like the Granit color that I have been looking
at.

Thanks to all for your time and help,
Darrell
 

Darrell2688

One of the Regulars
Messages
297
Location
Piner, Kentucky
Regarding wet blocking, until just recently, that had been my preferred method for converting all the heavy felted Westerns I've done over the years. It definitely works. My only issue with wet felting, though, is if you have felt that's not up to par for dye quality, and where the manufacturer used powdered dye to even out the color, the powdered dye will wash out and leave a splotchy washed out look. I remembered watching a few videos sometime ago where Steve Delk and some hatters at Advintage used boiling water in a cook pot to generate steam and would put the felt over top of that and leave it there for a while until the felt got hot and softened up. Afterward, the felt would be easily stretched over the block. I wondered if that method would work on those thick felted Resistols and other Westerns I convert. Well, it's now my preferred method and I don't end up with a splotchy. Also, I can very easily stretch these felts over a block by hand with very minimal use of a puller downer, and I'm talking about stretching a thick felted 6 7/8 Western over a 7 1/4 hat block. I used a pot full of boiling water and a grease splatter screen to set my hat on. I leave it on the cook pot until the felt gets soft and malleable and hot to the touch. I take it off and then stretch it over the block, by hand, with no problem. Easy, and the dye doesn't wash out and end up splotchy looking. Here's a couple I've done that way...

My Blue Resistol:
IMG-20211113-082227897.jpg


After:
4-X-Blue-Resistol-3-A.jpg


My Az-Tex:
Before:
IMG-20211110-054706138.jpg


After:
Az-Tex-14-A.jpg


And, another Resistol I'm currently working on:
IMG-20211203-062831501.jpg


IMG-20211203-062929461.jpg


IMG-20211203-064520175.jpg


These were small hats and stretched easily by hand over a block that was four sizes larger.

Hi Mr. Jones,

I was reading your post again and looking at the photos, I have a few questions. I was wondering what is the crown height on your Blue Resistol and how long do you leave your hats over the pot of boiling water to steam them? I may not have let my hat blank sit in the steam long enough.?? Also do you wear gloves to work with your hats after steaming them? How long have you been working on hats, all of your hats look like the work of a professional hat maker.
I am still working on my hat, some of the wrinkles will need some more work, but at least I am getting them worked out little by little.

Thanks for all your time and help,
Darrell
 
Last edited:

Darrell2688

One of the Regulars
Messages
297
Location
Piner, Kentucky
Welcome to the Lounge Darrell,
When I had this problem I wet the brim heavily at the wrinkles, sprayed lightly over the entire brim and used a heavy ( 20lb or so) dry iron to press them out, pulling the brim as I went. This assumes you still have the cording in place on the block. Without a great steam source this is the best way. The water saturates the felt and the dry iron creates steam within the felt with that water. Let it dry and do this as many times as required. As CVW said, pin it to the flange, stretching it as far as you can.

Hello Mr. Fawcett,

Thank you for all of your help with my problem hat, looks like I will have to continue to work on the wrinkles using the iron and stretching. I still have a small bubble on top and I have been able to work the wrinkles down some just not all the way. Last night as the hat was drying, I noticed one of the wrinkles looked like it was still soaked through, long story short I still have work to do on this hat.
I was thinking about the problem with the crown not flattening out and thought about using a hat stretcher in the very top of the crown. Is there a way to stretch the very top of the crown out to get it to sit flush against the top of the crown block?

Thank you for your time and help,
Darrell
 
Last edited:

Darrell2688

One of the Regulars
Messages
297
Location
Piner, Kentucky
I am largely self taught as a hatter so my process is trial and error and refinement. I don't make western hats so 6" open crowns are my maximum. Yes, many of the felts I buy it is impossible to get the 6" open crown plus a brim wider than 3". You can only get what the felt will give you...more crown less brim and vice versa. The advantage to using the western weight is those felts are larger than the dress weight. As I stated all my crowns are a max 6" and the smaller ones 56 & 57cm are a bit under that measure. Yes, air pockets trapped at the crown are an issue. I use latex gloves, lots of steam and patience to push the felt down. It takes a while and effort ( a long while with western weight) but it can be done. If you don't get it fully onto the block it usually leaves a crease which is a bitch to remove.

I use blocking springs (bought from Guy Morse-Brown out of the UK rather than blocking cord. I have blocking cord that I bought in a 25 metre length. It is off the shelf Home Depot but get the stuff that states it is minimal stretch. If it is stretchy you will never get the bite you need as it just keeps stretching out on you. It is cheap. BUT I have found the blocking springs while a bit pricey are much easier to use. Buy yourself a set of pusher & puller downers and a tollicker. You cannot make a good hat without decent tools and these 3 are indespensible. Also a decent iron for $35...I am a fan of the classic Black & Decker steam iron....Amazon has them.
I buy cheap cotton muslin fabric for my ironing cloths. I wash them if they get dirty and toss them when they get stained. I pay $5 or so per yard at the local fabric store.

Hello Belfastboy,

I have been reading all of the post over again and could you tell me what blocking springs are? I used some thumb tacks to hold the brim in place until the hat dries out, something that I am not keen on, the only good thing about using thumb tacks is I still have to cut the brim down and the holes created by the thumb tacks will be cut off.

I was at my local Home Depot, 20 miles away, I purchased another piece of round wood 1"x24"x24" to replace my old board, it warped from water and steam and a piece of Oak 3/4"x3"x24" to make a puller downer. I went to the local fabric store and bought some muslin cloth and some 1/8" nylon paracord. I will have to cut out a hole in my new board for my block to sit in and work on the puller downer also.

Thank you for all your time and help,
Darrell
 

T Jones

I'll Lock Up
Messages
6,609
Location
Central Ohio
Hi Mr. Jones,

I was reading your post again and looking at the photos, I have a few questions. I was wondering what is the crown height on your Blue Resistol and how long do you leave your hats over the pot of boiling water to steam them? I may not have let my hat blank sit in the steam long enough.?? Also do you wear gloves to work with your hats after steaming them? How long have you been working on hats, all of your hats look like the work of a professional hat maker.
I am still working on my hat, some of the wrinkles will need some more work, but at least I am getting them worked out little by little.

Thanks for all your time and help,
Darrell
Hello there Darrell, and thank you for the compliment...
The Blue Resistol started out at a size 6 7/8. Its original open crown height was 6 1/2 inches with a 4 inch brim width. So, after reblocking the new open crown height is 5 3/4. I actually reblocked it twice. With my first blocking the open crown height was 6 inches. But after I put it together and did my Cattleman crease it just didn't look right to me. I took it apart again and reblocked a second time to a 5 3/4 open crown. After creasing it again I ended up with a fuller and more proportionate looking crown. As creased, the crown height is 5 1/4 inches with a 3 inch brim width. The original block shape has also been changed to this 7 1/4 custom made vertical sided dome by Randall Alan, my preferred block shape.
Block-Randal-1-A.jpg


Block-Randal-2-A.jpg


I leave my hats over the boiling water until the felt feels soft and malleable. There's no real set time since every hat reacts differently. If I can easily mold the hat with my fingers while it's on the pot then I know it's ready. The felt will be really hot and soft, so I have my block close by when I take it off. Immediately I take the felt and stretch it over the block. As far as reblocking these old Westerns with this method it's super easy. Whether I'm reblocking a 6 7/8 hat or a 7 1/4 hat, one's just as easy as the other. With that said, I've never had the opportunity to try this method in a raw felt blank. I've known of a few hatters who use this method and it seems to work out well for them. I'm guessing that it would depend on what felt body they're using and who the manufacturer may be. Actually, I would like to try it on a raw body and see what I can do with it. I remember talking with one hatter, who passed away somewhat recently, was going to be a distributor for some nice felt bodies that were supposed to be really easy to work with and that stretched nicely over a block. I'm thinking they were Tonack felts. I can't recall. CVW may remember what those felts were. We both dealt with him.
So, as far as how long I've been working on hats, maybe since around 2014? Anyway, sorry for the rambling. I hope you were able to glean something out of it.
 
Messages
10,379
Location
vancouver, canada
Hello Belfastboy,

I have been reading all of the post over again and could you tell me what blocking springs are? I used some thumb tacks to hold the brim in place until the hat dries out, something that I am not keen on, the only good thing about using thumb tacks is I still have to cut the brim down and the holes created by the thumb tacks will be cut off.

I was at my local Home Depot, 20 miles away, I purchased another piece of round wood 1"x24"x24" to replace my old board, it warped from water and steam and a piece of Oak 3/4"x3"x24" to make a puller downer. I went to the local fabric store and bought some muslin cloth and some 1/8" nylon paracord. I will have to cut out a hole in my new board for my block to sit in and work on the puller downer also.

Thank you for all your time and help,
Darrell
Go to the Guy Morse-Brown website....just google that or HatblocksUK I think. He has an online shop for hatters tools. They are red silicone bands called blocking springs and you need one for each size of block. I love mine as for me they work much better & easier than the cords.
Keep working, and remember if it was easy then everyone would be making their own hats. Art Fawcett says he has made over 5000 fedoras and still was learning the craft.
 

Darrell2688

One of the Regulars
Messages
297
Location
Piner, Kentucky
Hello Everyone,

Well, I cut a hole in my new circle shaped board for my crown block to sit in.
I bought a new circle shaped board from Home Depot 1"x24"x24" and a piece
of wood, Walnut 1"x3"x24", the Walnut board, I used to make a Puller Downer,
not as nice looking like the hat tools being sold on the internet, but it works.
I also purchased some paracord 1/8" diameter, the paracord did not work
for a Hatters Cord, slips to easy, I locked the cord in place and wrapped it
around the hat 7 times and that stuff just won't hold, slips way to easy.
I bought some new thumb tacks yesterday and used them today. I worked
the hat crown down over the top of the block and got rid of the bubble, I
steamed the top of the hat and soaked it with hot water and worked in down
flush and down the sides. I managed to get a 5 7/8" open crown and a brim
that is about 3.5" wide. After the hat dries, I will take another shot at ironing
out the stubborn wrinkles on the brim.
SDC10448a.JPG

I also made a pusher downer, and it works pretty good. I guess I was a
little shaky when I took the photo. All of those shinney spots on the edge
of the brim is the new thumb tacks.

Darrell
 

Darrell2688

One of the Regulars
Messages
297
Location
Piner, Kentucky
I have a hard time working with the heavier felts as I have some arthritis in my hands. 180 grams are not too bad but the 220grams are a bear especially on non tapered square shouldered blocks. I love working with the Millinery Whse felts but the blanks are fairly tapered and hard to get them over the square shoulders of the block. If it is a larger size head I will wet block rather than just using steam. I soak the sucker thoroughly in hot water, block it (sometimes blocking it twice...say once on a 60 or 61cm block and then the final on the 62.5cm block) and let dry for 2-3 days. I get much better stretch when wet blocked than I do with just the steam.

Hi BB,
I was reading your post and realized that you use felts that you get from the Millinery Warehouse.
I purchased my felt from the Millinery Warehouse also. It was listed as a Western Weight hat blank 180grams and after sanding it all over inside and out it still weighs over 180 grams. This hat has been a bear to deal with, I finally got the felt worked out flat on top of the block, but I had to steam the hat and soak it with hot water and work the felt down over the block shoulders, I wore a pair of thick heavy rubber gloves to work on the felt. I have been checking out a Western weight 160gram premium suede capeline in Granite for a next project if I get this one finished. I contacted Drew and he suggested the 160G weight, because it has less stiffener applied to it and maybe easier to work with. The only concern that I have is in the listing, suede finish, it is also 100% rabbit fur felt. I am guessing that the suede finish is a shiny finish? Have you ever used one of their fur felts listed as a suede finish? I have had a bear of a time with the 180g, I can't imagine tackling a 220g weight Western Felt.

Darrell
 
Last edited:
Messages
10,379
Location
vancouver, canada
Hi BB,
I was reading your post and realized that you use felts that you get from the Millinery Warehouse.
I purchased my felt from the Millinery Warehouse also. It was listed as a Western Weight hat blank 180grams and after sanding it all over inside and out it still weighs over 180 grams. This hat has been a bear to deal with, I finally got the felt worked out flat on top of the block, but I had to steam the hat and soak it with hot water and work the felt down over the block shoulders, I wore a pair of thick heavy rubber gloves to work on the felt. I have been checking out a Western weight 160gram premium suede capeline in Granite for a next project if I get this one finished. I contacted Drew and he suggested the 160G weight, because it has less stiffener applied to it and maybe easier to work with. The only concern that I have is in the listing, suede finish, it is also 100% rabbit fur felt. I am guessing that the suede finish is a shiny finish? Have you ever used one of their fur felts listed as a suede finish? I have had a bear of a time with the 180g, I can't imagine tackling a 220g weight Western Felt.

Darrell
I love his 160gr felts....especially the suede finish. It is not shiny at all and it really does have a suede like finish. The dye penetration is very good and I have had little trouble with mottling of the felt if I pounce them a great deal. I have worked with just one, as a test, of the 220gr beaver. It is a nice felt, makes a nice heavy western weight hat.....but yes they are a bear to work with. I had to get a buddy to help me fully block it as it required 3 strong hands to get it done.
CIMG0247.JPG
 

Darrell2688

One of the Regulars
Messages
297
Location
Piner, Kentucky
I love his 160gr felts....especially the suede finish. It is not shiny at all and it really does have a suede like finish. The dye penetration is very good and I have had little trouble with mottling of the felt if I pounce them a great deal. I have worked with just one, as a test, of the 220gr beaver. It is a nice felt, makes a nice heavy western weight hat.....but yes they are a bear to work with. I had to get a buddy to help me fully block it as it required 3 strong hands to get it done. View attachment 385473
 

Darrell2688

One of the Regulars
Messages
297
Location
Piner, Kentucky
Hi BB,
Since getting the top crown area of the felt down onto the block is the hardest part of the battle during the blocking process, can you think of a way to stretch out that area before trying to stretch it over the block? I guess you could stretch it out by soaking in hot water and steaming the crown area for say 15 to 20 minutes, of course with beaver you would most likely have to steam the hat for longer than 20 minutes. I have watched YouTube videos of people blocking hat felts, pure rabbit and beaver and they seem to be able to push a felt onto a block with very little problem. I guess there is a secret to the work that they aren't telling people, other than heavy steam and using some old blocking equipment.

Darrell
 
Messages
10,379
Location
vancouver, canada
Hi BB,
Since getting the top crown area of the felt down onto the block is the hardest part of the battle during the blocking process, can you think of a way to stretch out that area before trying to stretch it over the block? I guess you could stretch it out by soaking in hot water and steaming the crown area for say 15 to 20 minutes, of course with beaver you would most likely have to steam the hat for longer than 20 minutes. I have watched YouTube videos of people blocking hat felts, pure rabbit and beaver and they seem to be able to push a felt onto a block with very little problem. I guess there is a secret to the work that they aren't telling people, other than heavy steam and using some old blocking equipment.

Darrell
I have never used one but the videos I have watched the hat shops have a steam box and would imagine that provides greater penetration of the steam...saturation if you will. Watching the Stetson video the felt bodies are soaked with hot water and then steamed. From that state they practically melt over the block. Not having any of that equipment I just resign myself to wrestling the felt over the block. I have never had to give up.....some are just harder than others. I use 3mm latex medical gloves as it gives me better purchase on the felt and I can work with hotter felt than I can with just bare hands.
It is harder on my square shouldered/non tapered blocks. My set with the dome and slight taper is much much easier as all felts just slide over the dome. It can get a little harder if the felt is smaller and I need to steal some crown from the brim. Wrestling the brim/crown break onto the block can be tough and that is where the Guy Morse Brown blocking springs work ever so much better and I think well worth the money. I have more on order so I now have at least one for all my block sizes.
 

Darrell2688

One of the Regulars
Messages
297
Location
Piner, Kentucky
I have been thinking about taking two-disc shaped pieces of wood, 1"x24"x24" and cutting oval shaped holes in both pieces, soaking the hat felt, then place the hat felt between the two pieces of wood, both pieces of wood together, steam the felt crown, put the crown block in the felt, then add weight to the bottom of the crown block. Kind of a work around to the block steamer that the hat makers use. I just wonder if this idea would work??
 
Messages
10,379
Location
vancouver, canada
I have been thinking about taking two-disc shaped pieces of wood, 1"x24"x24" and cutting oval shaped holes in both pieces, soaking the hat felt, then place the hat felt between the two pieces of wood, both pieces of wood together, steam the felt crown, put the crown block in the felt, then add weight to the bottom of the crown block. Kind of a work around to the block steamer that the hat makers use. I just wonder if this idea would work??

That seems close to what I explained I use as my brim press. I have 5/8" ply 2' x 2'. One each for my block sizes, hole cut to match the block + felt width.
I place the steamed felt while on the block through the hole while it is placed on one of my small work tables then I clamp the 4 quadrants and let it dry for 24 hours. Make sure it is free of puckers/wrinkles or it will set them in even firmer and render even harder to remove.
What do you use to set the brim/crown break?
 

Darrell2688

One of the Regulars
Messages
297
Location
Piner, Kentucky
That seems close to what I explained I use as my brim press. I have 5/8" ply 2' x 2'. One each for my block sizes, hole cut to match the block + felt width.
I place the steamed felt while on the block through the hole while it is placed on one of my small work tables then I clamp the 4 quadrants and let it dry for 24 hours. Make sure it is free of puckers/wrinkles or it will set them in even firmer and render even harder to remove.
What do you use to set the brim/crown break?

I don't have anything to set the brim/crown break, I just leave the blocking cord in place and use the steam iron to work the crown break into the felt. When I was at Home Depot recently, I was looking for a piece of Walnut. If I had the wood, I could make a tool to make the crown break. I was looking for a piece of wood 3"Wx4"Hx4"L, it wouldn't be fancy, but I think that I could make a tool to set a brim/crown break. I did find a piece wood that I almost bought, however it was a end post for a stair railing and expensive, I only needed a small section of the wood to make the tool. I guess that I could look for a different type of material to make the tool.
As for your setup to get the felt over crown block, I was thinking about the same setup and turn the hat upside down, so the crown sits down inside a tall cooking pot and place heavy weight on the bottom of the crown block. With the constant pressure the block should slip down into the felt, I could be wrong?
 

Darrell2688

One of the Regulars
Messages
297
Location
Piner, Kentucky
Hello Everyone,

I cut the brim down today, the brim is 3.25" wide, I had very little waste. I cut my sweatband down yesterday, 23 3/8" long then cut the reed at 24". I have got to find a better way to hold the sweatband ends together while I sew the ends together. I managed to get a bell shape in the sweatband, but it was a battle holding the ends together as I sewed it together. I always have trouble holding the ends together as I sew the ends together. I hand sew everything, including working with leather. My hat is still on the crown block, and I am using brim flange, I use the steam iron on the brim again today, working on giving the brim a slight bell shape. I will see how it turns out tomorrow. I will have to do a little sanding on the felt tomorrow and maybe I will get the sweatband installed. I did check the fit of the sweatband and it fits snug in the hat, and comfortable to wear. My homemade rounding jack worked well, but I will be converting back to a straight blade. Does anyone have a method that will make sewing the sweatband ends together easier?

Darrell
 

Forum statistics

Threads
107,198
Messages
3,030,666
Members
52,672
Latest member
Takatāpui
Top