Want to buy or sell something? Check the classifieds
  • The Fedora Lounge is supported in part by commission earning affiliate links sitewide. Please support us by using them. You may learn more here.

Finally... my 'homemade' hat

Stoney

Practically Family
Messages
977
Location
Currently on the East Coast
I think it looks great Andy. Like Tony has said. I'm sure that you didn't take the trouble to make that block just for one western conversion. I'm looking forward to seeing what you do next. Once you've been bitten by the hat making bug, there is no stopping it.

:eusa_clap :eusa_clap :eusa_clap
 

airforceindy

One of the Regulars
Messages
263
Location
Anchorage, AK
reetpleat said:
Very nice. One tip. You may have flattend the brim too much. Wet just the brim, and flip it up and let it sit till dry. If may well shrink up a little giving it a sharper flip up in the back and down in the front.

Thanks for the tip, Reetpleat. When I pulled off my brim flange for the first time, it was a fair bit sharper of a turn-up. However, given the width of the brim itself, I felt it looked better (on me) with a more subtle flip, and a relatively flat/drooping front. More relaxed, more sun protection, and gives a little bit more of a 'rustic' vibe!

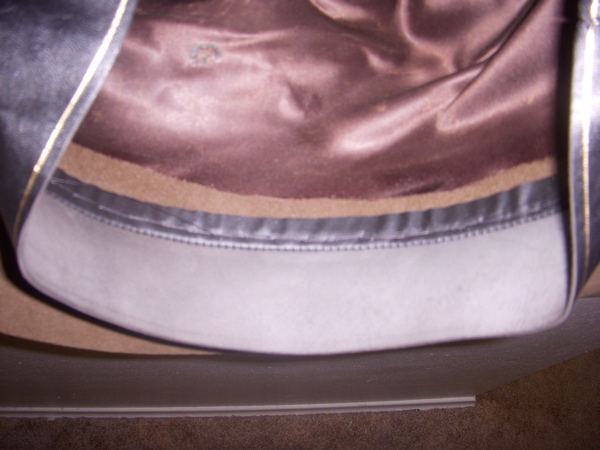
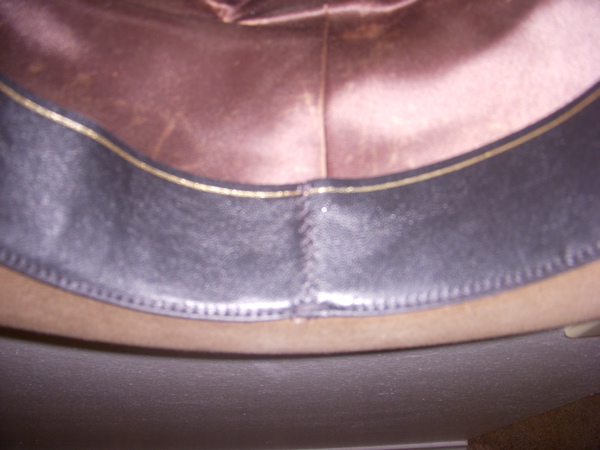
DonCarlos, the sweatband was a tedious but rewarding process. I will admit here, as I did over at COW, that I dismantled my first Adventurebilt (among other hats) to learn the best way of attaching the sweatband. After doing that and consulting with Marc Kitter, I determined that I needed to flip the reeded tape inside out, like this:
2847421570_990f9b7ca6_o.jpg

2847421660_e3967bc991_o.jpg

Some people sew through the holes already created by attaching the leather to the tape, but I felt it would look sloppy and not hold as well. So, following Steve Delk's example and Marc Kitter's advice, I sewed the tape only with what I believe is called a backstitch (full stitch forward, half-stitch back, etc.), with the stitches running between 1/8-1/4" above the brim break. The sweat (which I bought pre-made) had brown thread at the back, which I changed out to black.

Edward, I'm afraid my camera was on the fritz during the rebuild phase, so no pictures of the process. That'll be my top priority with the next one!

TonyB, the crown was quite tall, as you said. The original hat hat a 3/8" (?) cord on it, which left a mark against the rest of the faded felt. I wound up pulling some of the crown down into the brim, so that the mark was right on the brim break. I sanded it liberally to blend as much as I could, and it's barely visible now. Unfortunately, I was without something appropriate to use as a tollicker, so the break isn't as clean as I would like it; something to work on when the next project comes along.

Edward and Feraud: the brim trimming I did grade-school style. I took a ruler, marked on the underside of the brim what I thought was a good width (2 5/8") and made marks with a Sharpie from one side to the other, so that I had dots approximately 1/2" apart all the way 'round. I then used my sharpest knife (in the absence of a decent pair of scissors) to cut on that line, and sandpaper to correct minor deviations.

Thank you all for your comments/compliments!!!
Regards, Andy
 

Edward

Bartender
Messages
24,789
Location
London, UK
Feraud said:
I think there are (adjustable?) brim trimmers that cut a uniform line.
Our resident hatters can better confirm this piece of information.

Aha! Thanks, Feraud, Warbird, Tony B and AFIndy! It looks likely that this is a project I may well look into in the medium term.... :)
 

donCarlos

Practically Family
Messages
566
Location
Prague, CZ
Thanks for pictures. The only thing I´m still wondering about (and I´m a bit obsessed by this one) is, how it is done that the stitches don´t go through the felt. Or do they? I haven´t noticed them on my hats.
 
Messages
10,603
Location
My mother's basement
donCarlos said:
Thanks for pictures. The only thing I´m still wondering about (and I´m a bit obsessed by this one) is, how it is done that the stitches don´t go through the felt. Or do they? I haven´t noticed them on my hats.

The stitches do indeed go through the felt. Take a peek under the ribbon and you'll see 'em.
 

donCarlos

Practically Family
Messages
566
Location
Prague, CZ
tonyb said:
The stitches do indeed go through the felt. Take a peek under the ribbon and you'll see 'em.
That´s really strange, I´ve already replaced the ribbon on one of my hats but I saw nothing. Maybe they´re just too small. Anyway, I think I´ll get my own block and start my own hat soon :)
 
Messages
10,603
Location
My mother's basement
donCarlos said:
That´s really strange, I´ve already replaced the ribbon on one of my hats but I saw nothing. Maybe they´re just too small. Anyway, I think I´ll get my own block and start my own hat soon :)

Hat makers usually use thread close in color to the body felt, so it doesn't jump right up and scream at you. We're talkin' hats with reeded sweatbands here, NOT the unreeded type. The stitching securing the sweatband to the body goes through the reed tape.

I'm tempted to call it a "sweatband assembly," seeing how it's the leather sweatband material itself as well as the synthetic reed tape material it's attached to.

Most custom hatters get their sweatbands from outfits that specialize in just that -- making sweatbands. The sweatbands come to the hatter flat, in a curved strip, with the reed tape attached. The hat maker trims the sweatband to size, connects the ends of the reed with a ferrule, "drums" the sweatband and sews it together and then into the crown opening. It's a simple enough process to understand, but it sure is easy to screw it up.
 

airforceindy

One of the Regulars
Messages
263
Location
Anchorage, AK
tonyb said:
It's a simple enough process to understand, but it sure is easy to screw it up.

Indeed it is, the whole lot of it!!! Especially the sweatband and ribbon work. The sweatband has to be cut at just the right angle so that the reeded portion is longer than the part closest to the crown and bells out, making a comfortable surface to rest against your head. A little bit off, and you get edges digging into your forehead. Sewing the blasted thing in is a labor of love, particularly with this hat. The felt is ridiculously dense, and thick to boot. Stitches tend to sink into the felt a bit, the tighter your sewing the more buried your stitches will be. If the felt is dense, you should see an indentation if you don't see the thread itself. IN looser felt, the thread will truly be buried, and might even rip right through if the felt is of poor quality. I won't even go into getting the thing as straight as possible, and making sure the reeded tape doesn't bunch up. The ribbon is... just plain tedious. That's pretty much it.

But it's great fun!:D
 

Forum statistics

Threads
107,271
Messages
3,032,737
Members
52,737
Latest member
Truthhurts21
Top