jimmy the lid
I'll Lock Up
- Messages
- 5,647
- Location
- USA
A fellow Lounger recently asked me for some advice on doing a teardrop crease. I wrote a fairly detailed response, and thought it might be of more general interest. So, here goes...
Here's the basic teardrop formula. I do all of my creasing in front of a mirror (actually with a 3-way mirror), and I use steam to shape the crease...
1. Center the hat on your head. Place hat on head and, while looking in the mirror, make sure it's centered where you want it in terms of how it is sitting on your noggin. [As basic as this may seem, it is really important. There is nothing more frustrating than finishing a crease only to discover that the whole thing is way off-center! ]
]
2. Establish the center point of the pinch. Pick a point in the center (I line it up with my nose) and essentially do a center dent (while looking in the mirror). The goal is to establish where that center part of the pinch is going to be. Bring this down as low as you need to in order to establish a height that looks good. Once I have this front part of the crease about where I want it, I hit it with a burst of steam to lightly set it so that it holds its place.
3. Establish the side dents. With the hat on, and looking in the mirror, I scoop out the side dents and shape them the way that I want them. At this point, you can get a very good sense of how the front of the hat is going to look -- so you should get that the way you want it. Lightly steam the side dents to hold them in place.
4. Establish the height at the rear of the hat. Now, go to the back of the lid and fold it down to the height that makes sense for you. The objective is to establish the height at the round part of the teardrop, and this will also determine the amount of rake. Check out the hat from the side to see that you like the line. Make sure that the rounded part of the teardrop in back is uniform in terms of height. FWIW, mine usually wind up at about 4" in the back.
At this point, the hat should look good from the front and sides, with smooth lines from front to back, and a nice smooth roundness at the very back.
5. Elevate the "inner teardrop". At this point, the center of the crown will probably just be sunk down in the middle from all of the other shaping you have been doing. So, apply steam fairly liberally to the top of the crown, covering the entire area to soften things up. Then, take the knuckle of your index finger and, starting from underneath the crown at the point of the teardrop at the front pinch, simply run your knuckle parallel to the outer edge of the hat in a fluid, sweeping motion -- about a 1/2" in from the outer creased part of the lid. In other words, trace the teardrop with your knuckle from underneath the crown, pressing gently upward with your knuckle. You will need to hit the crown with steam and do this two or three times in order to really start establishing the elevated portion of the teardrop. Once you have the outline in place, then place your knuckle at the point of the teardrop in the front and bring it in a line straight back down the center of the crown toward the rear, pressing upward as you go. This helps to generally elevate the crown. Repeat this motion to really get a nice ridge at the front part of the teardrop. Then, you can also hit the round part of the teardrop with steam and gently use your knuckle to press upward and get the elevation you need, making circular motions from underneath.
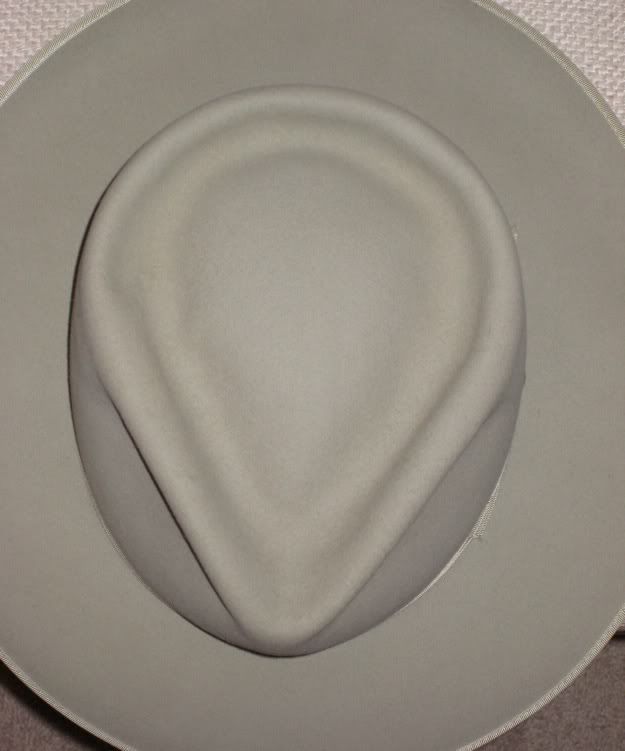
6. Other stuff. In order to make sure the back of the teardrop is nice and round, you can glide a thumb around the inside surface of the crease in the channel between the elevated part of the teardrop and the back of the hat -- pressing gently outward as you go in a nice clean sweep. Here's a photo to illustrate:
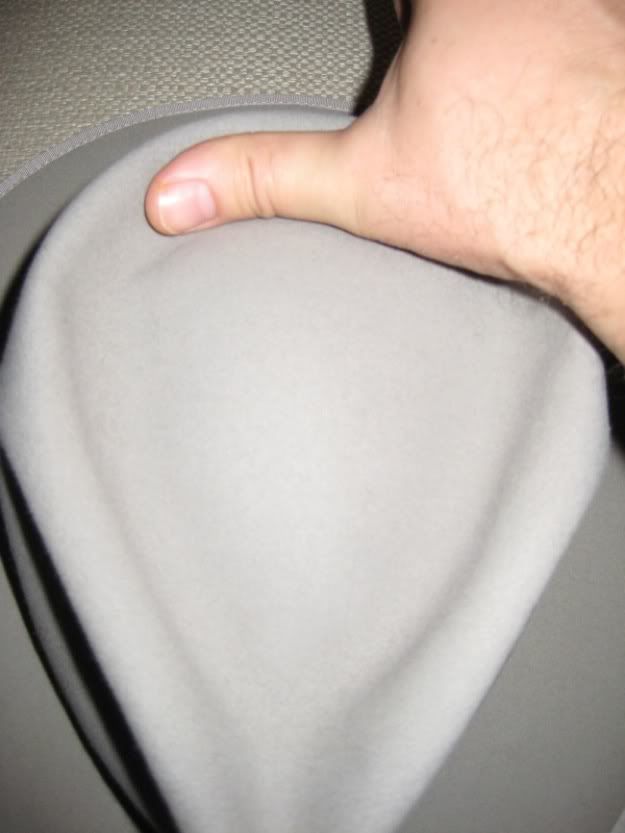
This really helps to smooth things out, as well. Also, if necessary, you can take a finger (stretched straight out), and glide it smoothly down the sides of the teardrop to help shape the teardrop itself and give the channel the depth that you want. But no pressing with fingertips! Keep everything nice and smooth, and only fiddle with the top of the hat as necessary. Most all the work in shaping the teardrop is done from underneath.
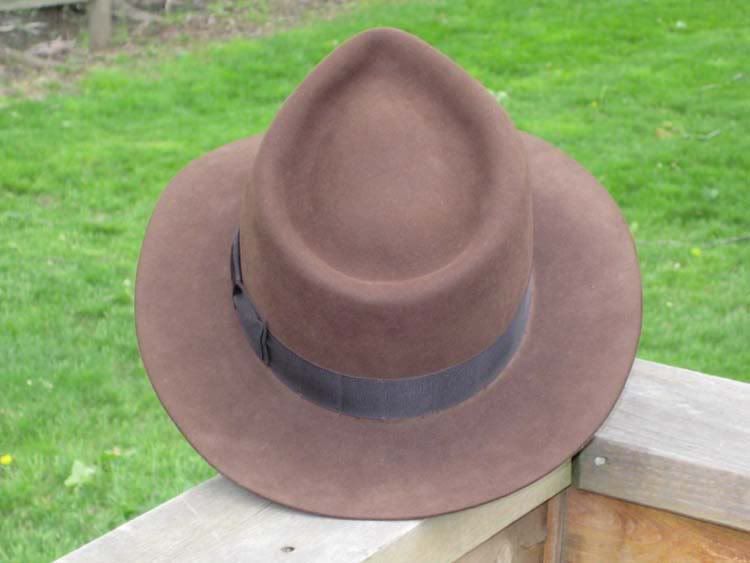
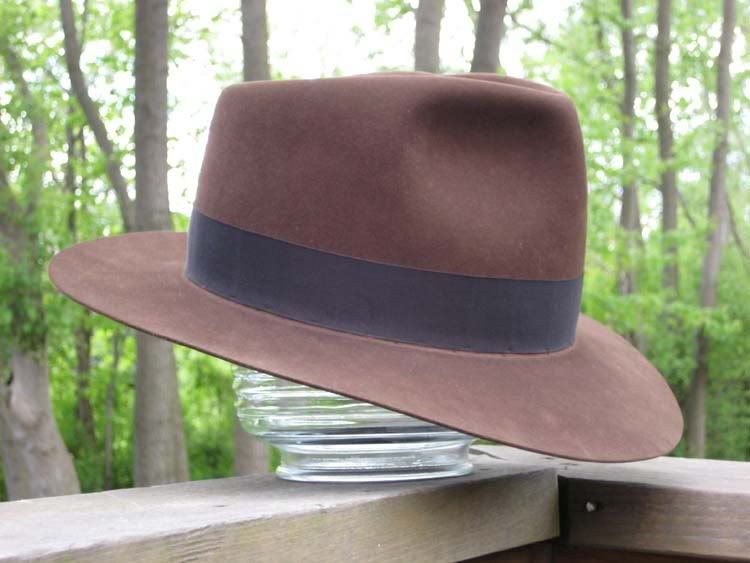
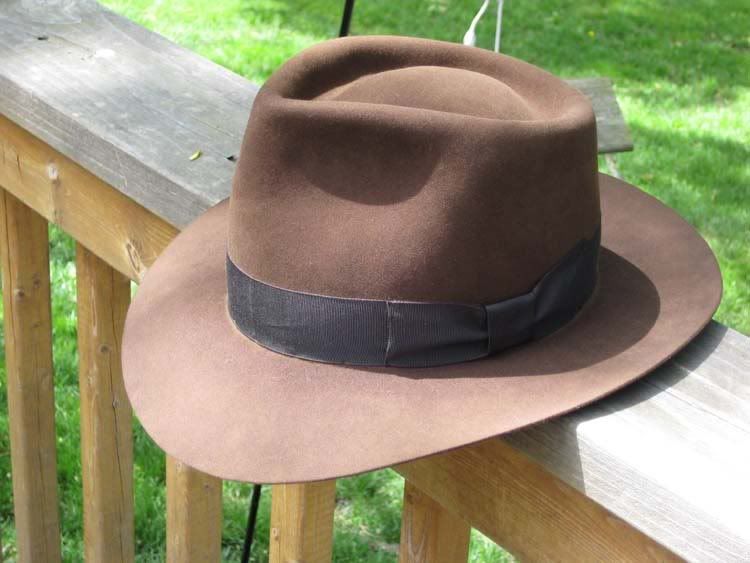
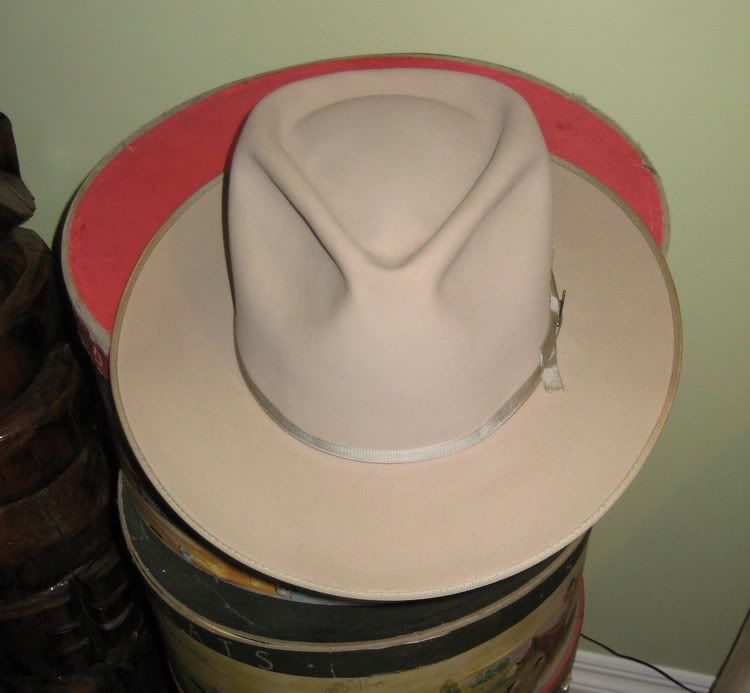
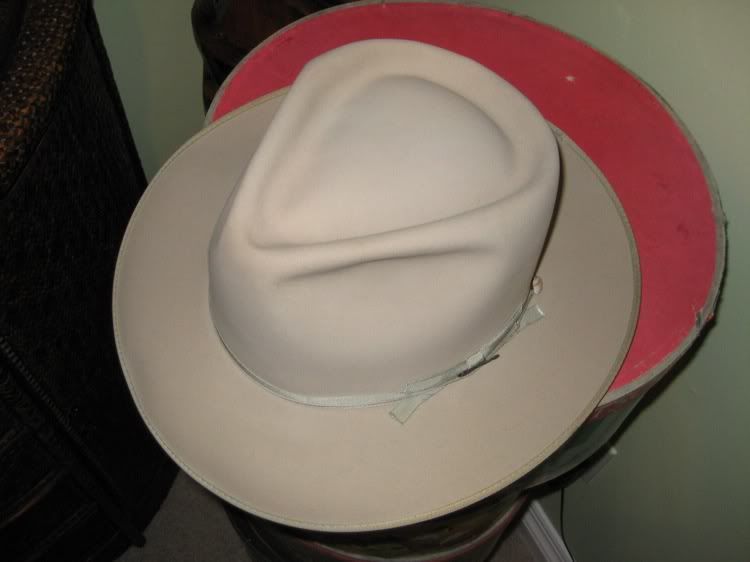
Here are some examples of the finished product:
I hope that this info is helpful! Hopefully, this thread can be a place for people to share ideas, ask questions and post examples of their own creases.
Cheers,
JtL
Here's the basic teardrop formula. I do all of my creasing in front of a mirror (actually with a 3-way mirror), and I use steam to shape the crease...
1. Center the hat on your head. Place hat on head and, while looking in the mirror, make sure it's centered where you want it in terms of how it is sitting on your noggin. [As basic as this may seem, it is really important. There is nothing more frustrating than finishing a crease only to discover that the whole thing is way off-center!
]2. Establish the center point of the pinch. Pick a point in the center (I line it up with my nose) and essentially do a center dent (while looking in the mirror). The goal is to establish where that center part of the pinch is going to be. Bring this down as low as you need to in order to establish a height that looks good. Once I have this front part of the crease about where I want it, I hit it with a burst of steam to lightly set it so that it holds its place.
3. Establish the side dents. With the hat on, and looking in the mirror, I scoop out the side dents and shape them the way that I want them. At this point, you can get a very good sense of how the front of the hat is going to look -- so you should get that the way you want it. Lightly steam the side dents to hold them in place.
4. Establish the height at the rear of the hat. Now, go to the back of the lid and fold it down to the height that makes sense for you. The objective is to establish the height at the round part of the teardrop, and this will also determine the amount of rake. Check out the hat from the side to see that you like the line. Make sure that the rounded part of the teardrop in back is uniform in terms of height. FWIW, mine usually wind up at about 4" in the back.
At this point, the hat should look good from the front and sides, with smooth lines from front to back, and a nice smooth roundness at the very back.
5. Elevate the "inner teardrop". At this point, the center of the crown will probably just be sunk down in the middle from all of the other shaping you have been doing. So, apply steam fairly liberally to the top of the crown, covering the entire area to soften things up. Then, take the knuckle of your index finger and, starting from underneath the crown at the point of the teardrop at the front pinch, simply run your knuckle parallel to the outer edge of the hat in a fluid, sweeping motion -- about a 1/2" in from the outer creased part of the lid. In other words, trace the teardrop with your knuckle from underneath the crown, pressing gently upward with your knuckle. You will need to hit the crown with steam and do this two or three times in order to really start establishing the elevated portion of the teardrop. Once you have the outline in place, then place your knuckle at the point of the teardrop in the front and bring it in a line straight back down the center of the crown toward the rear, pressing upward as you go. This helps to generally elevate the crown. Repeat this motion to really get a nice ridge at the front part of the teardrop. Then, you can also hit the round part of the teardrop with steam and gently use your knuckle to press upward and get the elevation you need, making circular motions from underneath.
6. Other stuff. In order to make sure the back of the teardrop is nice and round, you can glide a thumb around the inside surface of the crease in the channel between the elevated part of the teardrop and the back of the hat -- pressing gently outward as you go in a nice clean sweep. Here's a photo to illustrate:
This really helps to smooth things out, as well. Also, if necessary, you can take a finger (stretched straight out), and glide it smoothly down the sides of the teardrop to help shape the teardrop itself and give the channel the depth that you want. But no pressing with fingertips! Keep everything nice and smooth, and only fiddle with the top of the hat as necessary. Most all the work in shaping the teardrop is done from underneath.
Here are some examples of the finished product:
I hope that this info is helpful!
Hopefully, this thread can be a place for people to share ideas, ask questions and post examples of their own creases.Cheers,
JtL