Want to buy or sell something? Check the classifieds
  • The Fedora Lounge is supported in part by commission earning affiliate links sitewide. Please support us by using them. You may learn more here.
Messages
10,314
Location
vancouver, canada
Hello Everyone,

I have been looking around the forum to see if anyone has or is
making their own hat. I maybe missing that section entirely, so
far I have not found any threads started about making hats.

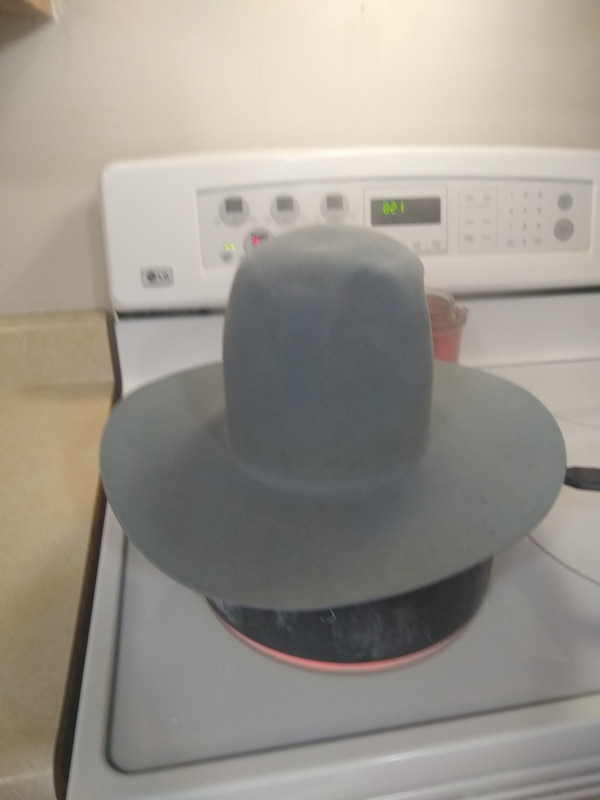
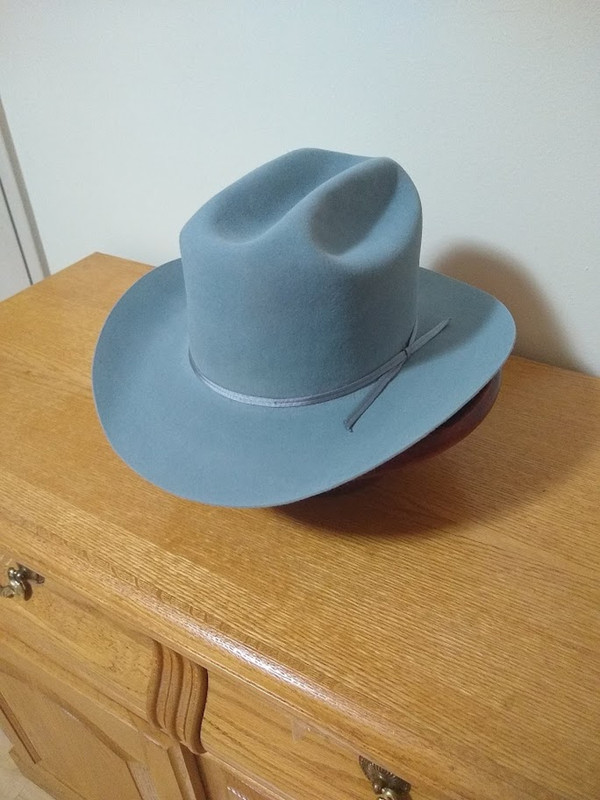
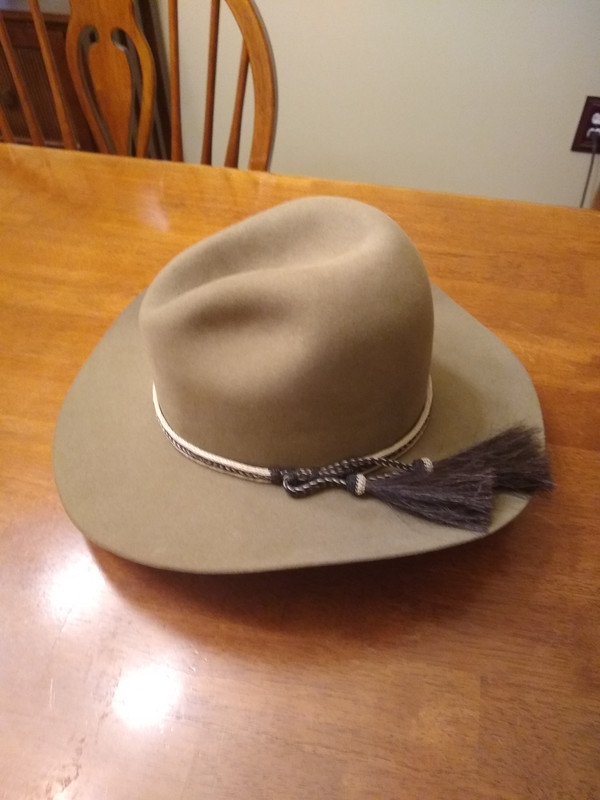
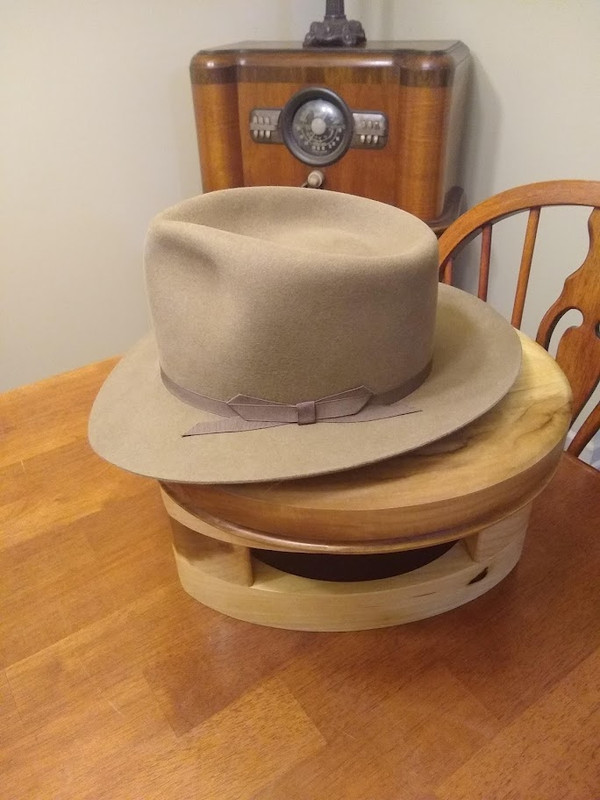
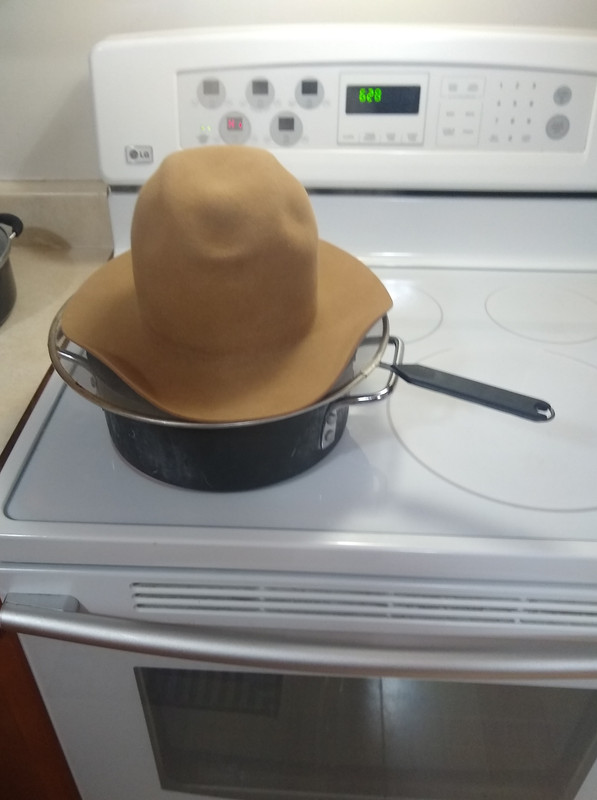
So far I have made three of my own hats and I am currently
working on a fourth hat, the new project is in smoke grey and
I am finding out that I should have gone with a lighter weight,
this hat is 180g weight, I should have gone with a 160g weight.
So far it is a bear, but I don't give up easy.

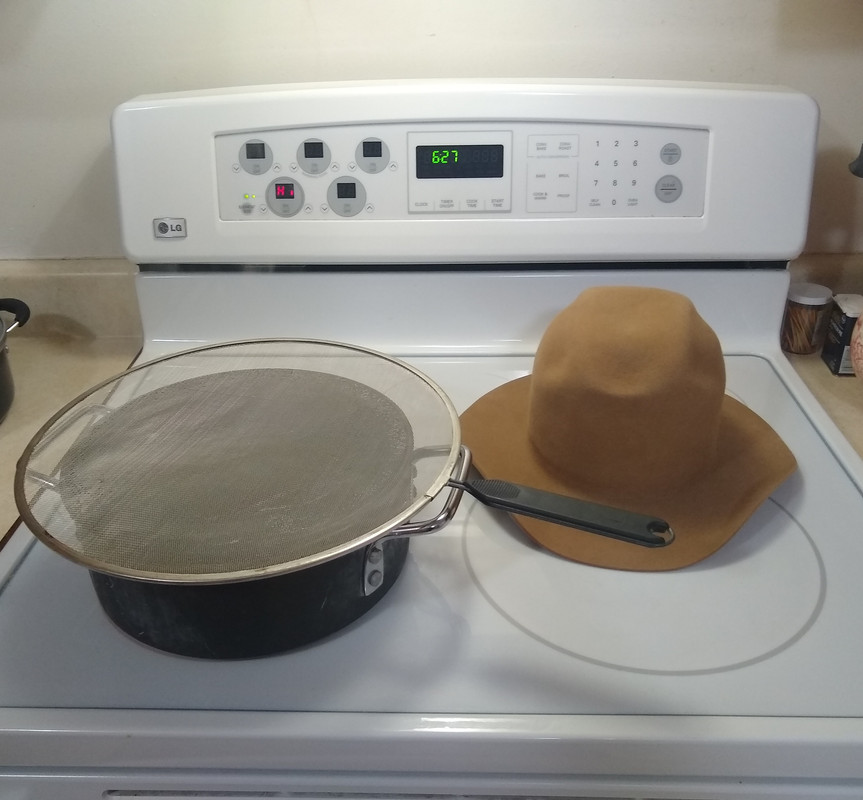
I have made my own hat block and a hat brim cutter. I purchased
a collection of brim flanges off of Ebay and I do use one of those,
yesterday I cut a oval shaped hole in a piece of aluminum to use when
I iron out the brim. I am also using some circular pine boards that I
purchased at Home Depot, they still work, however water is not a
friend to bare wood. I tried coating the wood with Polyurethane, however
ironing anything on a piece of wood coated with Polyurethane is not
a good idea, the fabric gets a nice coating even if it is wet.

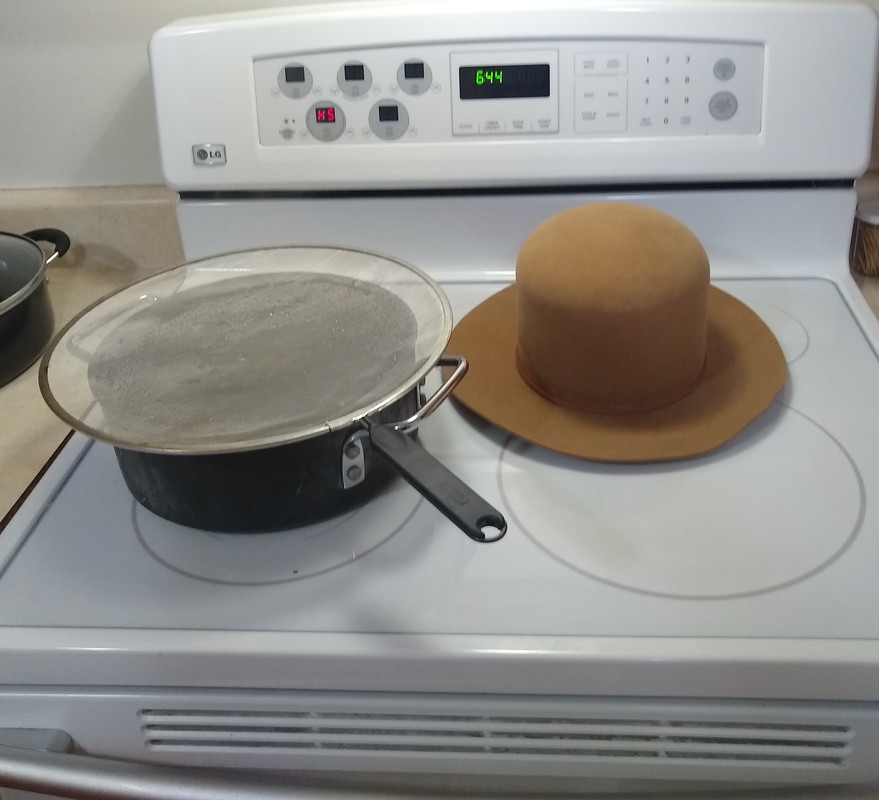
The new hat has a brim that is about 3.25" wide and the open crown
is about 6", I still have a lot of work to do on the hat.
If there is any interest, I can post some photos as I make the hat.

More Later,
Darrell

I have a hard time working with the heavier felts as I have some arthritis in my hands. 180 grams are not too bad but the 220grams are a bear especially on non tapered square shouldered blocks. I love working with the Millinery Whse felts but the blanks are fairly tapered and hard to get them over the square shoulders of the block. If it is a larger size head I will wet block rather than just using steam. I soak the sucker thoroughly in hot water, block it (sometimes blocking it twice...say once on a 60 or 61cm block and then the final on the 62.5cm block) and let dry for 2-3 days. I get much better stretch when wet blocked than I do with just the steam.
 

Darrell2688

One of the Regulars
Messages
290
Location
Piner, Kentucky
Hello Everyone,

It is good to see that there are others working on hats. I haven't made hats for anyone else,
just my own hats. The hat that I am working on right now was listed as 180g, well I weighed
it tonight after sanding on it and knocking down some rough spots and the darn thing weighs
a little over 180g, after sanding or pouncing it some. The hat blank was pounced before I
bought it and right now I am having a devil of a time trying to iron out some wrinkles that
flare out at the crown break. I have tried steam ironing; I soaked the hat in hot water
and used a wet pillow case with a steam iron and I am still frightening with the wrinkles.
The hat blank was pre-pounced and stiffened, I am beginning to think that the stiffener has a
lot to do with the problem or I don't have the right setup to get rid of the wrinkles. Along with
the wrinkles there is a small area in the crown of the hat that I can't get to lay down flat against
the top of the hat block. I have used this hat block several times and I have never had these
problems. One of the methods that I used, I put the hat on the block, then set it upside down in
the flange brim block, put another board on the top of the flange block then put about 20 pounds
of weight on the board. That was two days ago, well I gave it another try tonight.
Have any of you ever had problems like this while making hats?
Do I need to make a vise setup and press this hat?
This hat doesn't want to give an inch, I think that maybe, just maybe that I have a good brim
break after fighting with it tonight? I will find out after it dries out?
Any suggestions?

Thank you for your time and help,
Darrell
 

ChicagoWayVito

Practically Family
Messages
699
Hello Everyone,

It is good to see that there are others working on hats. I haven't made hats for anyone else,
just my own hats. The hat that I am working on right now was listed as 180g, well I weighed
it tonight after sanding on it and knocking down some rough spots and the darn thing weighs
a little over 180g, after sanding or pouncing it some. The hat blank was pounced before I
bought it and right now I am having a devil of a time trying to iron out some wrinkles that
flare out at the crown break. I have tried steam ironing; I soaked the hat in hot water
and used a wet pillow case with a steam iron and I am still frightening with the wrinkles.
The hat blank was pre-pounced and stiffened, I am beginning to think that the stiffener has a
lot to do with the problem or I don't have the right setup to get rid of the wrinkles. Along with
the wrinkles there is a small area in the crown of the hat that I can't get to lay down flat against
the top of the hat block. I have used this hat block several times and I have never had these
problems. One of the methods that I used, I put the hat on the block, then set it upside down in
the flange brim block, put another board on the top of the flange block then put about 20 pounds
of weight on the board. That was two days ago, well I gave it another try tonight.
Have any of you ever had problems like this while making hats?
Do I need to make a vise setup and press this hat?
This hat doesn't want to give an inch, I think that maybe, just maybe that I have a good brim
break after fighting with it tonight? I will find out after it dries out?
Any suggestions?

Thank you for your time and help,
Darrell
Hi Darrell,

Could you post some pictures of the hat in progress so we can see the extent of the issues that you are fighting?

What sources of steam do you have?

Pressing the hat with wrinkles will likely only serve to set them more. You need to get wrinkle free before pressing. I have a commercial hat press and I made the mistake once of trying to just press the wrinkles out and it did flat the brim but I have wrinkle marks in that brim that were pressed in.

One trick I do, is to wet, steam, iron, and stretch the brim, and then finally pin it to a wood board and then let it sit and dry for a week. I put in pins all around the brim, probably 40 - 60 pins. Then Later I will press that before brim pouncing.

Cheers!
 
Messages
10,314
Location
vancouver, canada
Hi Darrell,

Could you post some pictures of the hat in progress so we can see the extent of the issues that you are fighting?

What sources of steam do you have?

Pressing the hat with wrinkles will likely only serve to set them more. You need to get wrinkle free before pressing. I have a commercial hat press and I made the mistake once of trying to just press the wrinkles out and it did flat the brim but I have wrinkle marks in that brim that were pressed in.

One trick I do, is to wet, steam, iron, and stretch the brim, and then finally pin it to a wood board and then let it sit and dry for a week. I put in pins all around the brim, probably 40 - 60 pins. Then Later I will press that before brim pouncing.

Cheers!
Yes, once those wrinkles are pressed in they are very hard to get rid of entirely....often the wrinkles can be removed but still a shadow remains. I have found taking extra time to take wrinkles out that are caused by the blocking string, especially if you are blocking a large felt blank down in size.
 

Art Fawcett

Sponsoring Affiliate
Messages
3,717
Location
Central Point, Or.
Welcome to the Lounge Darrell,
When I had this problem I wet the brim heavily at the wrinkles, sprayed lightly over the entire brim and used a heavy ( 20lb or so) dry iron to press them out, pulling the brim as I went. This assumes you still have the cording in place on the block. Without a great steam source this is the best way. The water saturates the felt and the dry iron creates steam within the felt with that water. Let it dry and do this as many times as required. As CVW said, pin it to the flange, stretching it as far as you can.
 
Messages
10,314
Location
vancouver, canada
Welcome to the Lounge Darrell,
When I had this problem I wet the brim heavily at the wrinkles, sprayed lightly over the entire brim and used a heavy ( 20lb or so) dry iron to press them out, pulling the brim as I went. This assumes you still have the cording in place on the block. Without a great steam source this is the best way. The water saturates the felt and the dry iron creates steam within the felt with that water. Let it dry and do this as many times as required. As CVW said, pin it to the flange, stretching it as far as you can.
Yes, this is the method I have used with success (except for the pinning part). Lots of water, and my big old heavy dry iron that I bought off Ebay as a door stop.
 

Darrell2688

One of the Regulars
Messages
290
Location
Piner, Kentucky
Hello to All,
Thank you for all of your suggestions, I will have to continue to fight with this hat body.
Part of my problem maybe that my hat block might just be to tall? I made the hat block
and it is 6 7/8" tall and I might be able to make a hat with a open crown of 5.5" and a
brim 3.25" wide. I did take some photos of the wrinkles and what I have been using is
a very old steam iron, I soak the brim and also use steam and I cover the brim with a
wet pillowcase before I iron. Maybe I am using to much water? Could I use the steam
iron without the pillowcase?
SDC10438a.JPG
SDC10439a.JPG
SDC10440a.JPG
SDC10441a.JPG
SDC10439a.JPG
SDC10440a.JPG
SDC10441a.JPG


There are some stains on the felt from the antique brim flange. I have tried to clean
this old flange, I am not sure about how to clean or seal it? If I use the wrong stuff
it will rub off on the felt.
My block maybe about 1" to tall, I cut out a oval shape in the center of a piece of wood
that is 1"x24"x24" circle so the brim lays flat on the wood, recently I cut a oval shape
in a piece of aluminum and put that between the wood and the brim in an attempt to
iron out the wrinkles. Should I cut 1 inch off of the hat block or just wet the brim down
and tack it to the wood, iron it with a hot iron and then let it dry for four days?

Thank you all for all of your help,
I really appreciate it,
Darrell
 
Messages
10,314
Location
vancouver, canada
Hello to All,
Thank you for all of your suggestions, I will have to continue to fight with this hat body.
Part of my problem maybe that my hat block might just be to tall? I made the hat block
and it is 6 7/8" tall and I might be able to make a hat with a open crown of 5.5" and a
brim 3.25" wide. I did take some photos of the wrinkles and what I have been using is
a very old steam iron, I soak the brim and also use steam and I cover the brim with a
wet pillowcase before I iron. Maybe I am using to much water? Could I use the steam
iron without the pillowcase?
View attachment 384083 View attachment 384084 View attachment 384085 View attachment 384086 View attachment 384084 View attachment 384085 View attachment 384086

There are some stains on the felt from the antique brim flange. I have tried to clean
this old flange, I am not sure about how to clean or seal it? If I use the wrong stuff
it will rub off on the felt.
My block maybe about 1" to tall, I cut out a oval shape in the center of a piece of wood
that is 1"x24"x24" circle so the brim lays flat on the wood, recently I cut a oval shape
in a piece of aluminum and put that between the wood and the brim in an attempt to
iron out the wrinkles. Should I cut 1 inch off of the hat block or just wet the brim down
and tack it to the wood, iron it with a hot iron and then let it dry for four days?

Thank you all for all of your help,
I really appreciate it,
Darrell
I have a vintage flange that will stain a light coloured felt. I use a cling wrap to cover it before inserting the hat. All my blocks are 6" tall. If I am blocking a felt that does not require the full 6" or if the felt will only give me 5.5" in height I only take the felt down to what is needed or afforded, make sure the felt is even on the block and then tie it off with the blocking cord. I take extra precautions to smooth out any puckers caused by the blocking cord as it cinches up the felt to the block. Using my fingers, steam iron and manipulation I smooth it out as best I can. This helps minimize the puckering/wrinkles. Then using Art's method and persistence it gets the wrinkles out. I flood the wrinkled area, soaking it with water. I use my fingers to press on the wrinkled area to make sure it is saturated. Then using (usually both) a heavy classic Black & Decker steam iron and then my 24 lb dry iron (heated on my hot plate) and that rids it of the wrinkles. Of course the thicker the felt the more difficult it will to get rid of them. Have you watched the YouTube video of Art Fawcett - Vintage Silhouettes that shows him in edited form the making of a fedora? If not, it is a must see. It is by far the best instruction on professional hat making.
I am curious why do you only get a 5.5" open crown from a block so high? I do not really understand.
 

Darrell2688

One of the Regulars
Messages
290
Location
Piner, Kentucky
Hi Belfastboy,
I have tried to get a 6" open crown with this felt and when I get it pulled down to the 6" mark
I end up with a brim less than 3". This hat blank won't give an inch, so far, the best that I can
get is a open crown of 5.5", then the brim at the shortest point is 3.25". This hat body was
pounced and pre-stiffened, I don't know how much stiffener they applied, but this hat is hard
to work with. What do you use to stretch out the brim? Everything that I do is by hand, I don't
have a puller downer, pusher downer or a Foot Tollicker, I don't know who named the tools? This
hat blank was supposed to be 180g, but last night I sanded the hat inside and out, I checked the
weight after sanding and it still weighs a little over 180g, so it is a heavy felt.

What type of tacks do you use to hold your hat down on the wood?
I have never watched Art Fawcett, but I will. I have watched Hats by Lil Grizz and a number of
other hat makers. Grizz uses a pair of wide mouth pliers to stretch the felt brims out on his hats,
something like that might make me a little nervous.
 
Last edited:

Darrell2688

One of the Regulars
Messages
290
Location
Piner, Kentucky
Belfastboy,
I just finished watching Art Fawcett Vintage Silhouettes, that video has a lot of information
packed into it, I soaked my hat in hot tap water before I even tried to put it on my block, that
only helped a little, while forcing the hat down onto the block the felt formed a air pocket on top
and while trying to work the air out, a wrinkle was created on top, sanding last night fixed that
wrinkle, but another air pocket was formed on top, just a little smaller.
What cloth was in the Art Fawcett YouTube video to cover the brim before ironing and pressing?
Do you think that I should cut my hat block down to 6" tall or just work with it the way it is?
What type of twine do you use for a blocking cord? Some people use the
string or twin from venetian blinds, the twin that I have been using is a
little thick and it is a little tuff to push down into place.
With my cord tied in place tight, when I pull on the brim the cord will
loosen up allowing the felt to pull away from the block?

Darrell
 
Last edited:
Messages
18,887
Location
Central California
Hello to All,
Thank you for all of your suggestions, I will have to continue to fight with this hat body.
Part of my problem maybe that my hat block might just be to tall? I made the hat block
and it is 6 7/8" tall and I might be able to make a hat with a open crown of 5.5" and a
brim 3.25" wide. I did take some photos of the wrinkles and what I have been using is
a very old steam iron, I soak the brim and also use steam and I cover the brim with a
wet pillowcase before I iron. Maybe I am using to much water? Could I use the steam
iron without the pillowcase?
View attachment 384083 View attachment 384084 View attachment 384085 View attachment 384086 View attachment 384084 View attachment 384085 View attachment 384086

There are some stains on the felt from the antique brim flange. I have tried to clean
this old flange, I am not sure about how to clean or seal it? If I use the wrong stuff
it will rub off on the felt.
My block maybe about 1" to tall, I cut out a oval shape in the center of a piece of wood
that is 1"x24"x24" circle so the brim lays flat on the wood, recently I cut a oval shape
in a piece of aluminum and put that between the wood and the brim in an attempt to
iron out the wrinkles. Should I cut 1 inch off of the hat block or just wet the brim down
and tack it to the wood, iron it with a hot iron and then let it dry for four days?

Thank you all for all of your help,
I really appreciate it,
Darrell


6 7/8” tall blocks! And you made them yourself? Forget making hats, you can make a fortune selling blocks! :)
 

ChicagoWayVito

Practically Family
Messages
699
Belfastboy,
I just finished watching Art Fawcett Vintage Silhouettes, that video has a lot of information
packed into it, I soaked my hat in hot tap water before I even tried to put it on my block, that
only helped a little, while forcing the hat down onto the block the felt formed a air pocket on top
and while trying to work the air out, a wrinkle was created on top, sanding last night fixed that
wrinkle, but another air pocket was formed on top, just a little smaller.
What cloth was in the Art Fawcett YouTube video to cover the brim before ironing and pressing?
Do you think that I should cut my hat block down to 6" tall or just work with it the way it is?
What type of twine do you use for a blocking cord? Some people use the
string or twin from venetian blinds, the twin that I have been using is a
little thick and it is a little tuff to push down into place.
With my cord tied in place tight, when I pull on the brim the cord will
loosen up allowing the felt to pull away from the block?

Darrell
Ok, good you learned about wet blocking that will help. When you say you soaked in hot water, do you know for how long? It takes a good long while because you want to let the water penetrate the felt. After that though you really need a decent source of steam. I do not recall reading what sources of steam you have available to you. The volume of steam output helps greatly.

I would not cut your block down any. Just leave it the height it is and either block to a specified height that you've marked on the block OR raise the floor by getting a piece of plywood and cut out the bottom of the block profile and then you can make the block "shorter" that is the best thing to do if you want to shorten your crown height.

Blocking cord, any nylon cord in 1/8" diameter is going to do you just fine. In a pinch I have used chainsaw starter cord :).
The cord is almost always going to shift/loosen as you work the felt. So you have to continuously tighten the cord. Do you single wrap the block or double wrap the block with the cord? I've done it both ways. As you stretch the brim you will have some pull away from the crown. One way to help combat this is to stretch the brim while on the block and inserted into the flange as if you were flanging and then you pin it into place. I don't do this as I cannot stand to put pin holes into a $200 piece of wood. What I have done is picked up a piece of round craft wood from your favorite big box home improvement store and then fitted it with a dowel in the center that fits the center hole on my block. Block goes on dowel, then I stretch and pin. The only why I can stretch is to wet it and most importantly steam it. I use this steamer to apply steam just to the brim: 2000W Heavy Duty Steam Cleaner Mop Multi-Function W/19 Accessories 4.0 Bar 1.5L | eBay

Pressing cloth, you can buy some muslin or use sheets or pillow cases and cut them up.

You said you have some issues pushing down your blocking cord. Are you using a pusher downer?

Cheers!
 

Darrell2688

One of the Regulars
Messages
290
Location
Piner, Kentucky
Hello Brent,

Well yes, I made my own hat block, it has changed some since the first time that I made it. I made it to exact measurements for a 7 3/8" hat and since my hat size is 7 3/8" after putting in the sweatband it didn't fit of course. I made some measurements of my head, 23.25" and to get things to fit right, I made some changes and increased the diameter to 24" oval shape and added to the height because I want a 6" open crown. When I made the changes I use auto body putty, Bondo, I made a lot of measurements during the process and a lot of sanding of course. It has been a learning experience about what you can do and can't do. The block is sanded smooth, and I didn't paint it or use polyurethane because the heat from the iron transfers the covering to the felt, not a good result. Maybe I need to drill a hole in the center of the bottom so I will be able to use a wooden stand, or not. I do have another block out in my work area that needs some work, needs Bondo added to it and then a lot of sanding. I am not sure about the size though, so far, I have only made hats for myself. While I am thinking about it, I increased the size of my hat block to 24", I cut my sweatband to 23.25" length and the reed is cut 5/8" longer than the sweatband. It is fun cramming all that reed into the sweatband but after I am finished the sweatband has a little bell shape and fits the hat
like a glove.

Oops, sorry about being so long winded, more later,
Darrell
 
Last edited:

ChicagoWayVito

Practically Family
Messages
699
I cut my sweatband to 23.25" length and the
reed is cut 5/8" longer than the sweatband. It is fun cramming all that reed into the
sweatband but after I am finished the sweatband has a little bell shape and fits the hat
like a glove.
Darrell
This is goodness. Called Belling the sweatband and is exactly what you want to do. Nice work!
 

Darrell2688

One of the Regulars
Messages
290
Location
Piner, Kentucky
Ok, good you learned about wet blocking that will help. When you say you soaked in hot water, do you know for how long? It takes a good long while because you want to let the water penetrate the felt. After that though you really need a decent source of steam. I do not recall reading what sources of steam you have available to you. The volume of steam output helps greatly.

I would not cut your block down any. Just leave it the height it is and either block to a specified height that you've marked on the block OR raise the floor by getting a piece of plywood and cut out the bottom of the block profile and then you can make the block "shorter" that is the best thing to do if you want to shorten your crown height.

Blocking cord, any nylon cord in 1/8" diameter is going to do you just fine. In a pinch I have used chainsaw starter cord :).
The cord is almost always going to shift/loosen as you work the felt. So you have to continuously tighten the cord. Do you single wrap the block or double wrap the block with the cord? I've done it both ways. As you stretch the brim you will have some pull away from the crown. One way to help combat this is to stretch the brim while on the block and inserted into the flange as if you were flanging and then you pin it into place. I don't do this as I cannot stand to put pin holes into a $200 piece of wood. What I have done is picked up a piece of round craft wood from your favorite big box home improvement store and then fitted it with a dowel in the center that fits the center hole on my block. Block goes on dowel, then I stretch and pin. The only why I can stretch is to wet it and most importantly steam it. I use this steamer to apply steam just to the brim: 2000W Heavy Duty Steam Cleaner Mop Multi-Function W/19 Accessories 4.0 Bar 1.5L | eBay

Pressing cloth, you can buy some muslin or use sheets or pillow cases and cut them up.

You said you have some issues pushing down your blocking cord. Are you using a pusher downer?

Cheers!

Hi Chicago,

I soaked the hat in the kitchen sink for about 15 minutes or more, it was saturated, when I
pulled the hat out of the sink, the water flowed like pouring it from a bucket. When I first put
the hat in the sink, I filled the crown with hot tap water and rubbed it in until the outside was
wet, then I rubbed the outside while the hat was submerged to work the water into the felt,
then I left it to soak.

The steam iron that I use is a antique that my wife bought at the Antique Mall, this iron has
the cloth covering the cord and it heats up fast and works great.

I purchased a piece of wood from Home Depot that is 1"x24"x24" disc shape and then cut a
oval shape in the center big enough for the hat block to sit down in. I should have covered
it with aluminum because with the combination of water and steam it has bowed in the center.
I will be getting a new board for future use. I am already thinking about a Granite Grey color
for my next hat, 160g weight pure rabbit fur felt. I would have bought that color first but in
the description they said it was a Suede Felt Capeline in pure rabbit, turns out they just buffed
it out and has a Suede look, still not sure.

My blocking cord is the same as a chainsaw pull cord, it is thick and it just rolls down and gets
in the way.

The bottom of my block is flat, so I have to work on it when it is and as flat and close to the
board as I can get it.

As for a Pusher Downer as it is called, I don't have one, so I use a hammer handle that is flat
on the end that I use to force the cord down. I tried wrapping the cord several times but it just
rolls over and pills up. After reading some of the replies tonight I rounded up some thumb tacks
and soaked the brim, I used the single cord that I had on the hat and kept it tight and then
ironed and pulled the brim out as straight as I could and anchored the brim in place with the
tacks, I placed the tacks as close to the outer edge of the brim as I could, I wet the brim down
and set it the other room out of the way for it to dry.

I made my own hat brim cutting tool or rounding jack, I set mine up to use a fabric cutting
tool that uses round blades.

Darrell
 

T Jones

I'll Lock Up
Messages
6,594
Location
Central Ohio
Regarding wet blocking, until just recently, that had been my preferred method for converting all the heavy felted Westerns I've done over the years. It definitely works. My only issue with wet felting, though, is if you have felt that's not up to par for dye quality, and where the manufacturer used powdered dye to even out the color, the powdered dye will wash out and leave a splotchy washed out look. I remembered watching a few videos sometime ago where Steve Delk and some hatters at Advintage used boiling water in a cook pot to generate steam and would put the felt over top of that and leave it there for a while until the felt got hot and softened up. Afterward, the felt would be easily stretched over the block. I wondered if that method would work on those thick felted Resistols and other Westerns I convert. Well, it's now my preferred method and I don't end up with a splotchy. Also, I can very easily stretch these felts over a block by hand with very minimal use of a puller downer, and I'm talking about stretching a thick felted 6 7/8 Western over a 7 1/4 hat block. I used a pot full of boiling water and a grease splatter screen to set my hat on. I leave it on the cook pot until the felt gets soft and malleable and hot to the touch. I take it off and then stretch it over the block, by hand, with no problem. Easy, and the dye doesn't wash out and end up splotchy looking. Here's a couple I've done that way...

My Blue Resistol:
IMG-20211113-082227897.jpg


After:
4-X-Blue-Resistol-3-A.jpg


My Az-Tex:
Before:
IMG-20211110-054706138.jpg


After:
Az-Tex-14-A.jpg


And, another Resistol I'm currently working on:
IMG-20211203-062831501.jpg


IMG-20211203-062929461.jpg


IMG-20211203-064520175.jpg


These were small hats and stretched easily by hand over a block that was four sizes larger.
 
Last edited:
Messages
10,314
Location
vancouver, canada
Belfastboy,
I just finished watching Art Fawcett Vintage Silhouettes, that video has a lot of information
packed into it, I soaked my hat in hot tap water before I even tried to put it on my block, that
only helped a little, while forcing the hat down onto the block the felt formed a air pocket on top
and while trying to work the air out, a wrinkle was created on top, sanding last night fixed that
wrinkle, but another air pocket was formed on top, just a little smaller.
What cloth was in the Art Fawcett YouTube video to cover the brim before ironing and pressing?
Do you think that I should cut my hat block down to 6" tall or just work with it the way it is?
What type of twine do you use for a blocking cord? Some people use the
string or twin from venetian blinds, the twin that I have been using is a
little thick and it is a little tuff to push down into place.
With my cord tied in place tight, when I pull on the brim the cord will
loosen up allowing the felt to pull away from the block?

Darrell
I am largely self taught as a hatter so my process is trial and error and refinement. I don't make western hats so 6" open crowns are my maximum. Yes, many of the felts I buy it is impossible to get the 6" open crown plus a brim wider than 3". You can only get what the felt will give you...more crown less brim and vice versa. The advantage to using the western weight is those felts are larger than the dress weight. As I stated all my crowns are a max 6" and the smaller ones 56 & 57cm are a bit under that measure. Yes, air pockets trapped at the crown are an issue. I use latex gloves, lots of steam and patience to push the felt down. It takes a while and effort ( a long while with western weight) but it can be done. If you don't get it fully onto the block it usually leaves a crease which is a bitch to remove.

I use blocking springs (bought from Guy Morse-Brown out of the UK rather than blocking cord. I have blocking cord that I bought in a 25 metre length. It is off the shelf Home Depot but get the stuff that states it is minimal stretch. If it is stretchy you will never get the bite you need as it just keeps stretching out on you. It is cheap. BUT I have found the blocking springs while a bit pricey are much easier to use. Buy yourself a set of pusher & puller downers and a tollicker. You cannot make a good hat without decent tools and these 3 are indespensible. Also a decent iron for $35...I am a fan of the classic Black & Decker steam iron....Amazon has them.
I buy cheap cotton muslin fabric for my ironing cloths. I wash them if they get dirty and toss them when they get stained. I pay $5 or so per yard at the local fabric store.
 
Messages
10,314
Location
vancouver, canada
Regarding wet blocking, until just recently, that had been my preferred method for converting all the heavy felted Westerns I've done over the years. It definitely works. My only issue with wet felting, though, is if you have felt that's not up to par for dye quality, and where the manufacturer used powdered dye to even out the color, the powdered dye will wash out and leave a splotchy washed out look. I remembered watching a few videos sometime ago where Steve Delk and some hatters at Advintage used boiling water in a cook pot to generate steam and would put the felt over top of that and leave it there for a while until the felt got hot and softened up. Afterward, the felt would be easily stretched over the block. I wondered if that method would work on those thick felted Resistols and other Westerns I convert. Well, it's now my preferred method and I don't end up with a splotchy. Also, I can very easily stretch these felts over a block by hand with very minimal use of a puller downer, and I'm talking about stretching a thick felted 6 7/8 Western over a 7 1/4 hat block. I used a pot full of boiling water and a grease splatter screen to set my hat on. I leave it on the cook pot until the felt gets soft and malleable and hot to the touch. I take it off and then stretch it over the block, by hand, with no problem. Easy, and the dye doesn't wash out and end up splotchy looking. Here's a couple I've done that way...

My Blue Resistol:
IMG-20211113-082227897.jpg


After:
4-X-Blue-Resistol-3-A.jpg


My Az-Tex:
Before:
IMG-20211110-054706138.jpg


After:
Az-Tex-14-A.jpg


And, another Resistol I'm currently working on:
IMG-20211203-062831501.jpg


IMG-20211203-062929461.jpg


IMG-20211203-064520175.jpg


These were small hats and stretched easily by hand over a block that was four sizes larger.
Great tip. I shall try this. I have not reblock a large number of westerns....maybe 30 or so and luckily have never had the splotching issue so perhaps I am due for one. I have also found that blocking a refurb western is easier than blocking a brand new western weight felt. If the felt blank is at all tapered (and most are to some degree) with the 200+gram felt getting a new one over the blocks shoulders can be a bitch for me and I liken it to a wrestling match between me and the felt........and some days the felt wins or at least renders a draw.

I am also thinking that I can adopt your steaming method using my little hot plate in my shop but adding a large pot overtop of the hot plate, pot and hat creating a crude steam chamber. That would better get me the steam saturation than I can't really get from my little Jiffy Steamer. Thank you, again.
 

T Jones

I'll Lock Up
Messages
6,594
Location
Central Ohio
Great tip. I shall try this. I have not reblock a large number of westerns....maybe 30 or so and luckily have never had the splotching issue so perhaps I am due for one. I have also found that blocking a refurb western is easier than blocking a brand new western weight felt. If the felt blank is at all tapered (and most are to some degree) with the 200+gram felt getting a new one over the blocks shoulders can be a bitch for me and I liken it to a wrestling match between me and the felt........and some days the felt wins or at least renders a draw.

I am also thinking that I can adopt your steaming method using my little hot plate in my shop but adding a large pot overtop of the hot plate, pot and hat creating a crude steam chamber. That would better get me the steam saturation than I can't really get from my little Jiffy Steamer. Thank you, again.
You're welcome BB. I hope it works out for you. It works so well on these thick Westerns I do that it's now become my new primary blocking method. It really gets the felt hot and saturated with steam. Leave it on the pot long enough to where it feels soft and malleable. The second you take it off you want to stretch it immediately over the block. The felt will be hot to the touch. They've been stretching real easy just with my hands, and these hats were 6 7/8 going over a 7 1/4 block. Force of habit, though, using a puller downer, caused me a mishap with the blue one, which I already took care of. But, that was an error on my part and I really didn't need the puller downer, or at least that extra tug. It went easy over the block just using my hands. Anyway, I personally don't know how that method would work out on new felt but I remember watching videos quite awhile back where Steve Delk and a hatter from Advintage used that method on theirs, and of course, they were blocking raw felt bodies. Good luck with it.
 
Last edited:

Darrell2688

One of the Regulars
Messages
290
Location
Piner, Kentucky
Hello Everyone,
I did try the method used by Steve Delk and Marc Kitter with this hat blank, I put a big pan of water on the stove and heated it to a rolling boil and then put the felt over the pan and left it until the steam had penetrated the felt. Steam was flowing through the felt, the felt was soft and when I put it on the block the felt was easy at first then it just seemed to stop, so I repeated the steaming process and the felt stopped at about the same point? That is when I went to the hot bath method, the hot bath worked better until a air bubble formed at the top of the crown, and then another hot bath, I had to work the wrinkles across the top and down the side; I was able to work the felt down some, just not flush. There is still a small hump on the top, I will just have to work at it again in a few days, maybe after it dries out; it may look better?? I am thinking about a tear drop shape to the crown. The steam method normally works great, but this hat blank has so much stiffener, I have trouble getting the hot water to penetrate the felt. I did not notice any die color in the water when I used the hot water soaking method. This felt has been pounced and stiffened to the extreme, either that or it is not rabbit fur felt, it repels water real good, I had to massage the water into the felt while it was totally submerged.

I was looking at a pusher downer, puller downer and a tolicker and the cost
is rather high $180.00 for the set, and I only make a single hat ever so often.

I am going to stop by the local Home Depot this weekend and I am thinking
about buying some wood and take a shot at making some tools for my little
project. This is my home-made rounding jack, I made this out of things around my house, I used 3 pieces of tongue and grove wood for the main parts. I know it looks a bit rough, but it does work.
Darrell
SDC10434a.JPG
SDC10435a.JPG
 
Last edited:

Forum statistics

Threads
106,931
Messages
3,024,664
Members
52,470
Latest member
GokhanB
Top