Want to buy or sell something? Check the classifieds
  • The Fedora Lounge is supported in part by commission earning affiliate links sitewide. Please support us by using them. You may learn more here.

A1 Test Jacket Mod 1

fishmeok

Vendor
Messages
759
Location
minneapolis
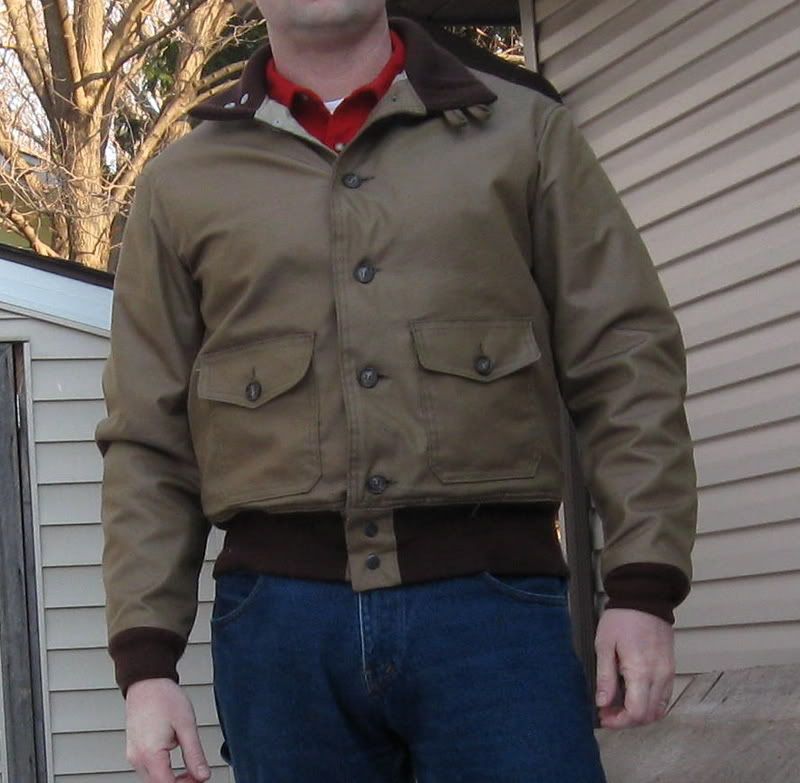
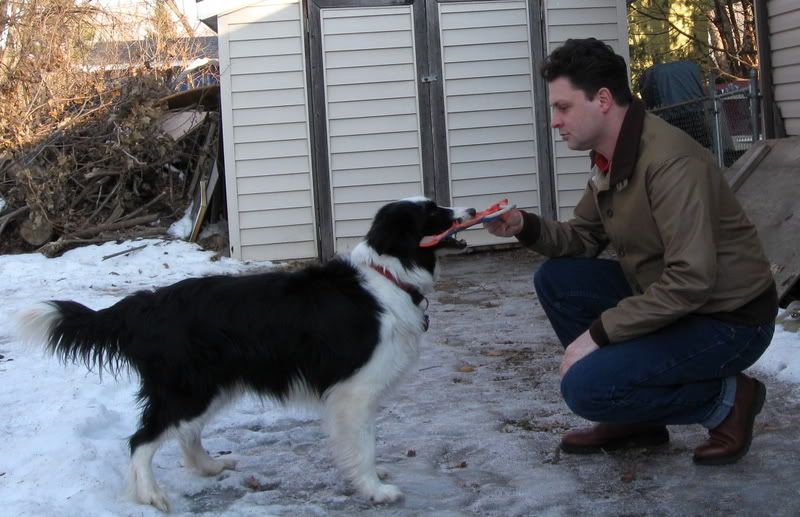
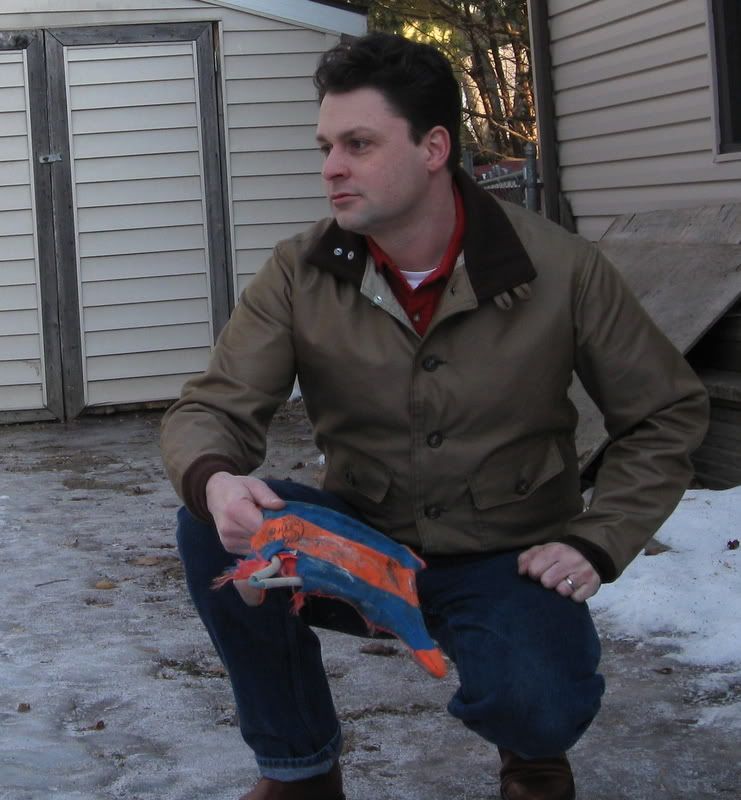
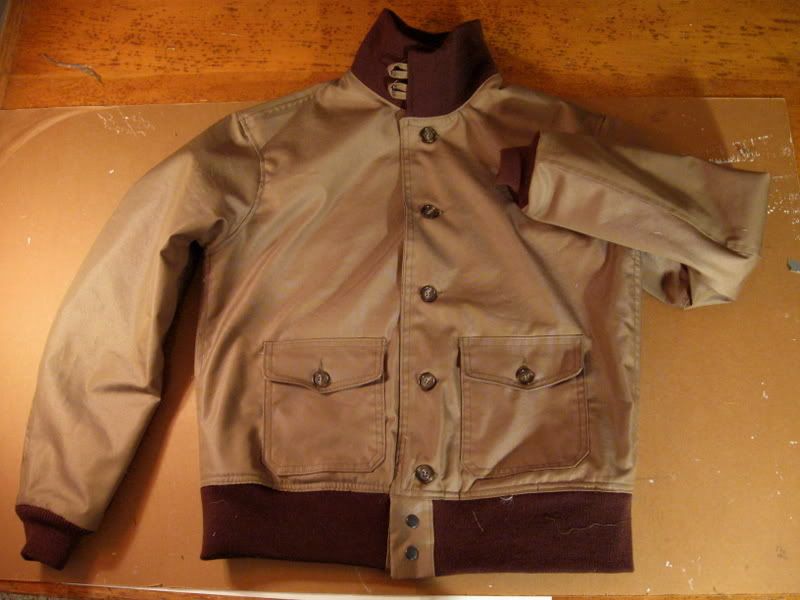
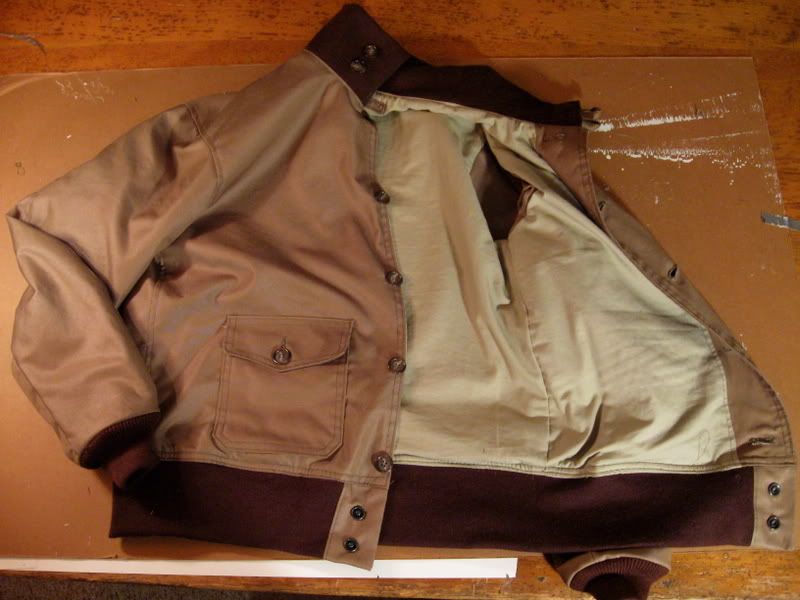
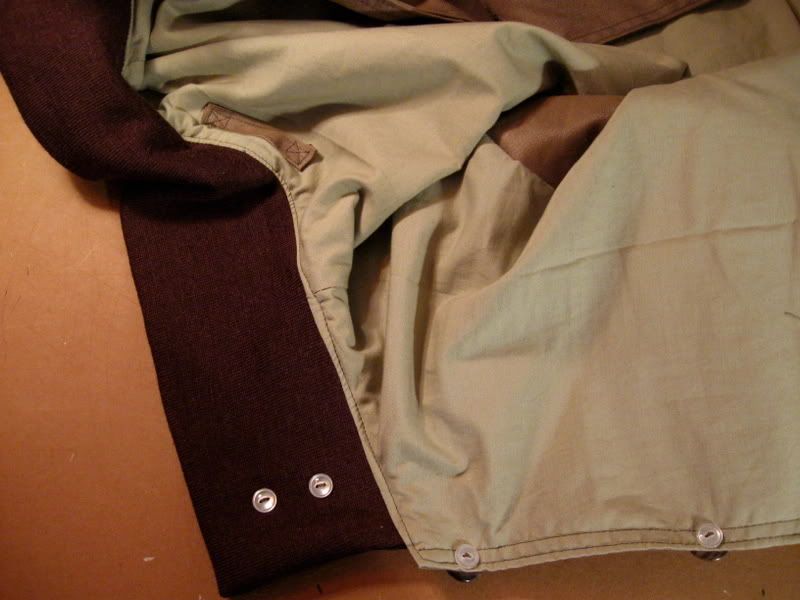
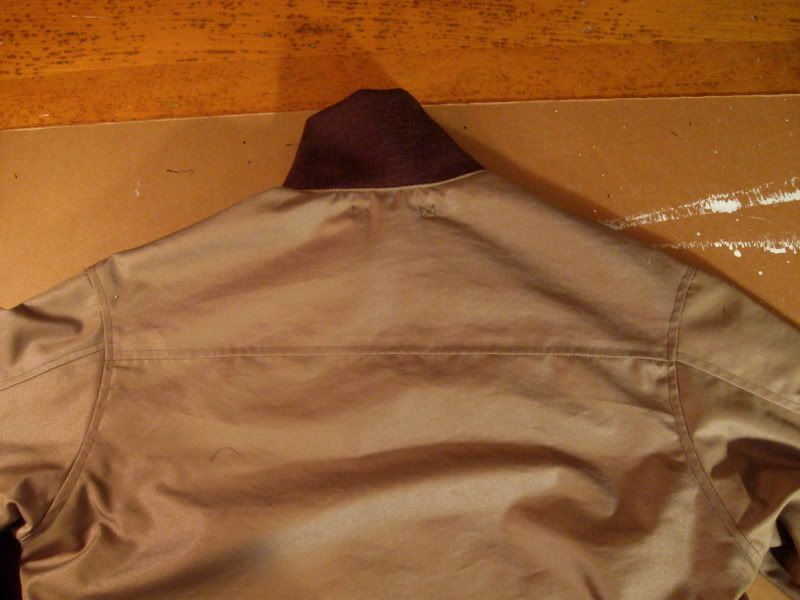
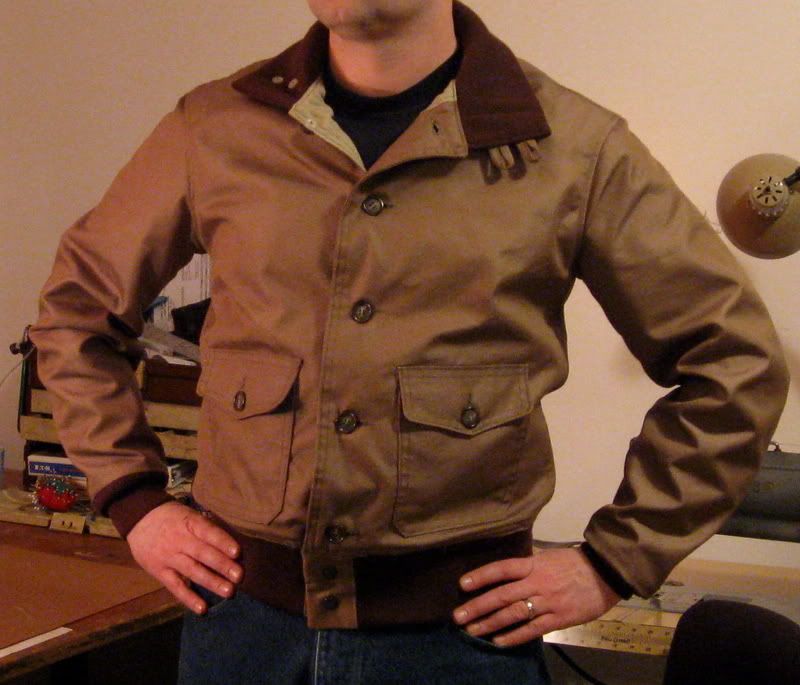
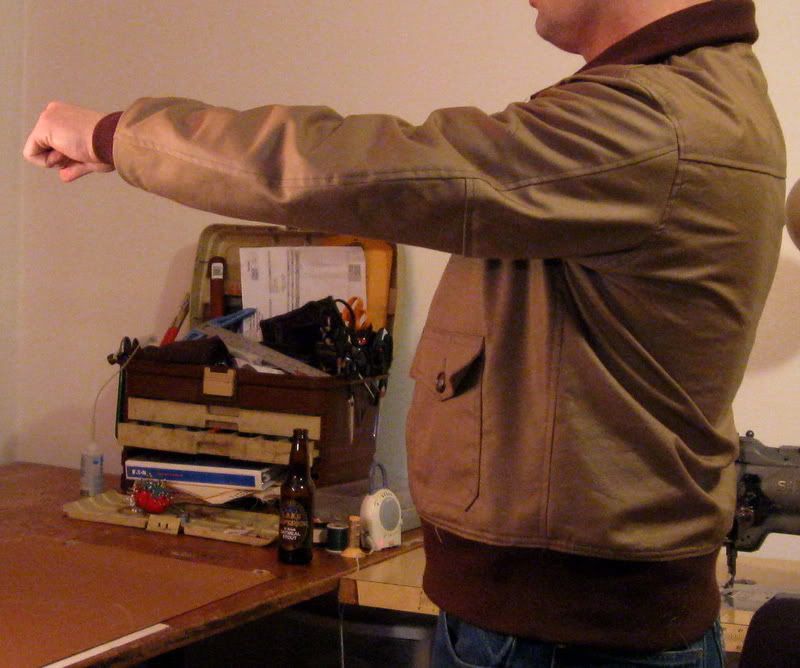
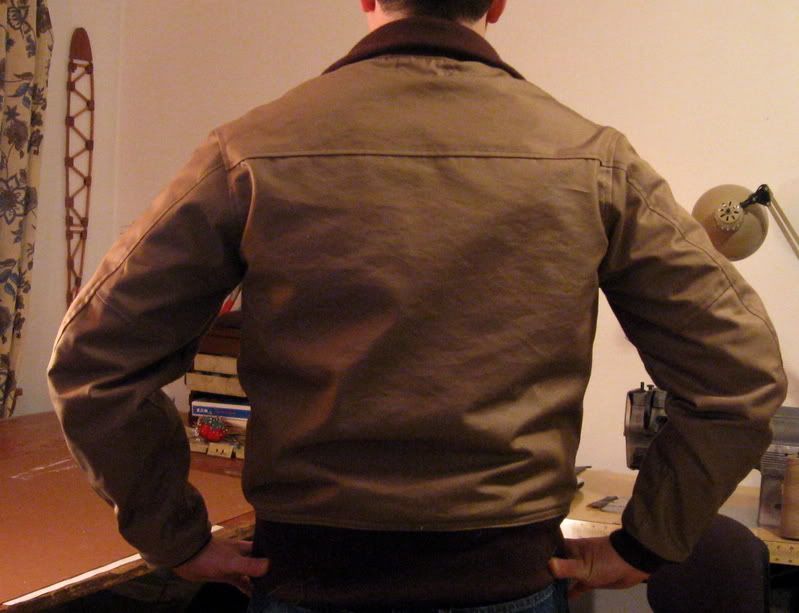
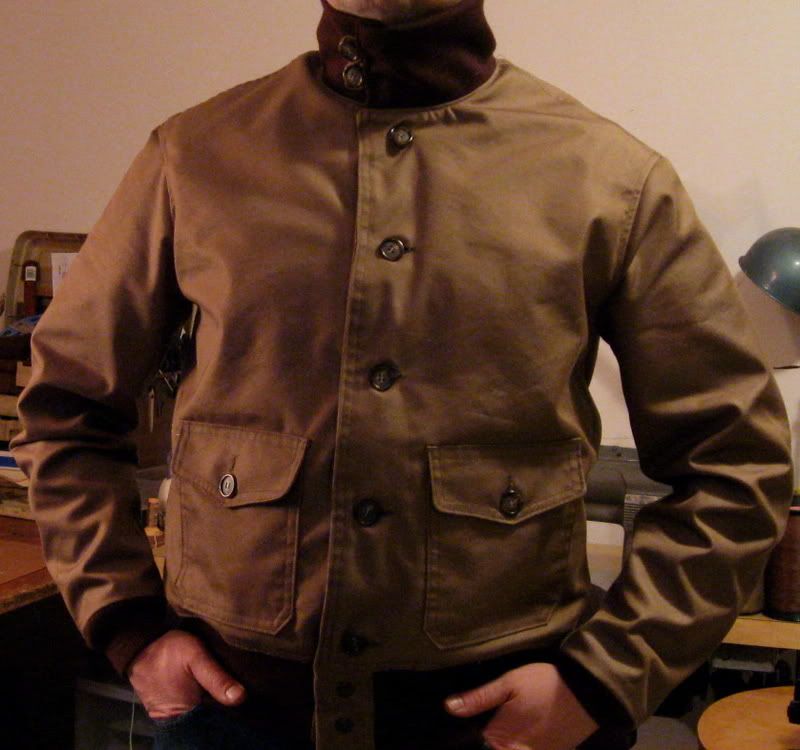
I tore down and rebuilt my A-1 test jacket and am looking for some feedback on the look, fit, etc. I completely remade the arms using a more "U" shaped armscythe (provides reaching room) and tightened up the lower arms a little more to try and get the "muttonchop" look of the originals. I also lengthed the arms by 1" but that's my personal preference. It does not bind or pull back excessivly when lifting the arms like version 1 did.

I removed almost 3" from the body, re positioned the pockets, and finally added the snaps. It has very high, tight armholes (22" armhole) and fits best with a t-shirt or light shirt, which is what I was going for. This is going to be my basic 44 size for future A-1, A-2 jackets.

Shoulders 20
Front length 24
Back length 26
Pit to pit front and back 23 (same both sides)
Arm 25
Epaulet seam 7 1/2

Cheers
Mark

IMG_1444.jpg


IMG_1431.jpg


IMG_1439.jpg


IMG_1447.jpg


IMG_1426.jpg


IMG_1427.jpg


IMG_1422.jpg


IMG_1429.jpg
 

scotrace

Head Bartender
Staff member
Messages
14,382
Location
Small Town Ohio, USA
I'm so glad we get to help with this process. You are doing extraordinary work, given that you have picked all this up on your own. I salute your ability to learn new skills and stick with it!

First, you've hit very close. A few adjustments here and there and you've got it.
Some of the things I would suggest are a matter of personal preference, and the A1 contract jackets leave a lot of wiggle room for personalization in terms of pocket placement. So I'll dispense with that stuff. (your placement is as I like it. Others may feel differently)

The shoulders square up to fit you beautifully. Not too pulled, not too dropped. Perfect.

The collar knit is sized and assembled to the jacket just right.

You seem to have a mis-mated seam at the back of the left shoulder. It squares up on the right side with the sleeve seam, but doesn't meet the same way on the left side.

All but one of the photos have your hands placed on the waist knit, which makes it harder to see snugness/fit/taper. But in the picture showing arm assembly and corresponding available reach, the knit and bottom of the jacket seem to be less snappy and tight than they might be. Then again, looking at the back of the jacket as worn, that might make for too much pucker. Again, might just be a photo thing.

This is a mock up, of course. I'm sure you'll pay close attention to button placement, selection and composition of the same in the final hide jacket.

This photo tells me the final hide version will be magnificent. Excellent judgment on sleeve length. WELL DONE:
IMG_1429.jpg


The A1 is my favorite leather jacket bar none. I can't wait to see the finished product. Have you worked from an example, or from a found museum piece, or from photos? Do you have the contract specs to refer to? Have you developed your label and tagging?
 

H.Johnson

One Too Many
Messages
1,562
Location
Midlands, UK
Excellent work, if I may say so. You may wish to examine the placement of the buttonholes in relation to the closing edge of the jacket. I think they are normally nearer.
 

buler

I'll Lock Up
Messages
4,375
Location
Wisconsin
Wow!!

Mark, that is amazing work. You are inspiring. Having spent quite a bit of time this weekend figuring out how to thread an old sewing machine I have, makes what you are doing seem out of reach.

Besides the mismatched seam that was already pointed out, I'd have to say the only other thing that I noticed was the puckering around the neck both front and back.

Again, outstanding job!
B
 

fishmeok

Vendor
Messages
759
Location
minneapolis
Thanks all-
The mismatched seam and puckering are construction errors on my part. When I re-made the arms with a smaller and different shape armhole I had to split the difference with the existing body side seam to take it in evenly. On the left side I had to fudge it a bit and rotate the arm forward to keep the side seam straight. The collar puckering is 'cause I forgot to snip the seam allowance on the curve to keep things smooth.

I agree about the buttonhole placement, they turned out to be one of the most difficult things to make, need more practice.

I was trying to keep the waistknit a bit looser than I would with an A-2. After looking at other A-1's and posting with some of the listers the A-1 seems to have been a looser fit around the waist- but I think it this case it didn't quite work out, especially with the cloth. I think leather might drape better though.

I almost have a label figured out, still finalizing the name. I'm trying to get myself on a schedule of at least two jackets a month, but these test jackets and pattern adjustments take a lot of time. It takes as much time and effort to make a cloth jacket as a leather one, materials are just cheaper.

I'm making my own patterns based mostly on pics and the jackets I have. Sure would like to have a chance to examine an original A-1 though.
Cheers
Mark
 

Doug C

Practically Family
Messages
729
You've done a heck of a good job so far. Besides the button holes being slightly too far away from the edge and that one sleeve/yolk seem not exactly lined up.. the only other thing I might look at is the length of the material that the snaps are attached to. In a couple of the pictures it looks like they don't exactly match up (front and back) and I'd guess by the pics that the back one needs to be a slightly longer. The pockets are perfect in my opinion, I think the widening of the pocket placement was an improvement (so to speak) that was made to the later A2s. Very nice!

Doug C
 

Forum statistics

Threads
107,497
Messages
3,038,332
Members
52,886
Latest member
maxraff
Top