Making a collar pattern.
Very, very nice jacket! Cheers for that good work Quirrel:cheers1:
Making a collar pattern.


I assume you're talking about the pouch that I stitched up for my bedwarmer/hot-water bottle, and not the waistcoat that I'm trying to resurrect, huh, Gin&Tonics?
I honestly didn't think I would be able to do this, because it was such a difficult shape, but I guess I proved myself wrong. I was certainly surprised by what I was able to achieve!

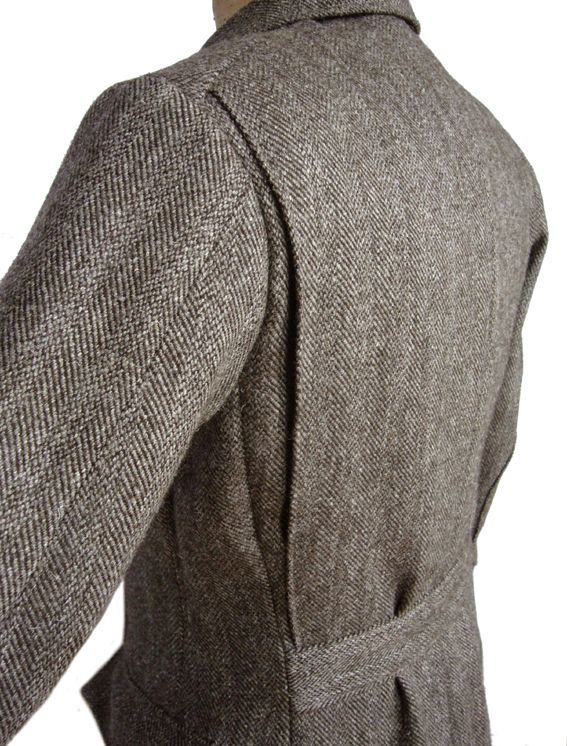
Any tips on sewing the backing/lining onto the shoulders and sides of the coat?
First rip the original backing off (including the centre seam if there is one), then trace around and cut the four pieces you need. If there is a back seam, sew it together now, making sure that when finished, the seam allowances will be hidden between the two pieces of the back. Now take one back piece, lay it out in front of you with the right side up, then place the front part (cloth part) on top of that. Then put the other back piece on top, right sides down, so that the vest front is now sandwiched between the two backs. Now you can sew the seams. Sew the shoulder seams, then the side seams, and then, being careful not to catch the vest front, sew together the two back pieces at the armhole. Again not catching the front, sew the back pieces together along the bottom. This is a method called bagging, and it should be self evident why, as the front of the vest is inside the "bag" made by the back. Carefully pull the front out through the hole in the neck, then tug on the neck an shoulder seams to make then neat, and with your hand through the opening in the neck push out the other seams so that they lie neatly, too. Finish by turning in the raw edges at the neck and stitching them together with a machine or hand stitch.


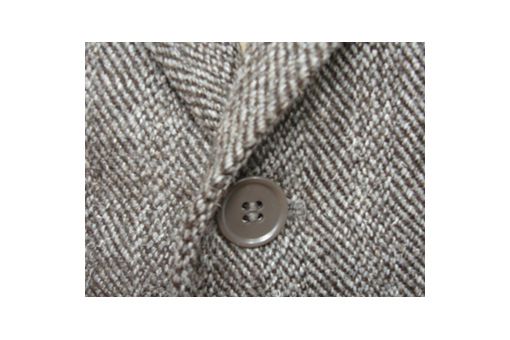
A closeup of my double-stitching. I do a simple loose stitch first, then I got back over it again, looping over the top to give it tightness and strength. You can see the diagonal loops in the photograph.

A closeup of my double-stitching. I do a simple loose stitch first, then I got back over it again, looping over the top to give it tightness and strength. You can see the diagonal loops in the photograph.

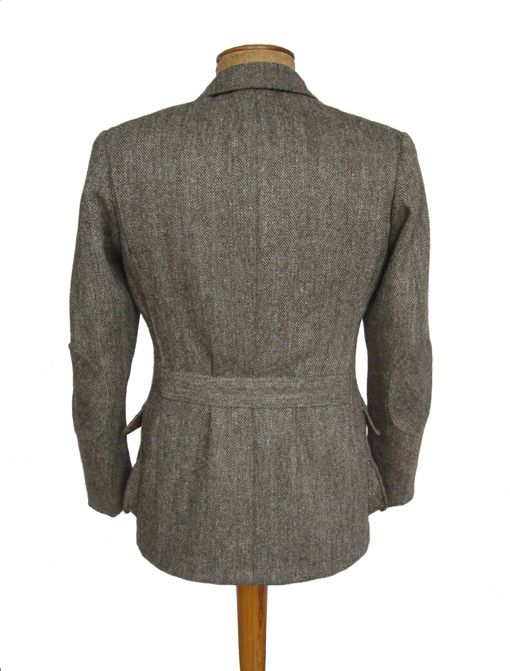
Progress Report
A closeup of my double-stitching. I do a simple loose stitch first, then I got back over it again, looping over the top to give it tightness and strength. You can see the diagonal loops in the photograph.
[/I]


 John Lofgren Monkey Boots Shinki Horsebuttt - $1,136 The classic monkey boot silhouette in an incredibly rich Shinki russet horse leather.
  Grant Stone Diesel Boot Dark Olive Chromexcel - $395 Goodyear welted, Horween Chromexcel, classic good looks.
  Schott 568 Vandals Jacket - $1,250 The classic Perfecto motorcycle jacket, in a very special limited-edition Schott double rider style.
Awesome job. Are you a tailor or is this a hobby of yours?