Want to buy or sell something? Check the classifieds
  • The Fedora Lounge is supported in part by commission earning affiliate links sitewide. Please support us by using them. You may learn more here.
Messages
10,392
Location
vancouver, canada
Light on the oil. Areas that were lighter, I would go over several times and press a little harder.
It did come out more even and darker. I was pleased with it. Should have taken a before and after, but then that's hard without proper lighting, etc.
Soaked the Terry cloth in coconut oil and then dabbed it on a paper towel to even it out. Then gently rubbed it over the felt. I did try it on a sample piece first.
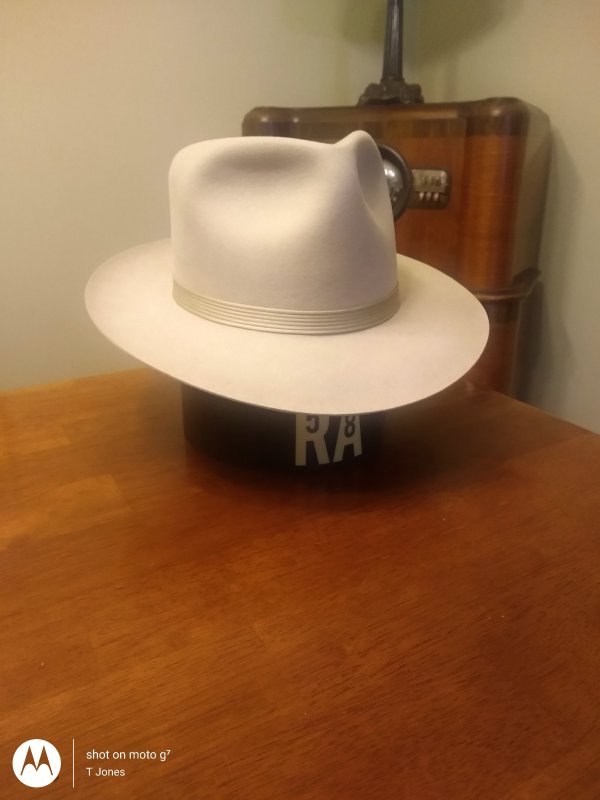
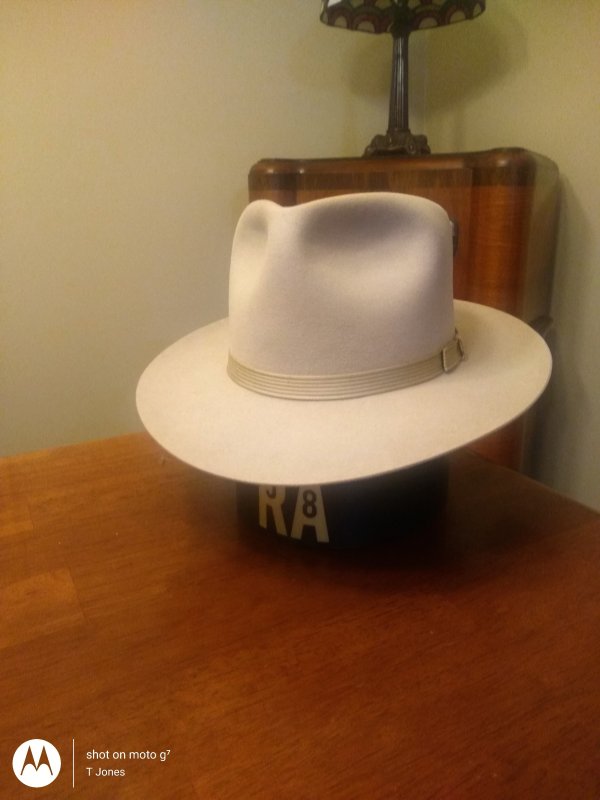
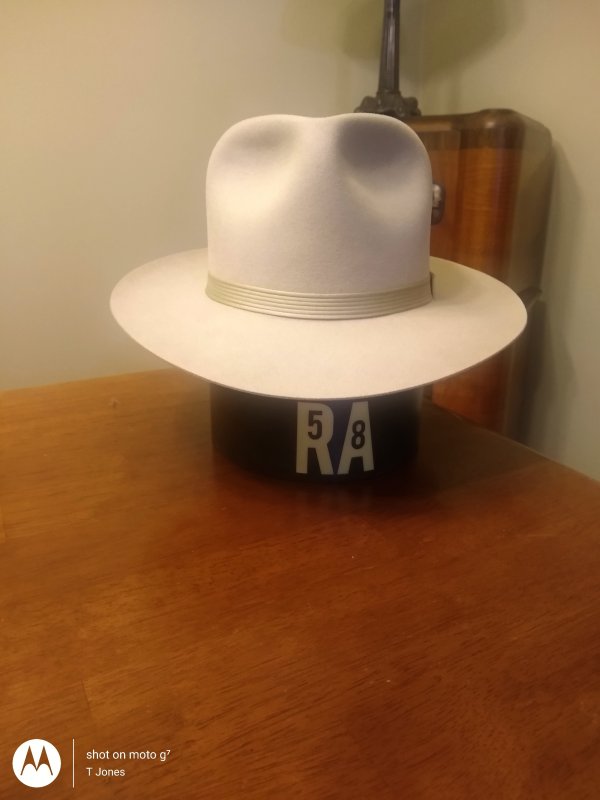
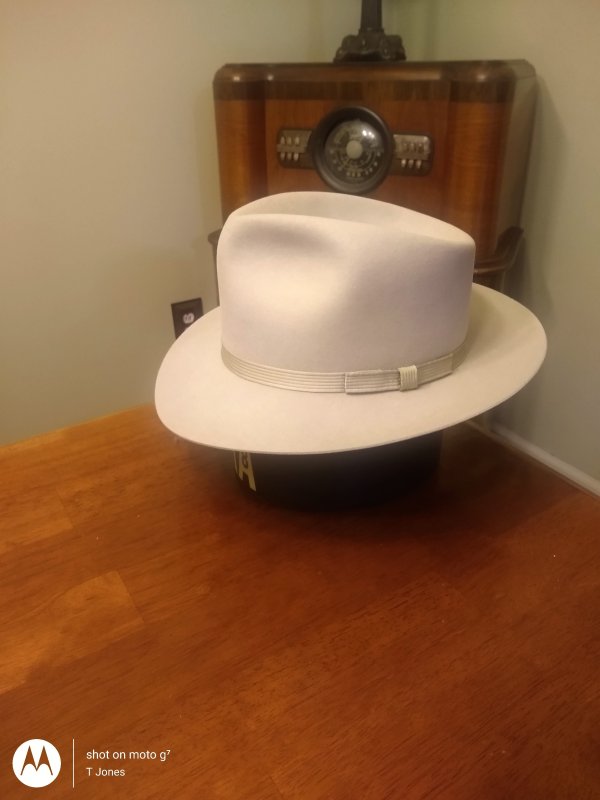
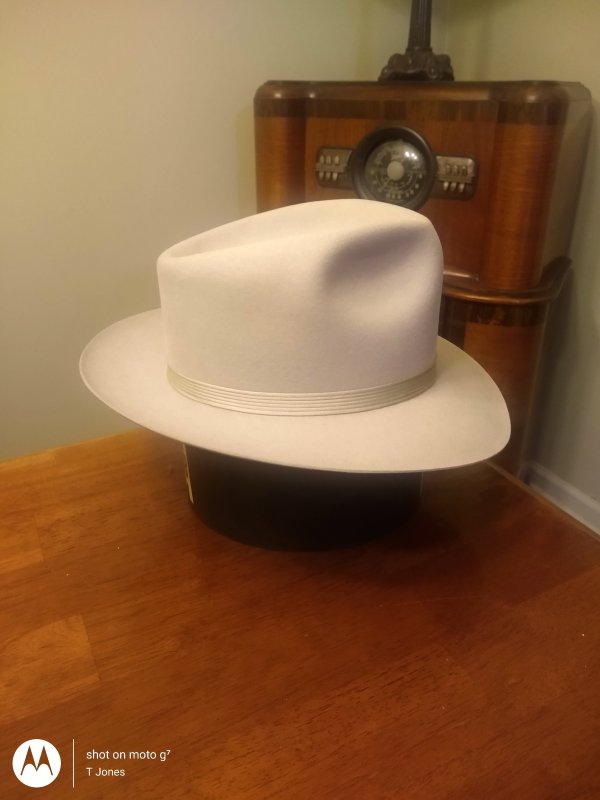
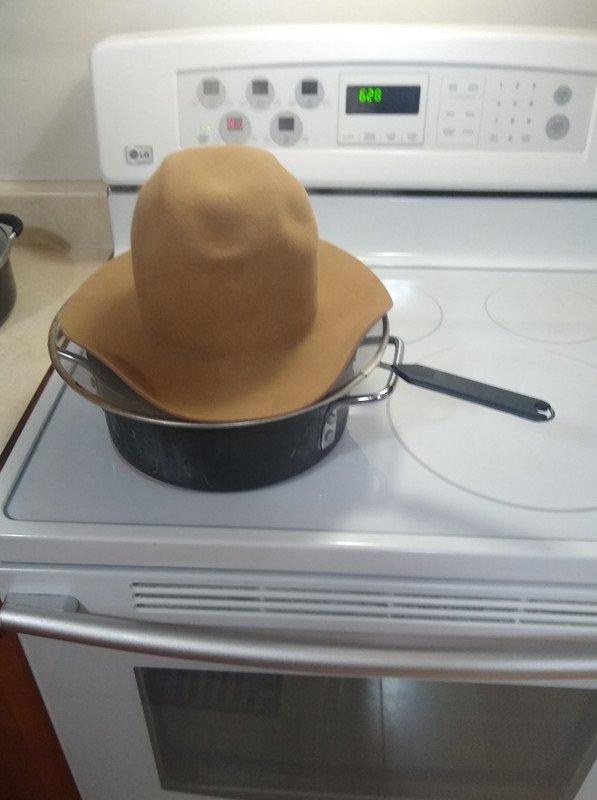
I am going to try it today on a light Fawn coloured felt.......Pray for me!
 

AbbaDatDeHat

I'll Lock Up
Messages
8,645
In my hat making journey I have found hatters on both sides of the divide. Thankfully there have been many that are gracious and willing to help out, share knowledge and pass on their skills. Then there are others who guard their expertise like Fort Knox. I have found more of the good guys and for that I am grateful and I endeavour to be the guy that shares.
I don’t make hats or do much work on mine Robert, but from all the info your posts have shared i feel like i could do some work if i felt like it. Sorry i haven’t said more before but your posts are greatly appreciated. Plus your humor is a bonus.
Thanks
Bowen
 

T Jones

I'll Lock Up
Messages
6,617
Location
Central Ohio
For my projects all I need are basic tools, a little imagination, patience, a block, brim flange, blocking cord, a puller downer, an iron, a flanging cloth, a pot of boiling water and grease splatter screen to achieve the results I want. This is my latest project, a No.1 Quality Stetson Western that I converted. A generous Lounger sent this one to me. It started out as a way too small 6 5/8. I was able to block it up to a 7 1/4 LO. It sports a tall straight crown that's creased to a Tear Drop with a 2 3/4 snap brim that I flanged on #19 brim flange. This turned out to be one of nicest looking hats I have. The pictures don't do it justice. The 6 ply mid-ribbon was salvaged from a vintage size 7 Beyer Rolnick Western. The ribbon and bow work are all one piece and to get it to fit my hat I had wet it down and stretch it out to get another 1 1/2 out of it. Even stretched out it was a tight fit that caused my brim to get wonky. So, I had to reflange the brim and it jacked the bow a little bit. I'll live with it. It's not that bad for me to take it apart again to rework it. The picture of me wearing the hat before I converted it is close to the actual color....
 

Attachments

  • No-1-and-me-1-A.jpg
    No-1-and-me-1-A.jpg
    30.1 KB · Views: 56
  • IMG_20230314_040735526.jpg
    IMG_20230314_040735526.jpg
    1.3 MB · Views: 54
  • IMG_20230314_041101962.jpg
    IMG_20230314_041101962.jpg
    2.5 MB · Views: 39
  • IMG_20230314_041156654.jpg
    IMG_20230314_041156654.jpg
    1.1 MB · Views: 44
  • IMG_20230314_041214678.jpg
    IMG_20230314_041214678.jpg
    1.2 MB · Views: 42
  • IMG_20230314_041238332.jpg
    IMG_20230314_041238332.jpg
    1.2 MB · Views: 43
  • IMG-20190223-080434841.jpg
    IMG-20190223-080434841.jpg
    92.7 KB · Views: 38
  • IMG-20190223-075955543.jpg
    IMG-20190223-075955543.jpg
    167.7 KB · Views: 51
Last edited:
Messages
10,392
Location
vancouver, canada
For my projects all I need are basic tools, a little imagination, patience, a block, brim flange, blocking cord, a puller downer, an iron, a flanging cloth, a pot of boiling water and grease splatter screen to achieve the results I want. This is my latest project, a No.1 Quality Stetson Western that I converted. A generous Lounger sent this one to me. It started out as a way too small 6 5/8. I was able to block it up to a 7 1/4 LO. It sports a tall straight crown that's creased to a Tear Drop with a 2 3/4 snap brim that I flanged on #19 brim flange. This turned out to be one of nicest looking hats I have. The pictures don't do it justice. The 6 ply mid-ribbon was salvaged from a vintage size 7 Beyer Rolnick Western. The ribbon and bow work are all one piece and to get it to fit my hat I had wet it down and stretch it out to get another 1 1/2 out of it. Even stretched out it was a tight fit that caused my brim to get wonky. So, I had to reflange the brim and it jacked the bow a little bit. I'll live with it. It's not that bad for me to take it apart again to rework it. The picture of me wearing the hat before I converted it is close to the actual color....
That is great work. My equipment list is about the same. I do have a Jiffy Steamer and a tailors iron that I can leave on all day. But no 'machinery'. If $$ were not an issue, (or space) I would buy a hydraulic brim press and an ASM sewing machine........but I won't do that.
 

dmeist

New in Town
Messages
31
Location
Ohio
That is great work. My equipment list is about the same. I do have a Jiffy Steamer and a tailors iron that I can leave on all day. But no 'machinery'. If $$ were not an issue, (or space) I would buy a hydraulic brim press and an ASM sewing machine........but I won't do that.
I have a jiffy steamer and a Reliable Steam Iron (which broke, bought it used). Loved it when it was working. Agree with the brim press and ASM, $$$$$$.

Tried to make a Sand Bag press, but the sand kept leaking everywhere.
 
Messages
10,392
Location
vancouver, canada
I have a jiffy steamer and a Reliable Steam Iron (which broke, bought it used). Loved it when it was working. Agree with the brim press and ASM, $$$$$$.

Tried to make a Sand Bag press, but the sand kept leaking everywhere.
I have found that if I use a heavy weight cotton cloth when flanging I can exert enough pressure that a sandbagger is not needed. I spend the time really pulling down the cloth so it exerts lots of pressure on the felt. A good non stretch cord and I can get the felt really tight against the flange. That and lots of steam.
I get great service from my gravity feed steam iron. I think I paid $150 including freight out of Tennessee, (Ebay). It is serving me well.
 
Messages
10,392
Location
vancouver, canada
I have a jiffy steamer and a Reliable Steam Iron (which broke, bought it used). Loved it when it was working. Agree with the brim press and ASM, $$$$$$.

Tried to make a Sand Bag press, but the sand kept leaking everywhere.
The other trick I started to use was to use a heavy weight black plastic garbage bag around the felt and Jiffy nozzle to create a steam tent. It is a cheap and easy way to get good steam penetration in the felt. It made a difference in easing the blocking process.
 

dmeist

New in Town
Messages
31
Location
Ohio
The other trick I started to use was to use a heavy weight black plastic garbage bag around the felt and Jiffy nozzle to create a steam tent. It is a cheap and easy way to get good steam penetration in the felt. It made a difference in easing the blocking process.
I'll have to check out the gravity steam iron. Here's the workshop. I just started this journey about a year ago.
 

Attachments

  • Workshop.jpg
    Workshop.jpg
    6.3 MB · Views: 61
Messages
10,392
Location
vancouver, canada
I'll have to check out the gravity steam iron. Here's the workshop. I just started this journey about a year ago.
The gravity feed irons work much the same except the water tank is mounted a few feet above so a pump is not needed. Mine has a teflon foot so I don't need a press cloth.

I am in my 4th year and the accumulation of equipment/odds & ends is a true rabbit hole. It seems I never have enough blocks and flanges (I have about 40 of each) and in spite of having accumulated 5000 yards of vintage grosgrain I so often don't have the exact right shade/tone or the right width. It is maddening.
 

T Jones

I'll Lock Up
Messages
6,617
Location
Central Ohio
That is great work. My equipment list is about the same. I do have a Jiffy Steamer and a tailors iron that I can leave on all day. But no 'machinery'. If $$ were not an issue, (or space) I would buy a hydraulic brim press and an ASM sewing machine........but I won't do that.
Thank you BB! $$$ always seems to be an issue for me too! So, it's the
kitchen and the dining room table for my workshop! And here's my steamer! Works like a charm!
 

Attachments

  • IMG-20211203-062929461.jpg
    IMG-20211203-062929461.jpg
    64.9 KB · Views: 49

Darrell2688

A-List Customer
Messages
300
Location
Piner, Kentucky
Thank you BB! $$$ always seems to be an issue for me too! So, it's the
kitchen and the dining room table for my workshop! And here's my steamer! Works like a charm!
That setup works great until your wife decides that she no longer needs the grease splatter screen and pitches it. I found that it works even better if you soak the felt in hot water then use the screen and pot for steaming the felt.
 

Yamahana

One Too Many
Messages
1,008
Location
Buckeye, Arizona
For my projects all I need are basic tools, a little imagination, patience, a block, brim flange, blocking cord, a puller downer, an iron, a flanging cloth, a pot of boiling water and grease splatter screen to achieve the results I want. This is my latest project, a No.1 Quality Stetson Western that I converted. A generous Lounger sent this one to me. It started out as a way too small 6 5/8. I was able to block it up to a 7 1/4 LO. It sports a tall straight crown that's creased to a Tear Drop with a 2 3/4 snap brim that I flanged on #19 brim flange. This turned out to be one of nicest looking hats I have. The pictures don't do it justice. The 6 ply mid-ribbon was salvaged from a vintage size 7 Beyer Rolnick Western. The ribbon and bow work are all one piece and to get it to fit my hat I had wet it down and stretch it out to get another 1 1/2 out of it. Even stretched out it was a tight fit that caused my brim to get wonky. So, I had to reflange the brim and it jacked the bow a little bit. I'll live with it. It's not that bad for me to take it apart again to rework it. The picture of me wearing the hat before I converted it is close to the actual color....
Your conversions and hat work always looks top notch to me.
 

T Jones

I'll Lock Up
Messages
6,617
Location
Central Ohio
That setup works great until your wife decides that she no longer needs the grease splatter screen and pitches it. I found that it works even better if you soak the felt in hot water then use the screen and pot for steaming the felt.
I used to soak the felt in hot water all the time but switched to steaming over the cook pot. For me, I'm getting better results that way. In some cases I may still resort to soaking in hot water but those instances are rare now. With some of the heavier Western felts from the '70s and into the '80s that I mostly work with, the dye quality was poor on those hats and the powdered dye that was used to even out the color washes out in the water. Steaming prevents a lot of that. I'm really happy with the results I get from steaming over the cook pot....and I hid the splatter screen in the basement where my wife can't find it!
 
Last edited:
Messages
10,392
Location
vancouver, canada
I used to use to soak the felt in hot water all the time but switched to steaming over the cook pot. For me, I'm getting better results that way. In some cases I may still resort to soaking in hot water but those instances are rare now. With some of the heavier Western felts from the '70s and into the '80s that I mostly work with, the dye quality was poor on those hats and the powdered dye that was used to even out the color washes out in the water. Steaming prevents a lot of that. I'm really happy with the results I get from steaming over the cook pot....and I hid the splatter screen in the basement where my wife can't find it!
I only wet block with the heavier modern felts. When I wet block them and then give them 12-15 minutes in the steam tent I get a much easier block and it facilitates a nice stretch of the felt over the top of block......no little bumps. Art taught me to steam them so much that it actually steams out the rough brim break of the felt from the factory. The 95gr FEPSA block so easily they are a dream. While the 250gram western weights are like wrestling an alligator.
 
Last edited:
Messages
10,392
Location
vancouver, canada
How did the Luring go with the light Fawn colored felt?
I was planning on posting today. It did not help. It just made the dark spot darker. I flipped the hat inside out and started it all over again. The problem was a weird one. It appeared to me that the felt had 4 small flakes of undissolved shellac embedded in the felt. I tried: steam, alcohol to melt and remove them but it did not budge the shellac much, only darkened the felt. I ended up scraping the flakes out with an exacto blade. Never seen undissolved shellac flakes before and never want to see them again.
This was on a western weight felt that I had already blocked inside out, pounced a lot to soften it some. So this is the 3rd blocking on this felt.
 

Forum statistics

Threads
107,276
Messages
3,032,871
Members
52,737
Latest member
Truthhurts21
Top