Want to buy or sell something? Check the classifieds
  • The Fedora Lounge is supported in part by commission earning affiliate links sitewide. Please support us by using them. You may learn more here.

Achieving that vintage look, via PhotoShop

happyfilmluvguy

Call Me a Cab
Messages
2,541
Photo to Drawing

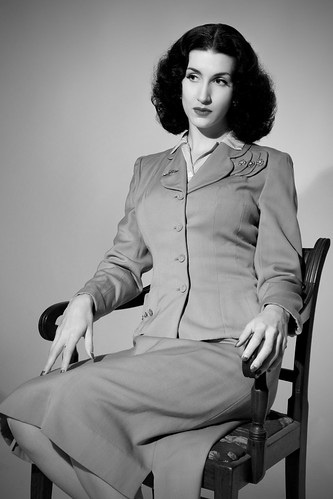
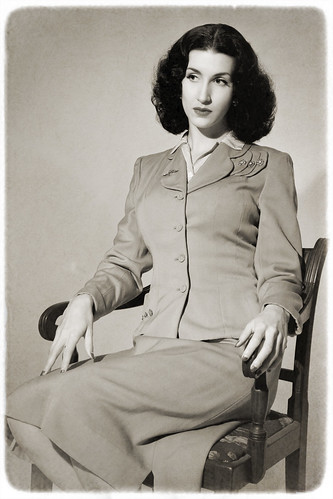
I've been browsing around Photoshop tutorials on how to make a photo look like a drawing. The only problem is, the photo is from the 1930s, black and white, and the details are never there every time I try each tutorial. Any ideas?

If I need to post the photo, I will, but for now I won't for reasons of my own.
 

Rufus

Practically Family
Messages
518
Location
London
I believe if you go to the filters on the drop down bar at the top, there's a sketch option, play with different attempts at that (Sometimes you have to adjust levels etc, until you are happy) , and possibly multiple your layers (The photo, and have top one on soft light, once you've filtered it, this will add depth
.....
You can also put a light yellow/Brown layer over top of whole image on separate layer, on 'colour burn' at a low opacity 15-20 per cent, which'll add some warmth to the line..

Hope that's not too confusing..

Ruf
 

Darhling

Call Me a Cab
Messages
2,517
Location
Norwich, RAF County!
I have had great experience with this technique, but I will not post my pictures:

Try this technique.
Duplicate your image. Concert the duplicate to grayscale. Select filters/stylize/find edges. Apply "blur more" to clean up some noise. Aply levels, adjusting blacks and whited till you get a clean line drawing effect. Invert, so that this is a white lines on black background image. "Select All" and "Copy."
Now go to your original image, and select "duplicate layer" twice. You now have three identical layers. Select the middle one, and apply gaussian blur, at an intesity of about 3 - 5. Secect your top layer and apply a layer mask. Alt-click on the mask to select it. Secect "Paste" and your negative line drawing will appear over it. Alt-click on the image of your top layer and you'll now sww the effect you want, although possibly too strong. Now deselect the "eye" on your bottom layer, activate the top one and select "Merge visible." Re-activate the bottom one, but leve the top one selected. The top layer os your (over)processed one, the bottom your original. Adjust the opacity of your top layer for the desired strenth of the effect. Save it as an action to make it easier next time. Here is your image processed this way.

taken from this site, second last post
http://www.istockphoto.com/forum_messages.php?threadid=41756
 

ukali1066

Practically Family
Messages
514
Location
West Yorkshire
Photoshopping a friend back to the English civil war

Hi all, I thought some of you might be interested to see this bit of fun I recently did for my friend Tony.

Tony is a re-enactor and living history expert, he specialises in late medieval upto the Napoleonic era, but his first love is the English civil war period....notice the period facial hair he sports so well....:eusa_clap

When I last visited him he asked if I could put him into this old [ and quite ridiculous ] painting.

It was a very enjoyable project for a dear friend, and I think he looks much more regal than the original guy...

left-view1.jpg


Equestrian-nonsense1.jpg


final3.jpg
 

ukali1066

Practically Family
Messages
514
Location
West Yorkshire
Many thanks gals...

Decodoll, I actually mainly used the ancient paintshop pro 5, and a bit of photoshop elements....I'm old fashioned...even in computer imaging programs...ahem...
 

decodoll

Practically Family
Messages
816
Location
Saint Louis, MO
ukali1066 said:
Many thanks gals...

Decodoll, I actually mainly used the ancient painshop pro 5, and a bit of photoshop elements....I'm old fashioned...even in computer imaging programs...ahem...

Just goes to show that the artist behind the tool is more important than the tool itself. :)
 

Mike in Seattle

My Mail is Forwarded Here
Messages
3,027
Location
Renton (Seattle), WA
Great job, Ukali1066! I'm always amazed when I see something like that - someone's head suddenly appears in some historic phto or painting.One of my goals for the next few months is learn to do these nifty things with Photoshop since I have PS Elements 5, and with a new job I'm doing, I have access to CS2. It's a little intimidating but I know once I sit myself down and start experimenting, it'll be grow on me.
 

Fleur De Guerre

Call Me a Cab
Messages
2,056
Location
Walton on Thames, UK
I've been having a go at distressing some of my pics to look vintage. I did have help from a Photoshop expert, but if anyone wants to know how I did it I can tell you what she told me!

Original:

2915678871_d29a0aa881.jpg


New/old version!

2958356487_1d8358543a.jpg
 

ukali1066

Practically Family
Messages
514
Location
West Yorkshire
Here's one of me inserted into a Civil war soldier [ oooh nasssty ]

It was originally Texas Jack Vermillion, he was a friend of Wyatt Earp later on...

reb.jpg
 

Wiseguy A

Registered User
Messages
105
Location
City of Angels
2-Strip-R-C_2-thumb-512x525-103.jpg


Here is a test I put together from a photo I took (I didn't have a photo with more vintage styling handy) that is meant to simulate what is often called the Technicolor Two-Strip Process. (Historically the two colors were actually recorded on one strip in alternating frames)

In the case above I added red to the cyan-tinted average of the green and blue separations.

2-Strip-R-C-thumb-512x532-96.jpg


In this case, my first attempt, I added red to the cyan-tinted sum of the green and blue channels. I think it made the cyan contribution too dominant.

My original photograph is here

http://www.digitalartform.com/archives/2009/03/technicolor_2-s.html
 

Davep

One of the Regulars
Messages
221
Location
Los Angeles
Making Your Own Vintage Photos

Didn't see this anywhere so, I figured I would share it here. In the reenacting world we love to take pictures and then antique them. With photoshop it is pretty easy to convert a picture to sepia. But the real good conversions involve scratches and authentic paper recreation.

For those so incline here is some tips


The problem with modern digital cameras is not only are the lenses far superior to what they had back in the 40's, but the light collection of the sensors allows for an incredibly deep depth of field under almost any lighting conditions, which was pretty hard to do in the 40's. Photos taken from crappy cell phone cameras are easier to make period from the start, but you can do it with any photo really.


Eric with one of the German units in the CHG has a pretty extensive collection of WW2 Photographs, as his grandfather fought in France. The first step to his process is, he scans the back side of these photos, to create a portfolio of "photo templates". The second step is to duplicate the photo development process used during that time. This is a process in which only the "black shades" appear. This is because the white shade, of the photo paper, in this case the scanned templates become the sources of any "white" that will appear in your result. This is why the border "white" is the same shade throughout the entire photograph.

If you don't have any 1940 photographs, you have two choices.
1. Go on ebay and purchase some
2. Take a scree print of some of Eric's, and photoshop off the image. Thereby creating your own template. This in fact is what I did to create though photograph background images sitting behind each unit's photo slideshow on the CHG website.

Obviously though, in photoshop, you will be bringing over the orginal "full whites" of your photo. Accordingly in order to have the "whites" of the photo paper bleach through, you must use "Linear Burn Mode". This allows the whites of the photo template to take presidence through. I myself am not familar with this too, i.e. how to apply it and adjust it use in the process. So I will be doing some experimentation. Also the "Linear Burn Mode" affects the "black shades" as well taking on some of the paper's tones, causing your "black" shades to skew green, brown, or some other color characterics of the photograph's paper.

But before using the Linear Burn Mode, on your orginal digit photo, Eric uses this three filters

1. Fog
2. Film Grain - this is used only in certain cases and limited use
3. Film Scatch - obtained from a roll of blank 35mm film, which has layer been scanned

Next he uses a "depth of range" adjustment to blurr up the background image.

The end result is something so perfect, it looks 65 years old

http://picasaweb.google.com/Oziron/FrundsbergHighlights#slideshow
photo.jpg
 

chanteuseCarey

Call Me a Cab
Messages
2,962
Location
Northern California
Since I had a good head shot taken of my hair done in a vintage style and was wearing my 1940s eyeglasses, I thought it would be fun to play with Photoshop and try to make the pics look more "vintage-esque".

If you have done this as well, please tell us what you did and show us the results here!

Here's my original color pic:
368614990.jpg
changed to grayscale to look blk&wht:
368614994.jpg
changing the Saturation to -32, and the Lightness to +7:
368615000.jpg
This last one here makes me think of the faded square pictures we have, taken in the mid 60s.

I'm still not satisfied with the looks of the grayscale change to create a black and white version. To me it look too soft focus. Will try other ideas to tweak it further. If you have done color to Blk&wht successfully, this please share it here.
 

Forum statistics

Threads
107,340
Messages
3,034,378
Members
52,781
Latest member
DapperBran
Top