Want to buy or sell something? Check the classifieds
  • The Fedora Lounge is supported in part by commission earning affiliate links sitewide. Please support us by using them. You may learn more here.

Making my own hat

bolthead

My Mail is Forwarded Here
Messages
3,905
Location
Pennsylvania, United States
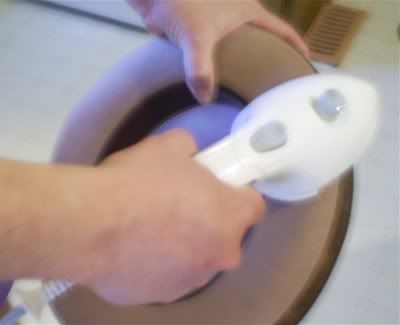
Thanks Tom....

Tango Yankee said:
Right here, Bolthead!

Stoney, you're making me feel bad. I've been collecting all the equipment and then some that I need to do the same, yet I've not gotten off my butt to give it a try yet. This may be the incentive I need to do so!

Outstanding job!!!:eusa_clap :eusa_clap :eusa_clap

Regards,
Tom
....now let's hop to it. :D
 

thunderw21

I'll Lock Up
Messages
4,044
Location
Iowa
Fantastic! I love seeing these 'do it yourself' threads. But to make your own hat from a body? Wow.
 

Roadrunner

One of the Regulars
Messages
140
Location
NW PA
:eusa_clap Wow. That's simply amazing, especially for a first effort! You, sir, are an inspiration.
 

Mark Brody

New in Town
Messages
42
Location
Omaha, NE
That really is incredible! I must ask, how did you get the logo in the liner? I'm considering making my own soon, and I don't know that I could stand a plain liner.
 

Stoney

Practically Family
Messages
977
Location
Currently on the East Coast
Again, thank guys.

Mustang,

I worked a couple of hours a night for about 3 nights, then sewing in the sweatband and re-flanging took about 5 hours and another 4 to finish it with the ribbon and liner. Total time about 15 hours of work.

Sorry Mr. Lucky and Tofu.. I only have 6 3/4 and 6 7/8 blocks and flanges. I think you will have to make your own. lol

Brody,

I used an ink-jet printer and an Avery printable fabric sheet to make the graphic for the liner. I used the cotton fabric sheet, but see from their website that they also have a satin sheet available. :rolleyes: Hmmm

I just replaced the top piece in the pre-made liner, available from hatsupply.com , and added a clear piece of plastic in front of the top piece.


JT,

Funny you should mention making my own felt. I was driving, by a river, with my grand nephew yesterday morning when he said "Uncle, If we could get some beavers out of that river we could make em into hats." I had to laugh. lol lol
 

Mike in Seattle

My Mail is Forwarded Here
Messages
3,027
Location
Renton (Seattle), WA
Stoney said:
I used an ink-jet printer and an Avery printable fabric sheet to make the graphic for the liner. I used the cotton fabric sheet, but see from their website that they also have a satin sheet available. :rolleyes: Hmmm

I just replaced the top piece in the pre-made liner, available from hatsupply.com , and added a clear piece of plastic in front of the top piece.

Something you might want to keep in mind or think about - inkjet ink isn't always the most stable. It sometimes bleeds onto & stains other items when it gets just the least bit damp. I know I'd be kicking myself if I wore a great hat like on a damp or drizzly day, or even a hot day when my head was giving off lots of sweat and then found a spot on the top where the liner label bled through. I've never used the product mentioned, and perhaps they have some sort of fixative in it that locks or waterproofs the inkjet ink.
 

Stoney

Practically Family
Messages
977
Location
Currently on the East Coast
I considered that as well Mike. I used Epson Durabrite ink which is suppose to be waterproof after it dries. I did spill a drink on some ink-jet photos once and saw that those with the Durabrite ink survived while those printed on my HP printer did not. If anyone else prints up liners like this, I suggest that the use an Epson printer. We'll see after it's worn in the rain or heat.

Edit: OK, you had me a little bit worried there. I had another liner label, left over since I printed it out too large. Hand washed in the sink with hot water and Dawn detergent.. Successfully washed with no running of the ink. Whew!
 

Ande1964

Practically Family
Messages
556
Location
Kansas
This is, at once, the best and the worst thread ever! The best because the results are awesome, and I am truly inspired. The worst because I can see this becoming an obsession in my already-overbooked life!

The part of the process that really bewilders me is the flanging. I have seen blocks, and I have seen flanges. I'm just not sure how you use the flange to make the up-turned brim. Can you explain it to me?

Great job!

Anj
 

Mike in Seattle

My Mail is Forwarded Here
Messages
3,027
Location
Renton (Seattle), WA
Glad to hear it came through the tests with flying colors. Bodes well for Epson Durabrite ink and Avery printable cloth as well. I'd probably be tempted to keep the test sheet slighly damp a day or two and see if there's any change. I've had some paperwork printed with our old Lexmark that got a little damp dashing from house to car in one of our downpours and found it blurred and ran some. Now I'm thinking I should purposely try it with the HP printer we now have... ;)
 

Stoney

Practically Family
Messages
977
Location
Currently on the East Coast
A picture is worth 1000 words

Anj,

This illustrates how I do it at home. I use a small Rowena Steam and Press iron. I highly recommend this model for flanging. It has a small removable water reservoir in the handle. The button just above my hand is the steam control. Push down, out and away from the center of the hat as you pump the stream button as quick as you can. The result is a series of shots of steam into the section that you are ironing. Keep the point of contact pressed hard against the flange as you go. You want to do this quickly since the felt will scorch very easily. The steam is the key to this, not the heat from the iron. Turn the flange in your hand to work on the next section of brim.

flanging.jpg


I only put the surface of the iron directly against the felt right at the edge where the crown and brim meet, when setting the crown brim edge to a square angle. I normally use a piece of white t-shirt to cover the felt as I steam it. The fabric's job is to protect the fur. I omitted the piece of t-shirt from this picture so you could see how I hold the flange and iron.

A real hatter has a steam machine that does this job, but my method is good for doing this at home.
 

Tango Yankee

Call Me a Cab
Messages
2,433
Location
Lucasville, OH
Stoney,

A few questions, if you don't mind:

First, the hat body. Am I correct in thinking that what you started with was a "capeline" as opposed to "hood" type body? (Trying to make sure I have it right which is which in my mind.)

How did you determine how much felt stiffener to use?

I've been wondering for a while about Hat Supply's sweatbands. Which did you use, and what do you think about it in terms of quality?

Did you affix a small bow at the back of the sweatband? If so, what did you use to make it? (I've been thinking flat shoestring cut to size, but...)

Again, you're an inspiration!

Thanks,
Tom
 

Stoney

Practically Family
Messages
977
Location
Currently on the East Coast
Tom,

The hat body that I used was a capeline. It was close to hat shape when I started. It stretched easily over the block when wet.

When I performed the initial flanging ,wet, I had to really stretch the felt to get the brim straight and remove the wrinkles at the base of the crown, where the brim starts. I used the bottom of a cologne bottle to stretch the wet felt outward toward the edge of the flange. I ironed the brim flat, after the felt was dry, then dry flanged it using the steam iron as shown above to achieve the 90 deg Crown-Brim angle and put the curve into the snap brim.

Stiffener... I added a little at a time until the hat was stiff enough , but not as stiff as a cowboy hat. Generally, more stiffener went into the crown then on the brim. I brushed it into the felt after spraying it on with a spray bottle. I thought it would be easier to add a little at a time rather than try to get it all in one shot. It took several applications of stiffener before I was satisfied.

I used the brown sweatband from hatsupply. I wasn't impressed with the quality, but it works for now. If anyone knows of a supplier of quality sweatbands that will sell to the public please let me know. Otherwise the quality of items from hatsupply.com was great. Oh and hatsupply has sweatband ferrules as well.

I did put a small bow on the back of the sweatband. I used some plain white 3/16" grosgrain ribbon to make it. I think a very small shoestring or braided cord will work as well.
 

Tango Yankee

Call Me a Cab
Messages
2,433
Location
Lucasville, OH
Thanks, Stoney!

Stoney said:
Oh and hatsupply has sweatband ferrules as well.

I didn't know she'd gotten them in. I sent her an e-mail a few months ago asking about ferrules after I learned about their application in sweatbands and how to put them in from Art, and described what I'd be doing with them. She said she'd get them and asked if she could put the description up on the site. In the meantime I'd gotten them elsewhere.

Cheers,
Tom
 

Forum statistics

Threads
107,590
Messages
3,041,744
Members
52,966
Latest member
theartboxstore
Top