Brad Bowers
I'll Lock Up
- Messages
- 4,187
This post was borrowed from my blog, but I know folks here might be interested in it, too.
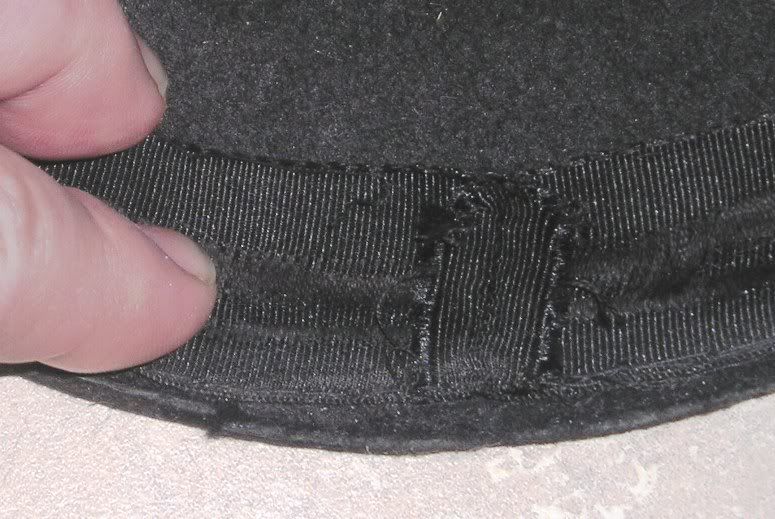
This thread hopes to take some of the mystery out the crafting of Derbies, as some of the construction methods are rather unique to these stiff hats. Some of the methods, such as the brim curling and binding methods, apply to other older styles of hats, such as Top Hats and Homburgs, but are different from soft felt hats.
Felt bodies for Derbies are crafted as with any other hat, but one important distinction is that they are impregnated with shellac after the felting process was complete, but before they are dyed. The shellac is what gives the Derby its stiffness. All hats, even soft felt ones, have a certain amount of shellac in them, but Derbies have more than any other.
Blocking the Hat
Originally, Derbies felt bodies, as with all hats, were stretched over wooden blocks that gave the crown the desired shape. Because of the copious amounts of shellac in the felt, the bodies were heated and then muscled down onto the block. Once done, the next step was to iron the crown to set the shape, and to pounce (or sand smooth) the surface to the required finish.
Derbies require a different block shape than a soft felt hat. For one thing, the crowns are not creased in any way, and so they don’t need to be taller to accommodate the crease. The height of the block is the height of the finished hat’s crown. For a soft felt hat, the block is taller than the finished crown height, to give enough felt for, say, a deep center crease, as was popular in the 1920s and 1930s.
Additionally, the profiles of the crowns will be different. There are different styles of crowns for Derbies, just as there are different styles of crowns for soft felt hats, and each one gives different results. In general, though, Derby blocks are easily distinguished from their shellac-deficient brethren.
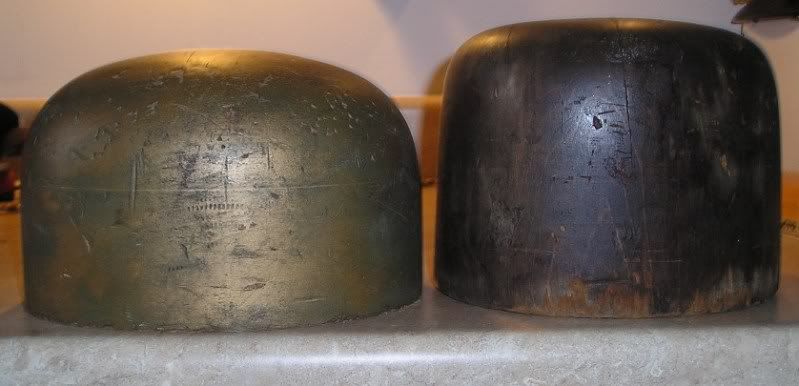
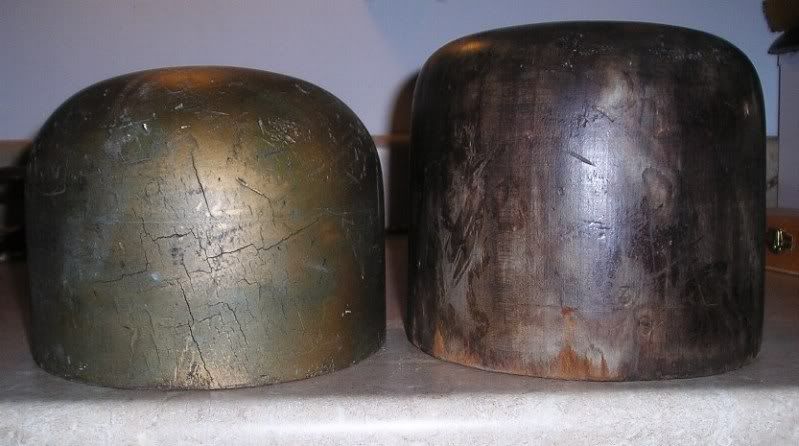
Here are a couple of photos of hat blocks to give you some idea of the different profiles. They are different hat sizes, but just look at the height and profiles. The block on the left is a Derby block. It’s only five-inches tall, and has more rounded shoulders than the six-inch soft felt hat block on the right.
Side View
Front View
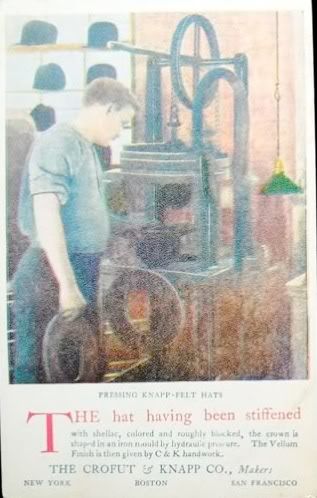
Most manufacturers eventually switched to hydraulic presses to block their stiff hats. Crofut & Knapp, who once boasted about their hand-blocked Derbies and chided their competitors for using hydraulic presses, eventually switched to the presses as well. The bodies were heated in a gas or electric oven, and then placed upside down inside an iron mold in the shape of the crown. A rubber bladder was placed inside the crown and filled with cold water, which forced the sides of the crown up against the iron mold and gave the Derby its final crown shape.
C&K Postcard showing the Hydraulic Press
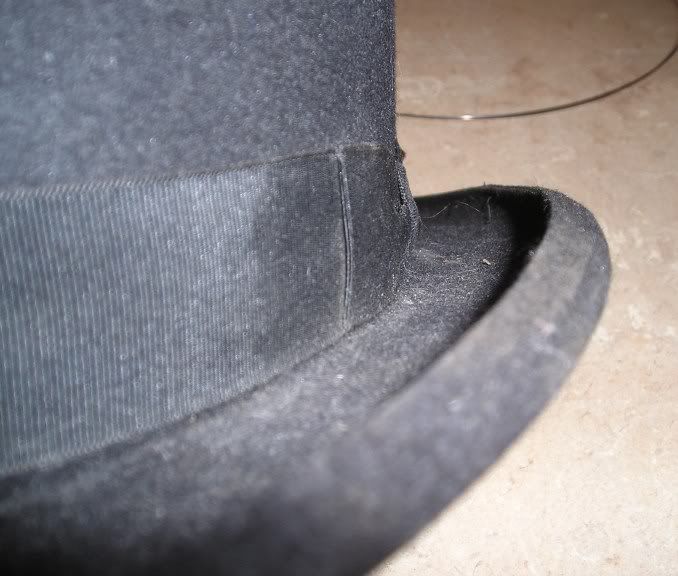
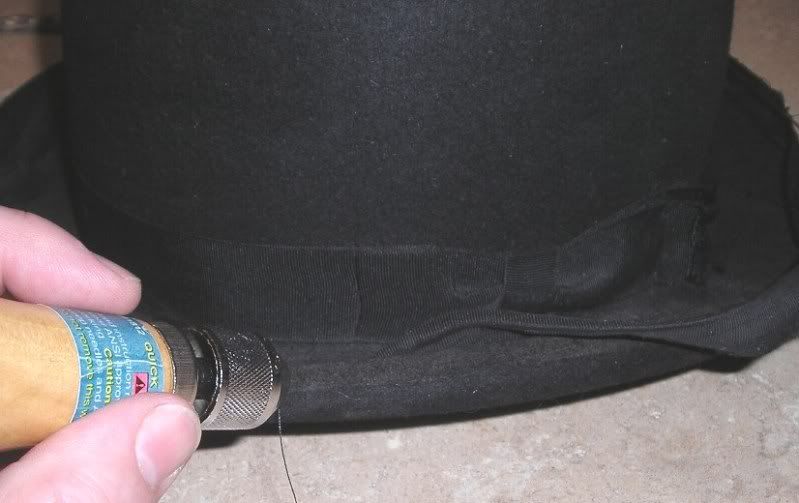
Rounding the Brim
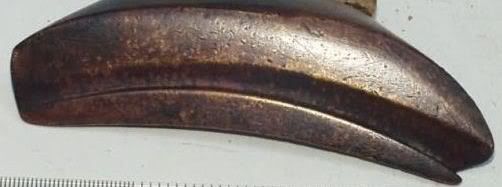
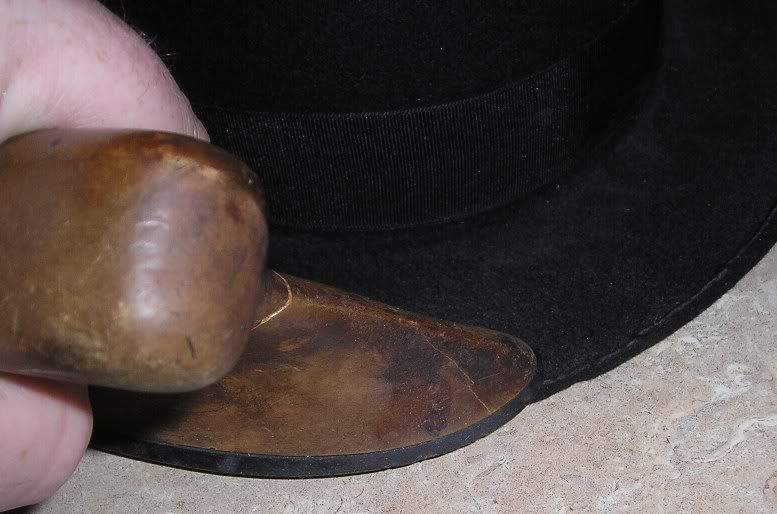
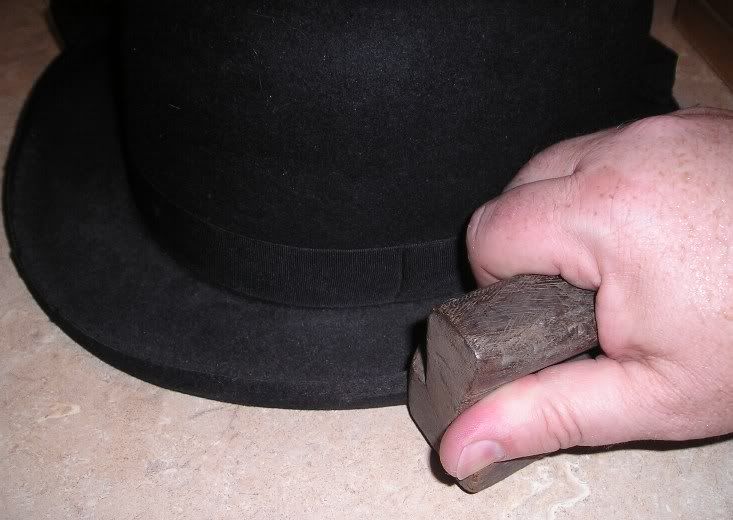
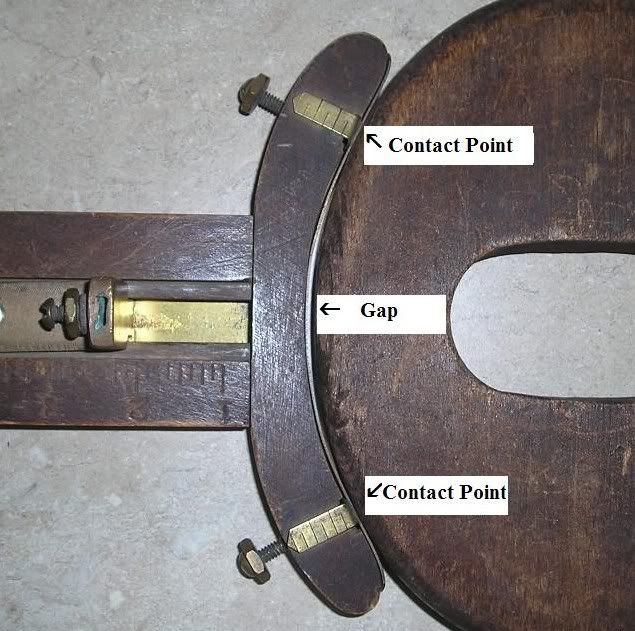
Whereas most hat brims have a fixed brim width all the way around, Derbies require a wider brim on the sides than on the front. This allows the brim curler to give the brim a very short, perpendicular curl on the front, and a wider, taller, and more pronounced curl on the sides. To achieve this extra width on the sides, known as a dimensional brim, a rounding jack with special adjustments for Derbies is used. The knobs adjust the contact points so that the jack rides farther out on the sides from the crown than on the front. Derbies generally are 1/8" to 1/4" wider on the sides than the front.
The Business End of a Rounding Jack
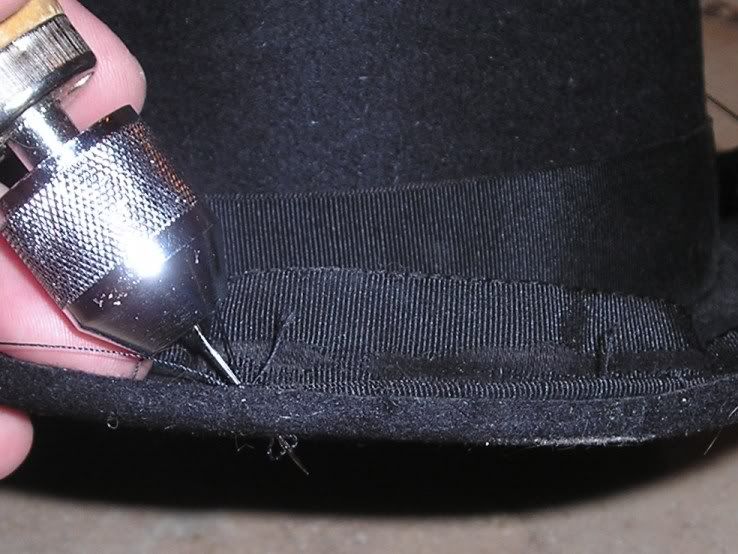
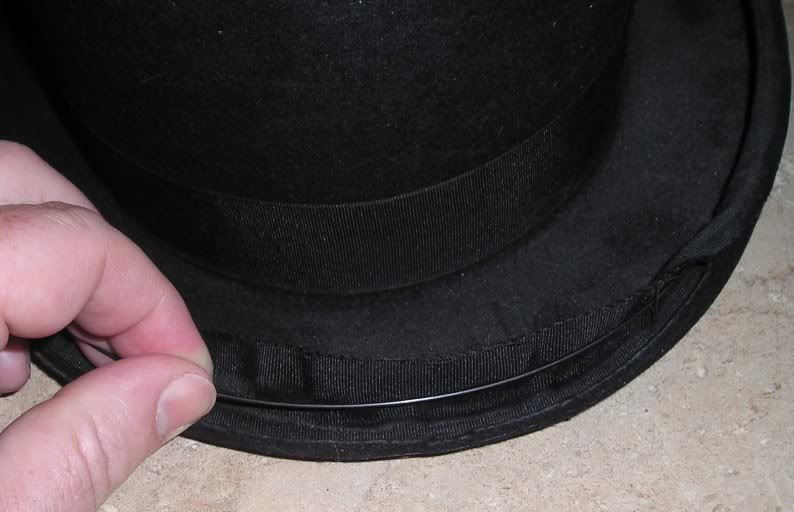
Ironing the Brim
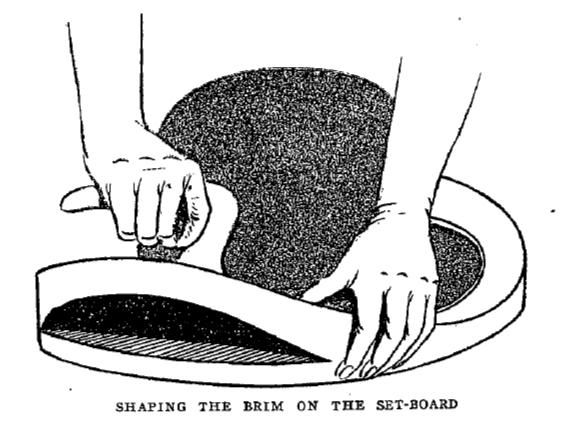
Once the brim is cut to the correct size, the brim break, the angle where the brim meets the crown, is set by ironing the brim on a set board. It’s a concave board that adds the proper curl to the flat portion of the brim. I don’t have a set board, but here is a drawing from Henry L. Ermatinger’s 1919 Scientific Hat Finishing and Renovating.
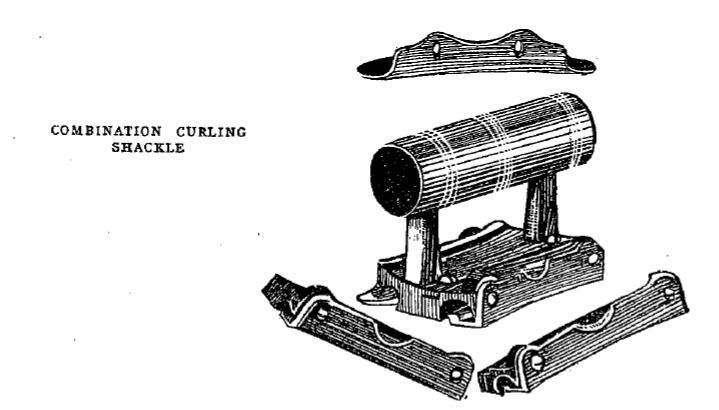
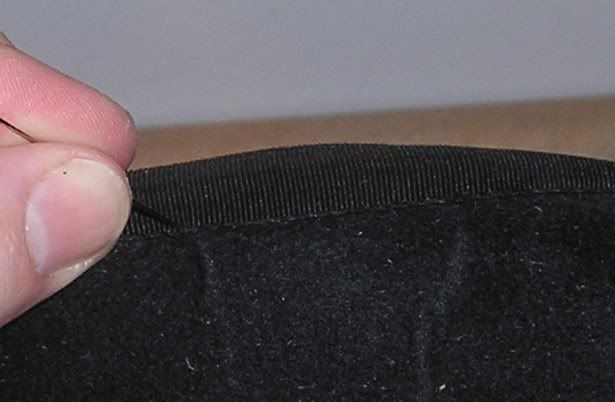
Making the Front and Rear Curls
The secret to a stylish Derby is in the brim curl, which, is properly done by hand by a master curler, an artiste extraordinaire.
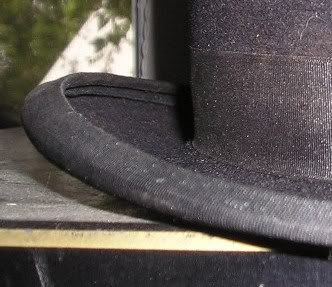
The side curl is called a D’Orsay curl. It can be open, as seen here in this Dobbs Derby, or ironed much flatter, more like an overwelt that isn’t sewn down.
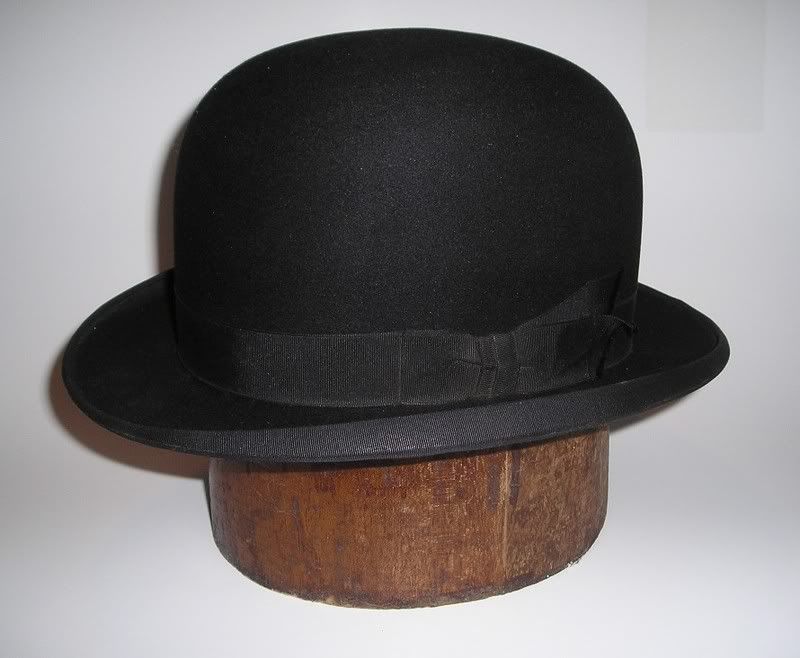
Derby curling was originally done by hand with specialized tools, but by the time of the 1958-59 Derby revival, this had changed. Between not having any expert curlers in the factories due to sparse sales, and also for the sake of the profit margin, the style of curl was changed to a very simple upright curl, the same as contemporary Homburgs. This could be done with a flange and greatly sped up the manufacturing process by not requiring the hand labor, but the classic sense of elegance was lost.
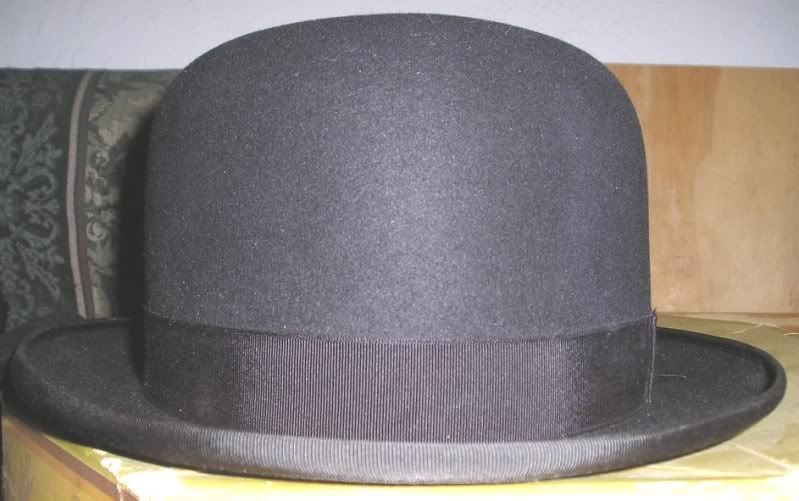
Cavanagh Derby from the 1958-59 Derby Revival
This thread hopes to take some of the mystery out the crafting of Derbies, as some of the construction methods are rather unique to these stiff hats. Some of the methods, such as the brim curling and binding methods, apply to other older styles of hats, such as Top Hats and Homburgs, but are different from soft felt hats.
Felt bodies for Derbies are crafted as with any other hat, but one important distinction is that they are impregnated with shellac after the felting process was complete, but before they are dyed. The shellac is what gives the Derby its stiffness. All hats, even soft felt ones, have a certain amount of shellac in them, but Derbies have more than any other.
Blocking the Hat
Originally, Derbies felt bodies, as with all hats, were stretched over wooden blocks that gave the crown the desired shape. Because of the copious amounts of shellac in the felt, the bodies were heated and then muscled down onto the block. Once done, the next step was to iron the crown to set the shape, and to pounce (or sand smooth) the surface to the required finish.
Derbies require a different block shape than a soft felt hat. For one thing, the crowns are not creased in any way, and so they don’t need to be taller to accommodate the crease. The height of the block is the height of the finished hat’s crown. For a soft felt hat, the block is taller than the finished crown height, to give enough felt for, say, a deep center crease, as was popular in the 1920s and 1930s.
Additionally, the profiles of the crowns will be different. There are different styles of crowns for Derbies, just as there are different styles of crowns for soft felt hats, and each one gives different results. In general, though, Derby blocks are easily distinguished from their shellac-deficient brethren.
Here are a couple of photos of hat blocks to give you some idea of the different profiles. They are different hat sizes, but just look at the height and profiles. The block on the left is a Derby block. It’s only five-inches tall, and has more rounded shoulders than the six-inch soft felt hat block on the right.
Side View
Front View
Most manufacturers eventually switched to hydraulic presses to block their stiff hats. Crofut & Knapp, who once boasted about their hand-blocked Derbies and chided their competitors for using hydraulic presses, eventually switched to the presses as well. The bodies were heated in a gas or electric oven, and then placed upside down inside an iron mold in the shape of the crown. A rubber bladder was placed inside the crown and filled with cold water, which forced the sides of the crown up against the iron mold and gave the Derby its final crown shape.
C&K Postcard showing the Hydraulic Press
Rounding the Brim
Whereas most hat brims have a fixed brim width all the way around, Derbies require a wider brim on the sides than on the front. This allows the brim curler to give the brim a very short, perpendicular curl on the front, and a wider, taller, and more pronounced curl on the sides. To achieve this extra width on the sides, known as a dimensional brim, a rounding jack with special adjustments for Derbies is used. The knobs adjust the contact points so that the jack rides farther out on the sides from the crown than on the front. Derbies generally are 1/8" to 1/4" wider on the sides than the front.
The Business End of a Rounding Jack
Ironing the Brim
Once the brim is cut to the correct size, the brim break, the angle where the brim meets the crown, is set by ironing the brim on a set board. It’s a concave board that adds the proper curl to the flat portion of the brim. I don’t have a set board, but here is a drawing from Henry L. Ermatinger’s 1919 Scientific Hat Finishing and Renovating.
Making the Front and Rear Curls
The secret to a stylish Derby is in the brim curl, which, is properly done by hand by a master curler, an artiste extraordinaire.
The side curl is called a D’Orsay curl. It can be open, as seen here in this Dobbs Derby, or ironed much flatter, more like an overwelt that isn’t sewn down.
Derby curling was originally done by hand with specialized tools, but by the time of the 1958-59 Derby revival, this had changed. Between not having any expert curlers in the factories due to sparse sales, and also for the sake of the profit margin, the style of curl was changed to a very simple upright curl, the same as contemporary Homburgs. This could be done with a flange and greatly sped up the manufacturing process by not requiring the hand labor, but the classic sense of elegance was lost.
Cavanagh Derby from the 1958-59 Derby Revival