Want to buy or sell something? Check the classifieds
  • The Fedora Lounge is supported in part by commission earning affiliate links sitewide. Please support us by using them. You may learn more here.
Messages
10,342
Location
vancouver, canada
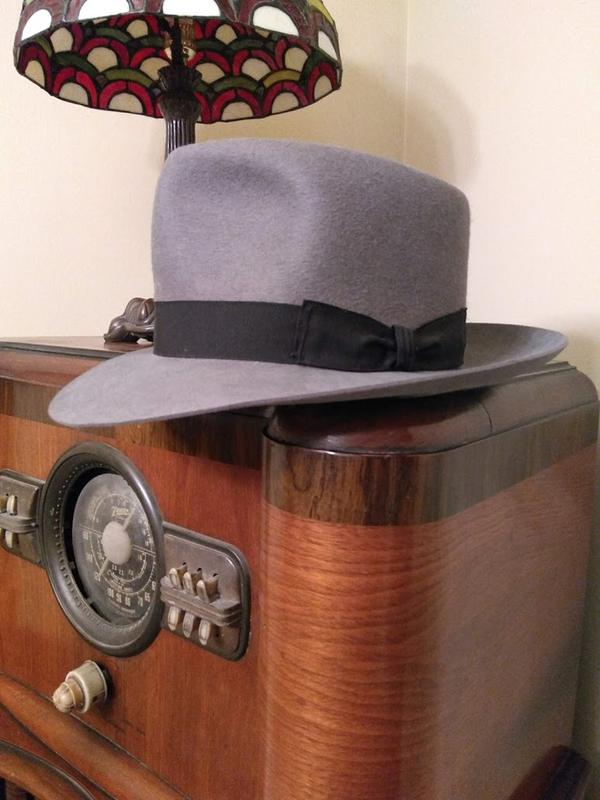
Nice work, the hats look great.

What curling shackles/irons are you using? Pictures?

As for your question on liners. I either buy some generic ones from Hats by Leko (www.hatsupply.com), or I purchased a handful from lounge member @DOGMAN, and I have made my own. I have not done any with a logo on them. I do like using fabric other than satin. I think jacquards and brocades are a great option, you see that done by Black Sheep Hatworks fairly regularly. I have considered buying some liners in bulk with a logo on them, and would probably get them from NES Enterprises. They have a website that basically says to call them to find out what they offer.

I will snap some pics tomorrow of the brim curling tool. Purchased from Guy Morse Brown out of the UK. He offers just the one size and the amount of brim curl is determined by the operator. I liked that as it saved me a ton of money and most of my curls will be smaller ones. He has a YouTube video demonstrating how to use it. I think the link is available from his website. He makes beautiful blocks and flanges but I cannot afford them!
He also offers a very different way to cut brims.

I purchased some shantung polyester (faux silk) today and will try the heat transfer method to put my logo on them. I had thought of buying reproductions of vintage fabric...William Morris for example. If the heat transfer doesn't work I will try the reproductions. I have a Black Sheep hat and love the vintage look fabric in the liner.

Yes, I have half dozen of Dogman's liners and love them.
 
Messages
10,342
Location
vancouver, canada
I just ordered the sublimation transfers for my liners. The company told me the logo will transfer to the liner with sharp edges and as sharp colours as it appears on my monitor. All for about $2 an image. The finesse is doing the actual heat transfer with out a press. I have some ideas and we shall see. About two weeks before I receive the transfers.
 
Messages
10,342
Location
vancouver, canada
Here is a picture I snapped showing my logo heat transferred to a faux silk polyester. Heat transferring an image using sublimation ink is not supposed to work with an iron but I am happy with the results. It saves me buying a heat press for $150. Printing companies here are asking $10 to do the sublimation printing and upwards of $15 for a screen print. . The piece in the photo
CIMG1887.JPG
will be sewn onto the sides of the liner for a total cost of under $2 for the entire liner. The ghosting and smudges are from the paper I used underneath the cloth ...didn't notice the writing and stains.
 
Messages
10,342
Location
vancouver, canada
This has been a great weekend. First my idea to do the sublimation printing for my liners and have it turn out so well turned out to be good in practice not just in my head. I bought an iron on Craigslist today for $12 that has a solid ironing plate big enough to handle the full image...it works!

On my blocks my plan was to save some money and use one size block for two head sizes by sizing up using painter's tape and the thickest Gorilla tape. I have 59cm block for 58cm or 7 1/4" heads and I taped it up for my first commission - a 59 or 7 3/8". Today I am blocking my next commission for a 7 1/4" head so I need to remove the tape and restore the block to it original dimensions. Voila! It worked, the tape stripped off easily and with the painters tape as base left zero residue. I am thinking next time if I am careful in my tape job and with the removal I can use the tape form again with just a few simple repair spots.
 

ChicagoWayVito

Practically Family
Messages
699
This has been a great weekend. First my idea to do the sublimation printing for my liners and have it turn out so well turned out to be good in practice not just in my head. I bought an iron on Craigslist today for $12 that has a solid ironing plate big enough to handle the full image...it works!

On my blocks my plan was to save some money and use one size block for two head sizes by sizing up using painter's tape and the thickest Gorilla tape. I have 59cm block for 58cm or 7 1/4" heads and I taped it up for my first commission - a 59 or 7 3/8". Today I am blocking my next commission for a 7 1/4" head so I need to remove the tape and restore the block to it original dimensions. Voila! It worked, the tape stripped off easily and with the painters tape as base left zero residue. I am thinking next time if I am careful in my tape job and with the removal I can use the tape form again with just a few simple repair spots.
Aside from using painter's tape, you can use what is referred to as a duffer. Basically you use another piece of felt (usually a second quality), get it on the block nice and tight and then drive in small nails around the bottom and then trim off all remaining felt (no brim felt), no you have just sized up your block and you can then block the good hat body over it.

Down side is using felt and putting nail holes in your block.
 
Messages
10,342
Location
vancouver, canada
Aside from using painter's tape, you can use what is referred to as a duffer. Basically you use another piece of felt (usually a second quality), get it on the block nice and tight and then drive in small nails around the bottom and then trim off all remaining felt (no brim felt), no you have just sized up your block and you can then block the good hat body over it.

Down side is using felt and putting nail holes in your block.
And I am toooo new to the hat making thing so have not screwed up any felts yet.....I have none in the scrap heap yet!
 
Messages
18,915
Location
Central California
Here is my latest creation. A Tonak bunny, 4 1/2" brim front, 5" sides, 2 3/4" brim. It is a dark blue but not a navy with Art's vintage grosgrain ribbon in a midnight blue/royal blue highlight. I need lots or work on my bows both to improve the quality and up my speed.....right now it takes forever! View attachment 247391 View attachment 247392


Looks pretty darn good to me!
 

jlee562

I'll Lock Up
Messages
5,047
Location
San Francisco, CA
Apologies in advance for the hat heresy.

Been wanting some custom liners for a while now, my 7xCB had a horribly stained one and being fairly modern, I decided to deconstruct it to make a liner pattern. A couple of hours later with a needle and thread and viola! This is a really slubby, ikat dyed, tsumugi silk...in other words, kimono fabric. The next one I might need to make slightly taller, but I am satisfied with the results for a first pass.


ChicagoWayVito

Practically Family
Messages
699
Apologies in advance for the hat heresy.

Been wanting some custom liners for a while now, my 7xCB had a horribly stained one and being fairly modern, I decided to deconstruct it to make a liner pattern. A couple of hours later with a needle and thread and viola! This is a really slubby, ikat dyed, tsumugi silk...in other words, kimono fabric. The next one I might need to make slightly taller, but I am satisfied with the results for a first pass.


I had to do the same thing to make my liner pattern. Just be careful as it is important how you copy the liner pieces as it will determine if you cut them out facing side up or facing side down.

Good work!!
 

ChicagoWayVito

Practically Family
Messages
699
Also grabbed a moonshine FEPSA felt from Tim/Pure Beaver...


It's ever so slightly more blue hued in person. Interestingly, also slightly stiffer than the Cypress felt. No ideas for a build, I just liked the color.

It is a great color. I've been looking at this and gun smoke color, especially since Tim announced that he will no longer be carrying Fepsa as they are no longer communicating with him and have not provided any reasoning. So when his 300 remaining hat bodies are gone then that is it. Just $180 a hat body is a bit steep right now as I am on a payment plan with Art to purchase his professional hat steamer.
 
Messages
18,915
Location
Central California
It is a great color. I've been looking at this and gun smoke color, especially since Tim announced that he will no longer be carrying Fepsa as they are no longer communicating with him and have not provided any reasoning. So when his 300 remaining hat bodies are gone then that is it. Just $180 a hat body is a bit steep right now as I am on a payment plan with Art to purchase his professional hat steamer.


The problem, even more than the steep price, is the lack of XXL hat bodies needed for 7 5/8 to 7 3/4 heads. All Tim could offer me was FEPSAs take on silverbelly.
 

ChicagoWayVito

Practically Family
Messages
699
The problem, even more than the steep price, is the lack of XXL hat bodies needed for 7 5/8 to 7 3/4 heads. All Tim could offer me was FEPSAs take on silverbelly.
I might be wrong but using a professional steamer is likely the way to go in order to stretch that body into an XXL size, however as you like large brims there would be some sacrifice made in that area. I have also seen European hatters use what looks to be some kind of steaming box and the felt is really malleable after spending time in the "sauna".
 

ChicagoWayVito

Practically Family
Messages
699
Here is a video on youtube that I found on hat making. It is always interesting to see the various ways to do the same thing.

// I would really love to have some sculpted brim flanges and try out the technique shown here.

I think after my sandbagger build (hope to finish in November) that I will take on a steaming chamber of some sort.
For my sandbagger using extruded aluminum and a pneumatic cylinder. It will be unheated unless I can devise a safe heating solution. Currently looking at heated silicone pads used to heat the print bed on 3D printers, just don't know how flexible they are as it needs to have some flex for conforming to the flange.
 
Messages
10,342
Location
vancouver, canada
Here is a video on youtube that I found on hat making. It is always interesting to see the various ways to do the same thing.

// I would really love to have some sculpted brim flanges and try out the technique shown here.

I think after my sandbagger build (hope to finish in November) that I will take on a steaming chamber of some sort.
For my sandbagger using extruded aluminum and a pneumatic cylinder. It will be unheated unless I can devise a safe heating solution. Currently looking at heated silicone pads used to heat the print bed on 3D printers, just don't know how flexible they are as it needs to have some flex for conforming to the flange.
It is interesting the hatter did not trim the brim to size with a rounding jack prior to putting it on the flange...Seems like an easier way than forming it then cutting it with scissors.
 
  • Like
Reactions: BKM

jlee562

I'll Lock Up
Messages
5,047
Location
San Francisco, CA
It is a great color. I've been looking at this and gun smoke color, especially since Tim announced that he will no longer be carrying Fepsa as they are no longer communicating with him and have not provided any reasoning. So when his 300 remaining hat bodies are gone then that is it. Just $180 a hat body is a bit steep right now as I am on a payment plan with Art to purchase his professional hat steamer.

It was a coin toss between this and gunsmoke, believe me!

It's a shame about FEPSA, I wonder what their issue is. I did want to grab one more before stock ran out. They're such nice felts. Both the cypress and moonshine are new shades to my hat collection. Well, they're only hat parts so far...

Paraphrasing a commenter from Tim's post: the hat industry collectively seems to bemoan the lost arts of hat making, while also acting as gatekeepers to new folks trying to get in.
 

Emilis

Familiar Face
Messages
88
Here is a video on youtube that I found on hat making. It is always interesting to see the various ways to do the same thing.

// I would really love to have some sculpted brim flanges and try out the technique shown here.

I think after my sandbagger build (hope to finish in November) that I will take on a steaming chamber of some sort.
For my sandbagger using extruded aluminum and a pneumatic cylinder. It will be unheated unless I can devise a safe heating solution. Currently looking at heated silicone pads used to heat the print bed on 3D printers, just don't know how flexible they are as it needs to have some flex for conforming to the flange.
Thank you for the interesting video!

I have a question. At 3:40 in the video, they use this interesting flanging method. Do you think it does the same job as flanging with a sandbag?

-E
 

T Jones

I'll Lock Up
Messages
6,600
Location
Central Ohio
After a few years of working on hats I have a few rules that I've established for myself and I think they've served me pretty well...

• Don't overthink it. Don't approach your work believing that everything has to be a complicated process. Calm down. Take your time. It's much simpler than you think.

• Keep it simple. Do you really need a lot of expensive equipment to accomplish what you're after? Hand tools for the trade are expensive enough and when you get into specialized equipment like sewing machines specific for sweats and brim bindings, sandbaggers for brim flanging, steamers, etc... you'd better have very deep pockets, especially if you're just starting out or if you're a hobbyist. You can accomplish the same results with simple hand tools specific for the trade, and a steam iron. I only use blocks, flanges, a pusher downer, a puller downer, a ruler, a pencil, a rounding jack, some sandpaper, a sanding block, a flanging cloth, and a steam iron. I can come up with good results by keeping things simple.

Be patient. Don't rush your work. Take your time and think about it. As with any specialized work, patience is your greatest asset.

Have a plan in mind for the hat you're wanting to build. Even before you put the felt on the block, have in mind what you want to accomplish with it, the look, the style, the era, ...etc.

If you don't know, ask questions. There's plenty of experienced hat makers here on the Lounge who would be happy to help you with advice if you have a question or if you run into a little difficulty. Don't be afraid to ask.

Gray-Converted-Stagecoach-11-A.jpg

 
Last edited:

Forum statistics

Threads
107,023
Messages
3,026,600
Members
52,528
Latest member
Zonko
Top