Want to buy or sell something? Check the classifieds
  • The Fedora Lounge is supported in part by commission earning affiliate links sitewide. Please support us by using them. You may learn more here.

Learning how to make my own A-2

fishmeok

Vendor
Messages
759
Location
minneapolis
I'm not really sure if this is the right forum for this, but anyway...
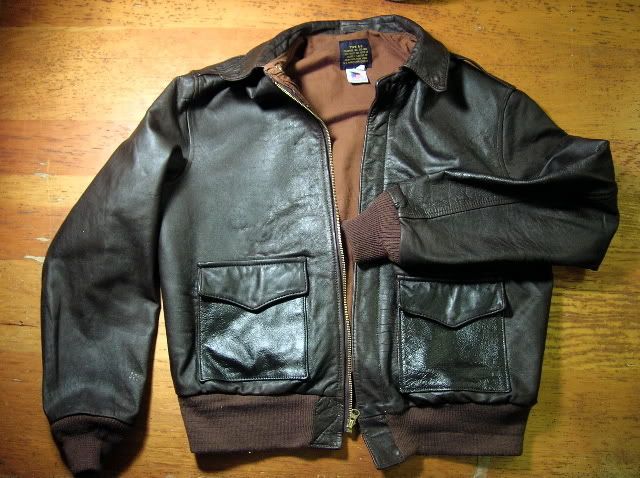
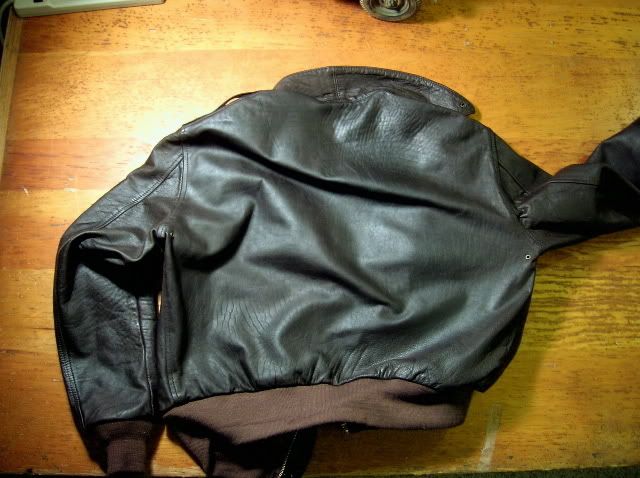
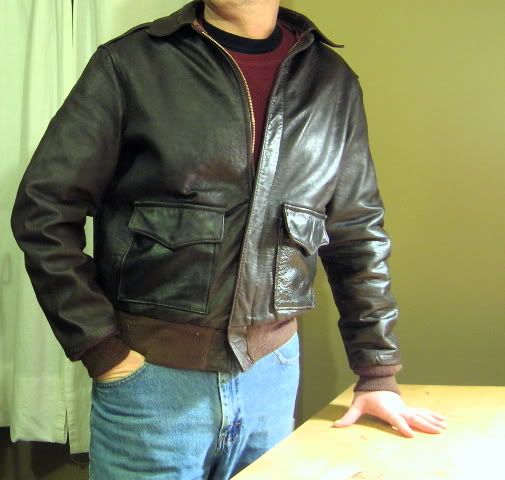
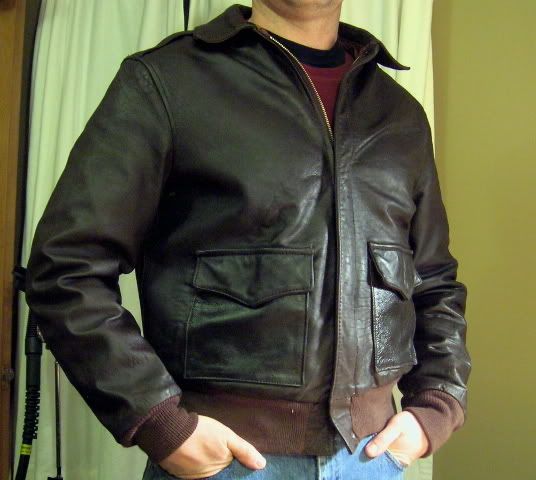
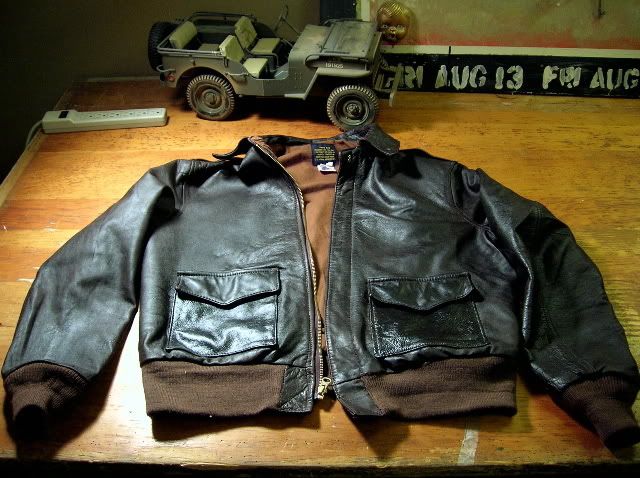
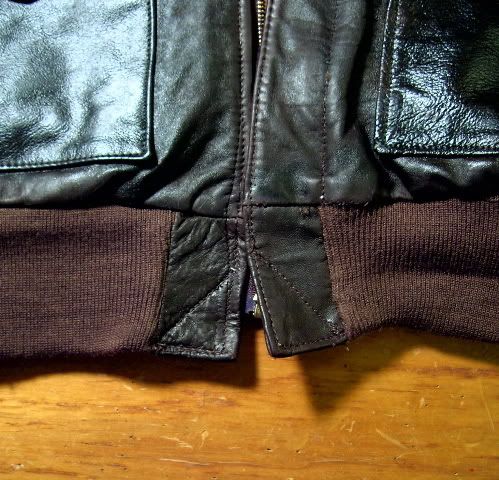
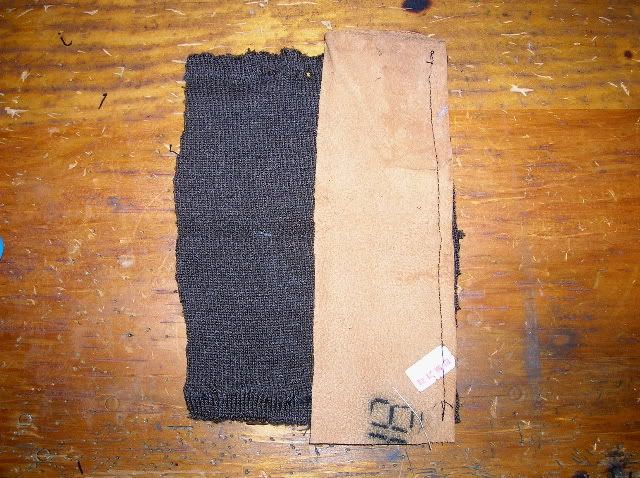
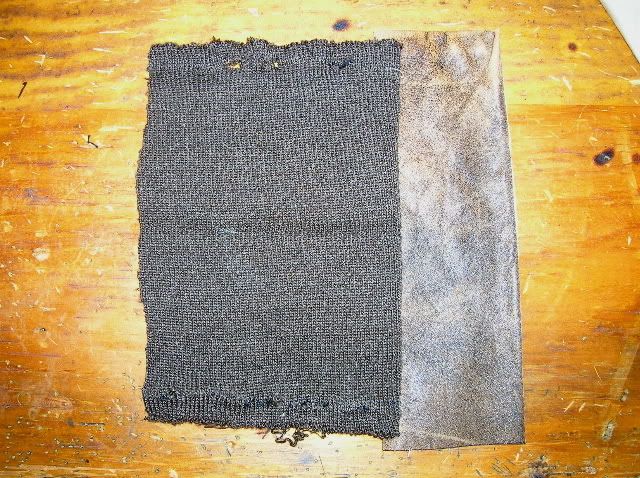
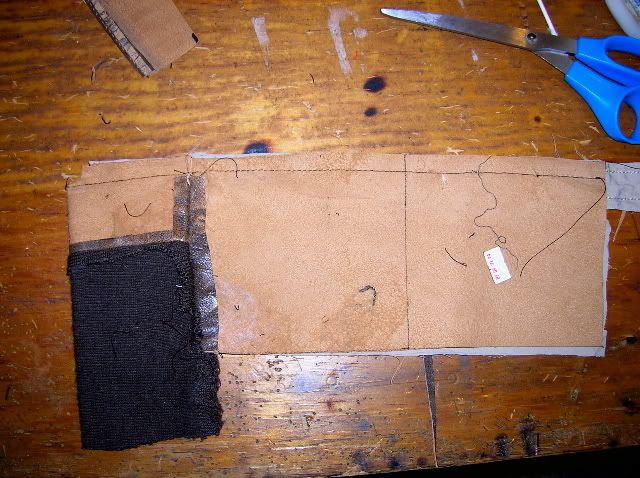
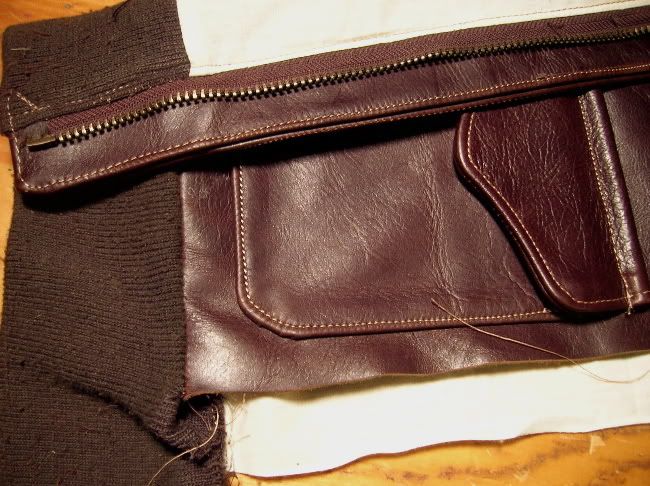
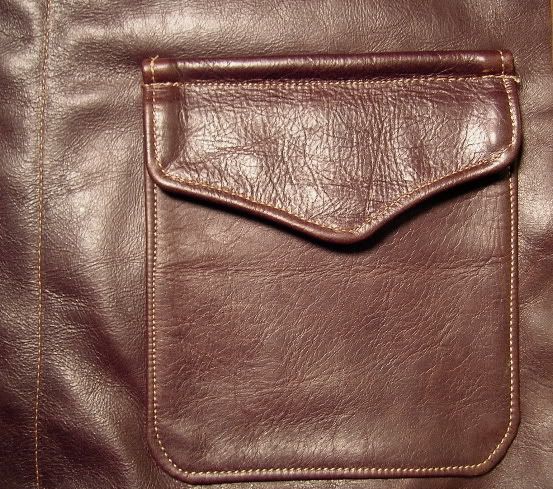
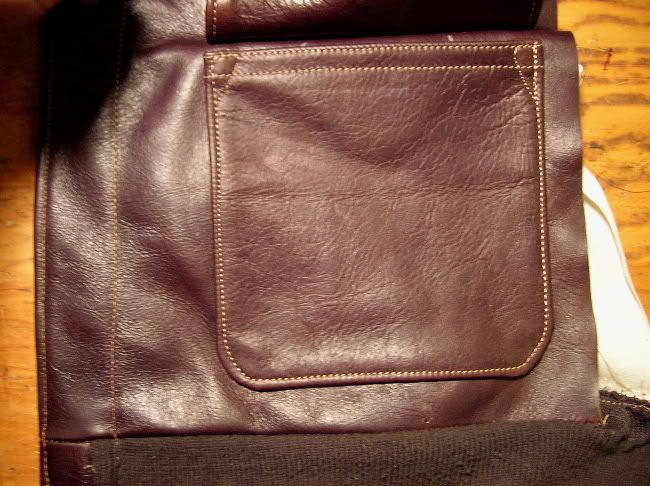
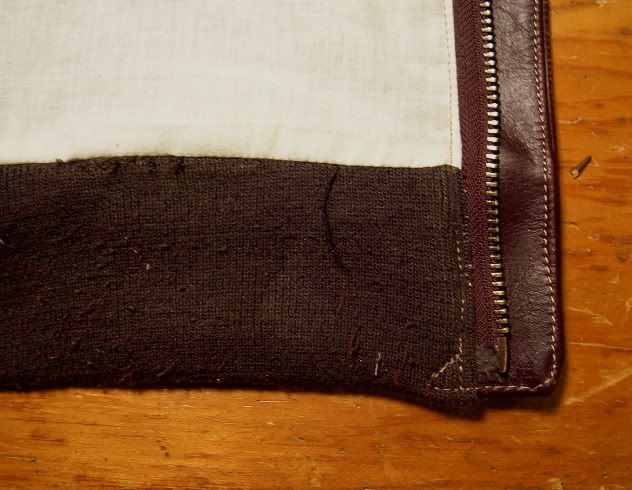
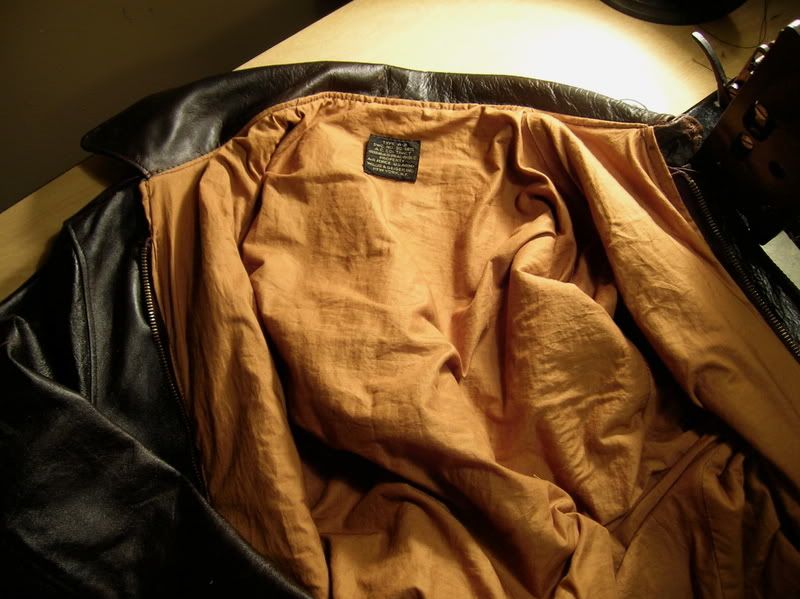
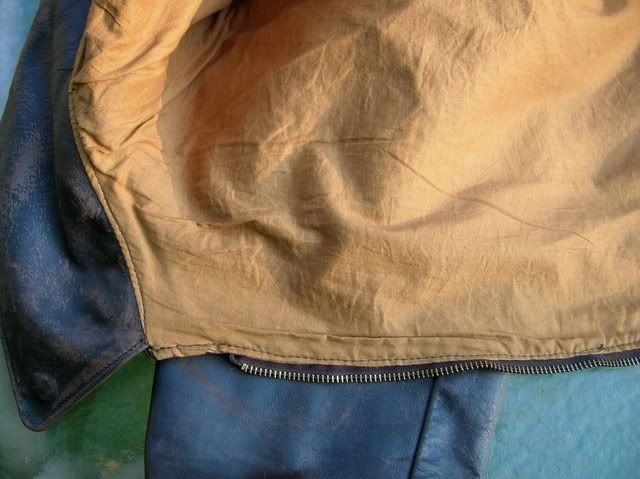
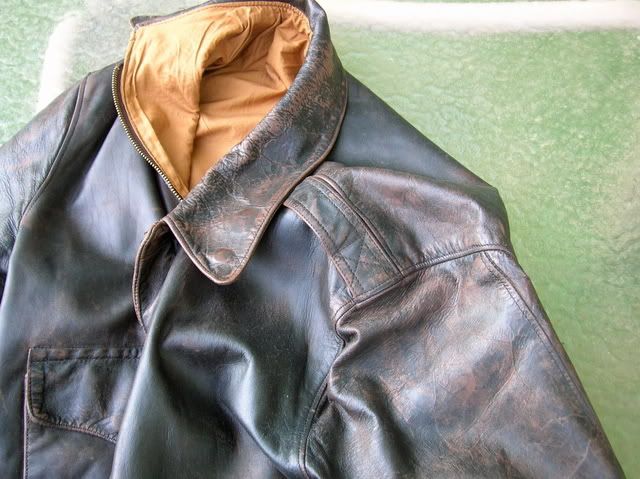
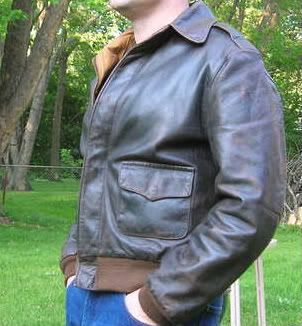
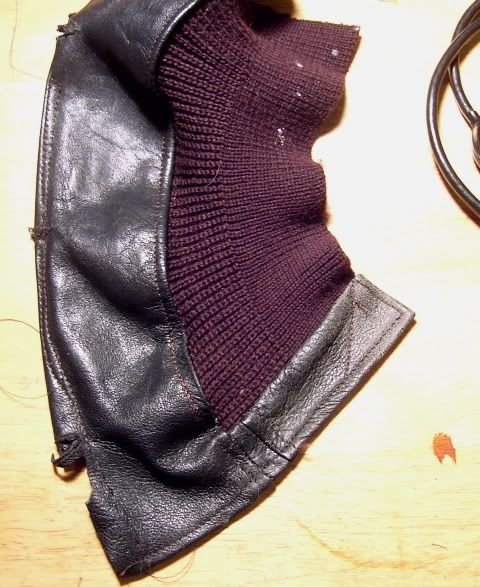
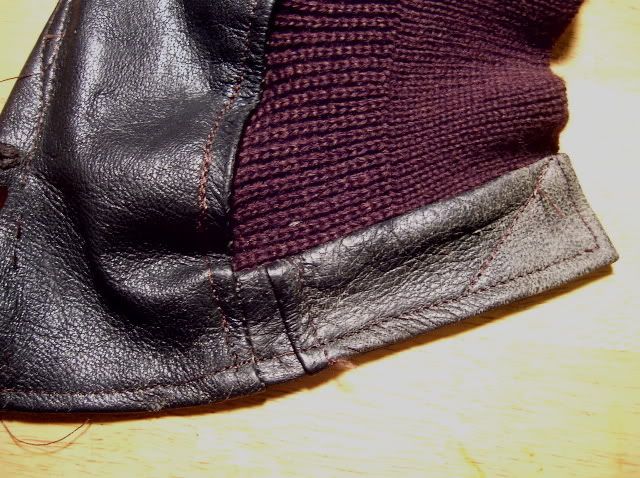
So I've been picking up vintage sewing machines and experimenting with them on leather- the ultimate goal being to teach myself how to make jackets (or just how to sew...). I don't want to invest in an industrial machine until I find out if I have enough talent to do this in a halfway decent manner. I have several project jackets in the closet (Avirex, W&G, etc) to experiment on and I've spent enough time figuring out how the sewing machines actually work to begin making practice pieces. Tonight I took the first steps and made a new pocket for my Avirex and a practice A-2 bottom windflap corner with some M-422A waistband I had left over from another project. You can see I made the stitching too far from the edge on the pocket, and made a bunch of mistakes on the other practice piece, but for a first try I'm fairly proud of myself... :lol:

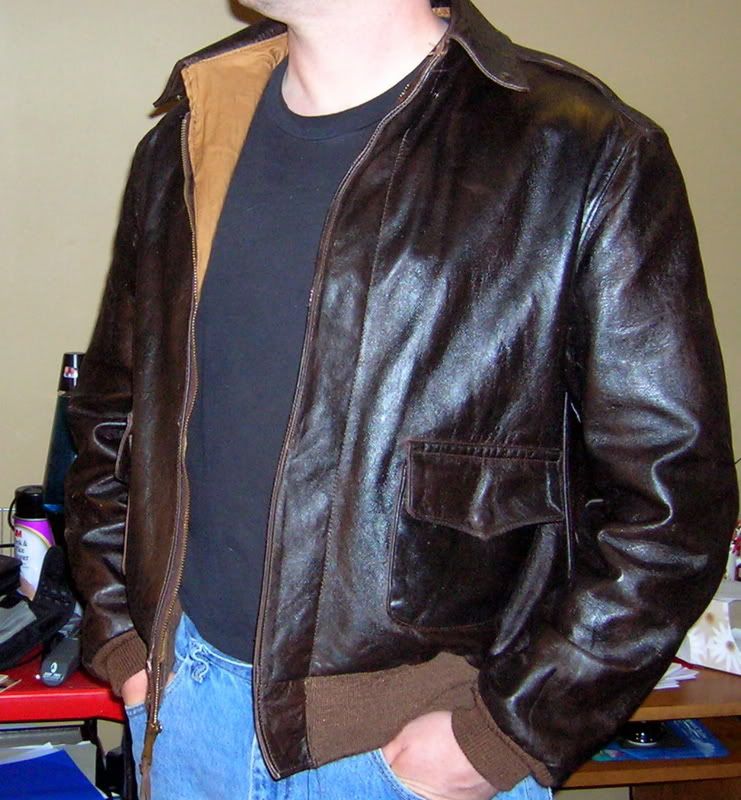
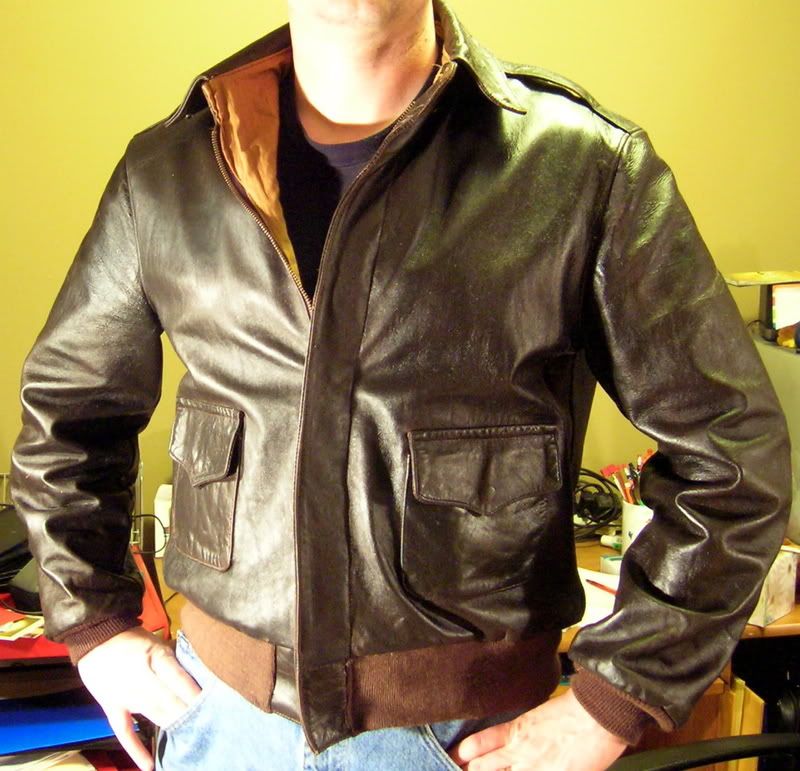
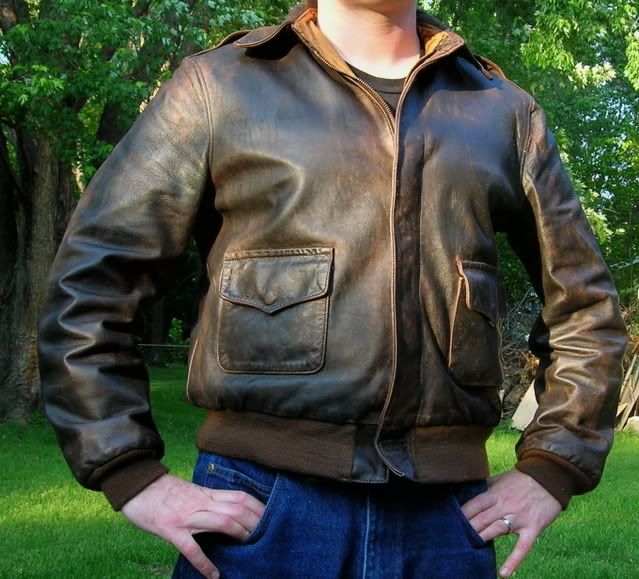
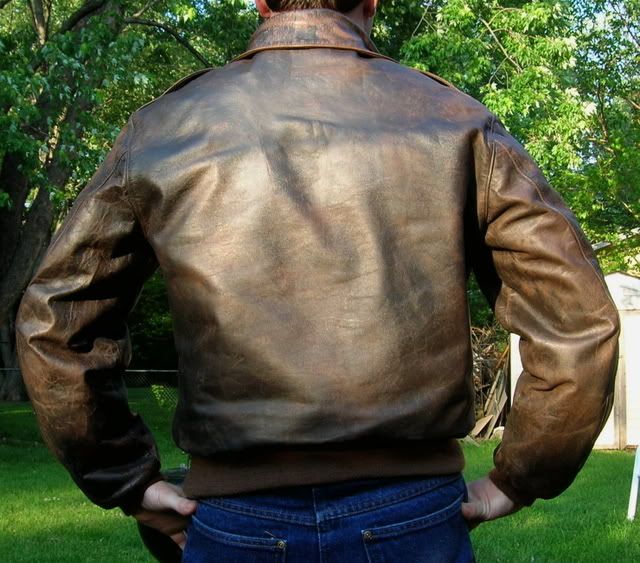
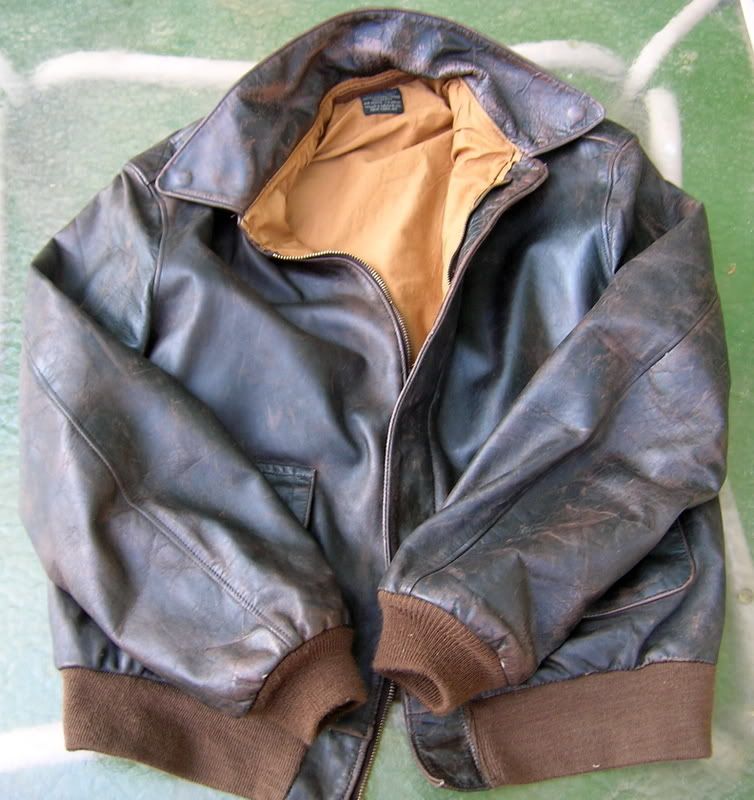
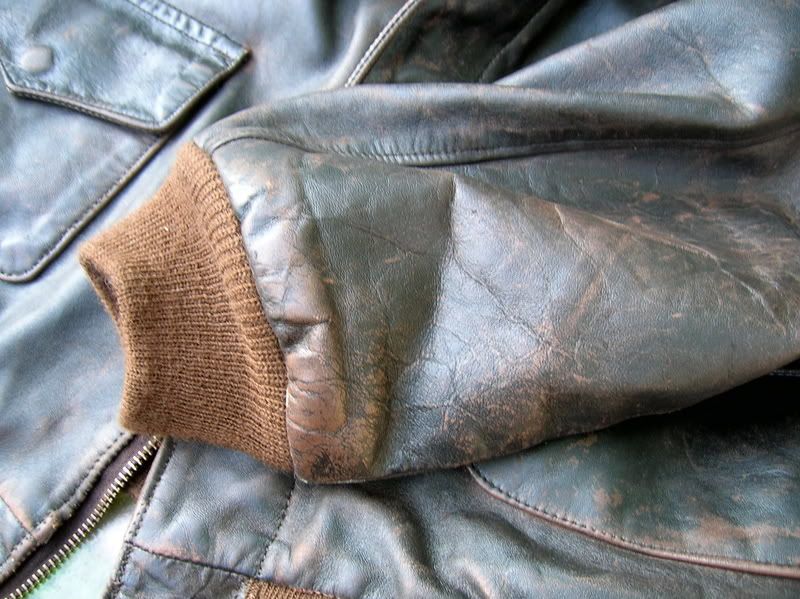
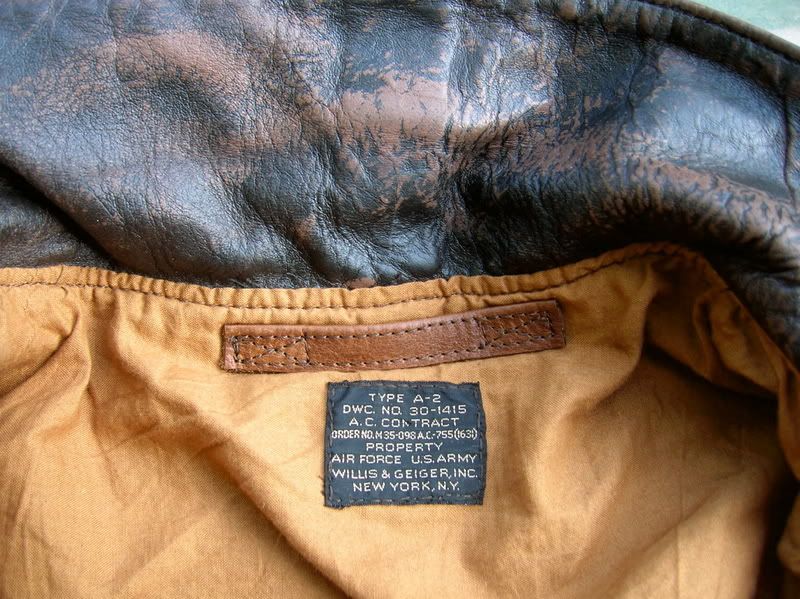
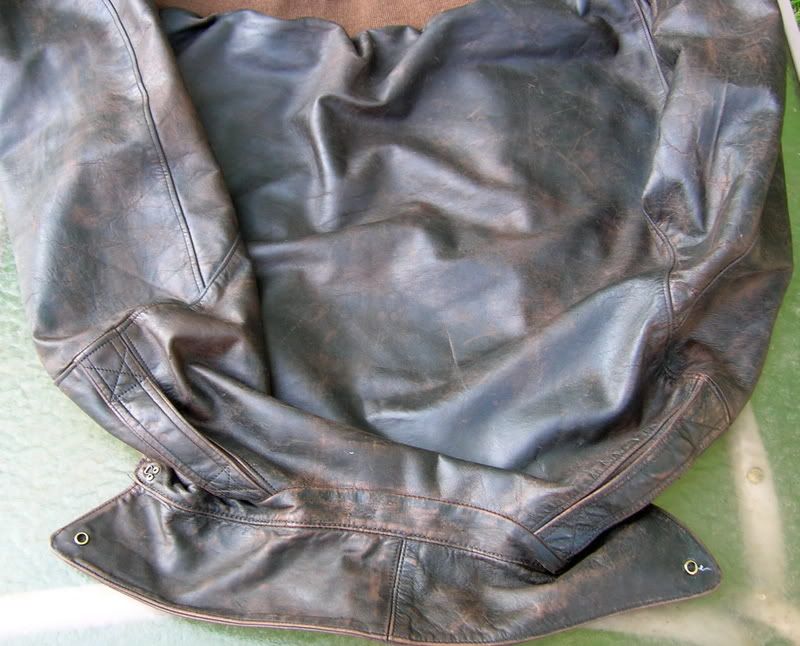
BTW I'm lucky enough to have a Goodwear so I can see how real A-2's are constructed- it's like having a reference book I can wear. :)
Cheers
Mark

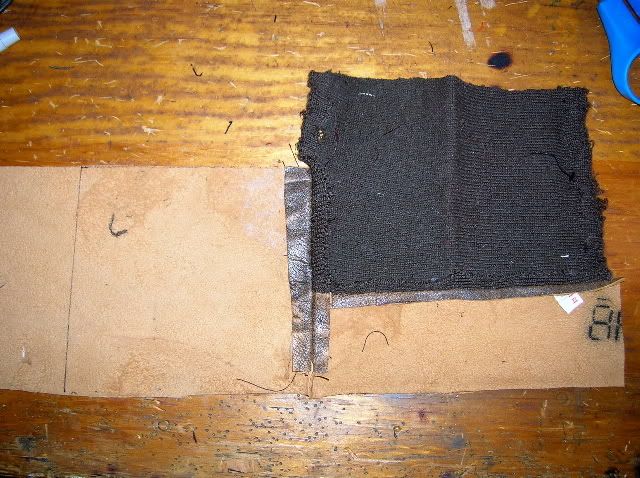
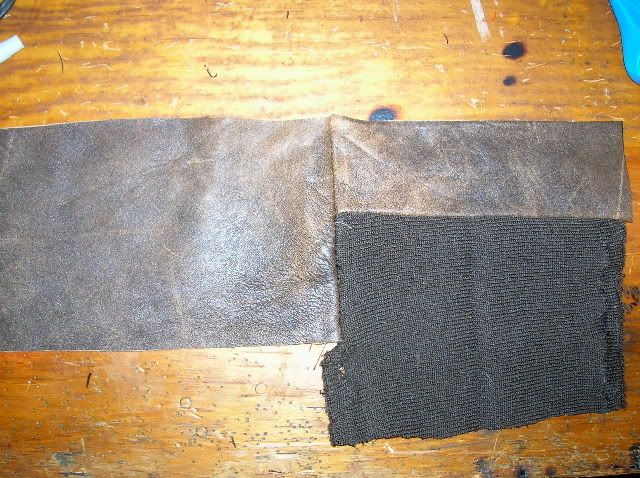
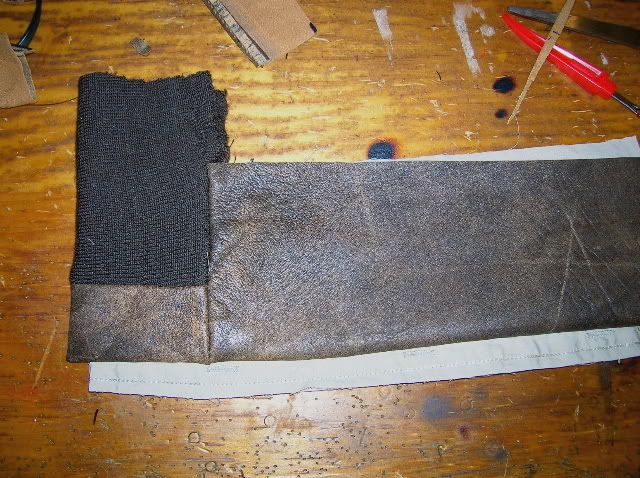
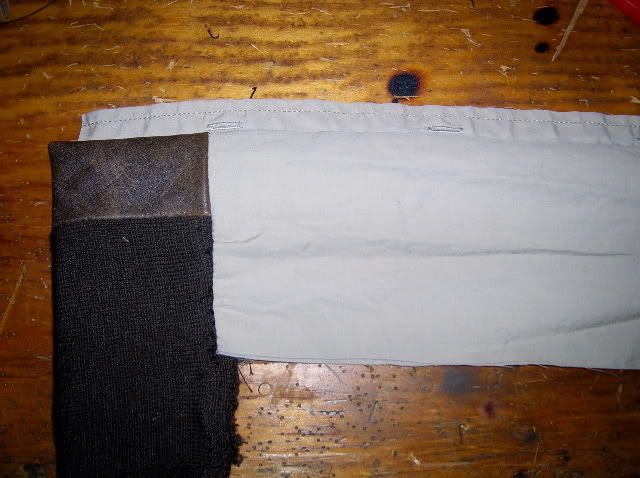
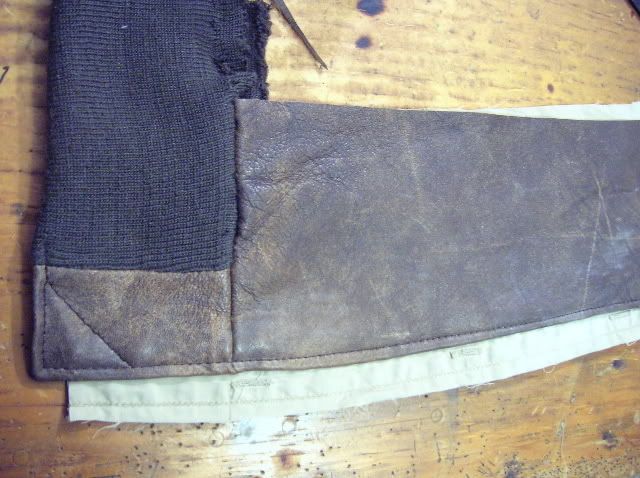
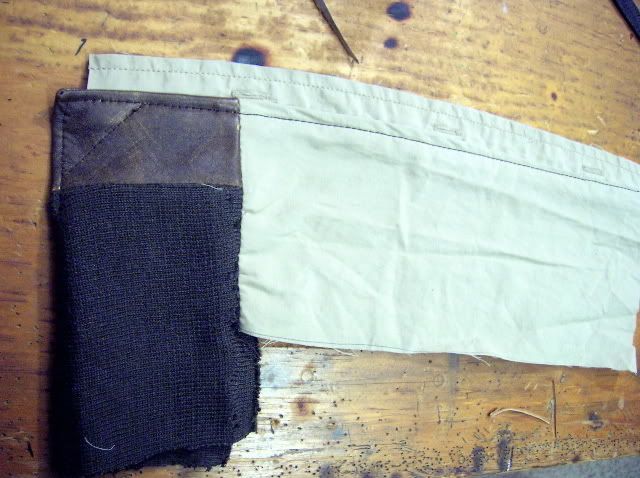
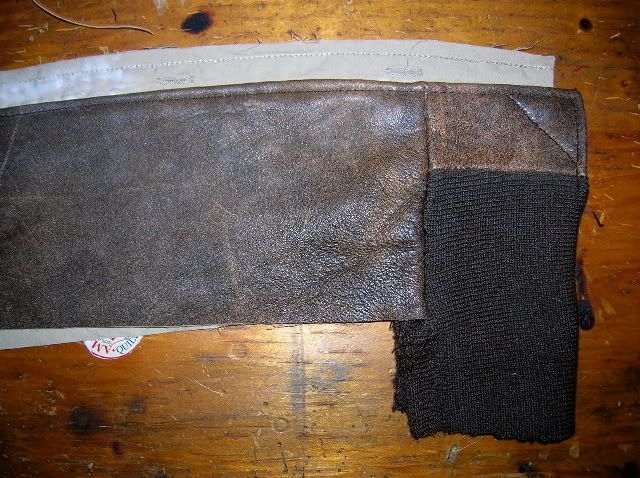
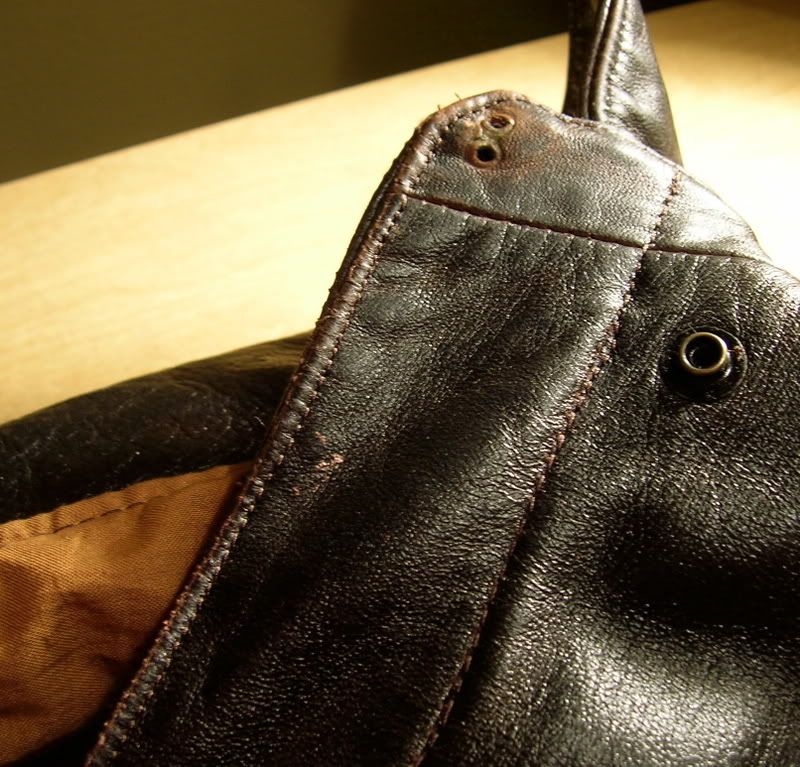
Practice corner piece-

DSCN2730.jpg

DSCN2731.jpg


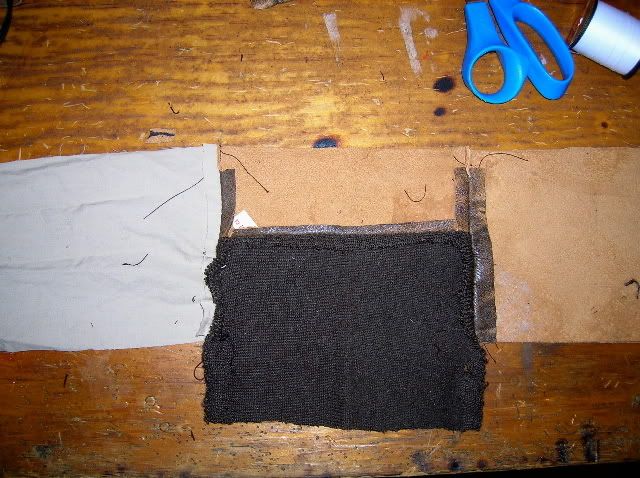
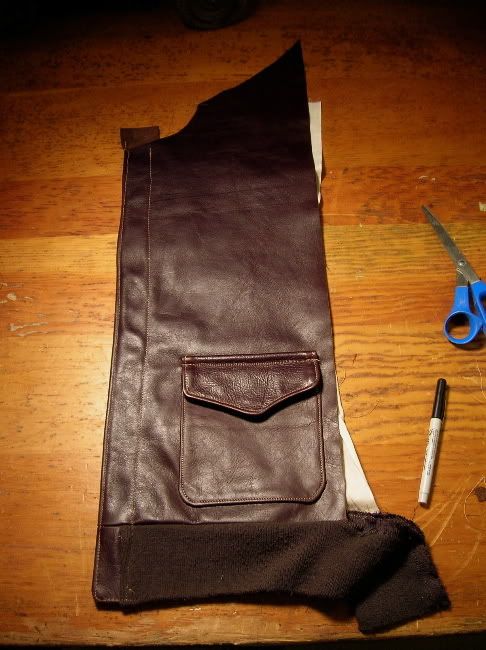
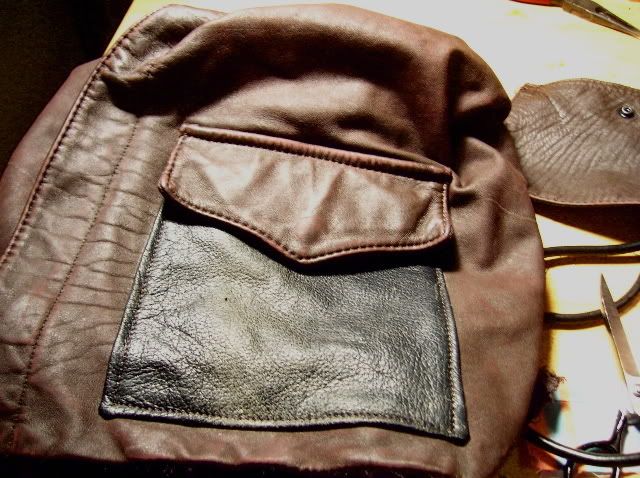
New Pocket- I don't know why I went with square- just seemed like a good idea at the time.

DSCN2732.jpg

DSCN2735.jpg


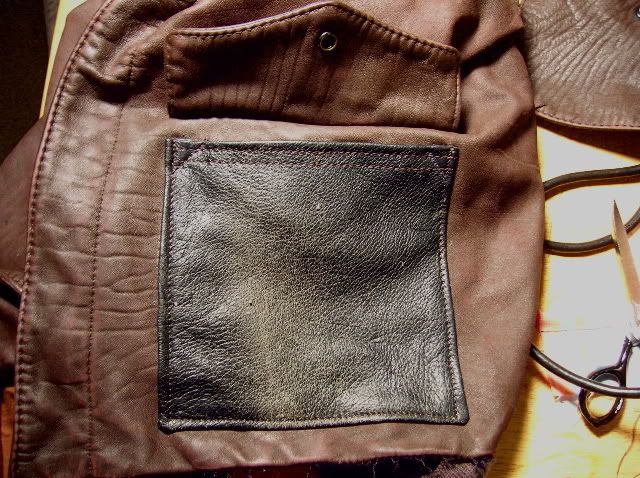
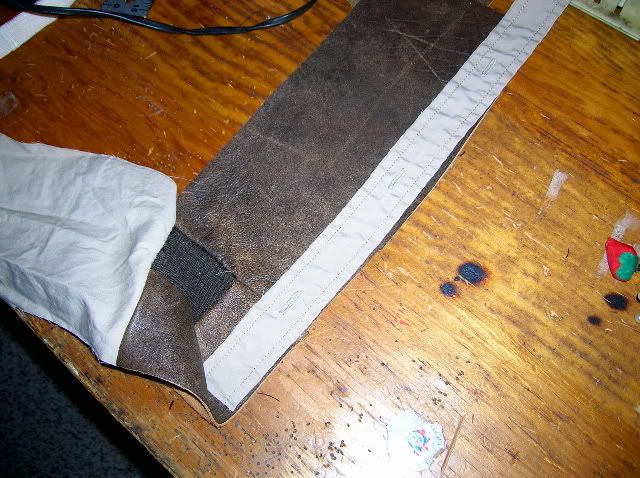
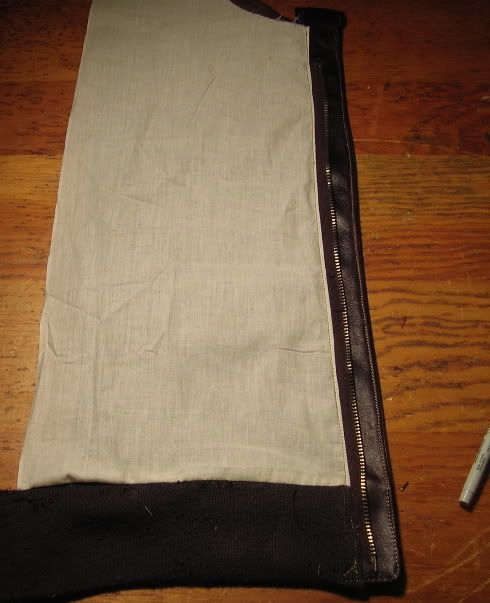
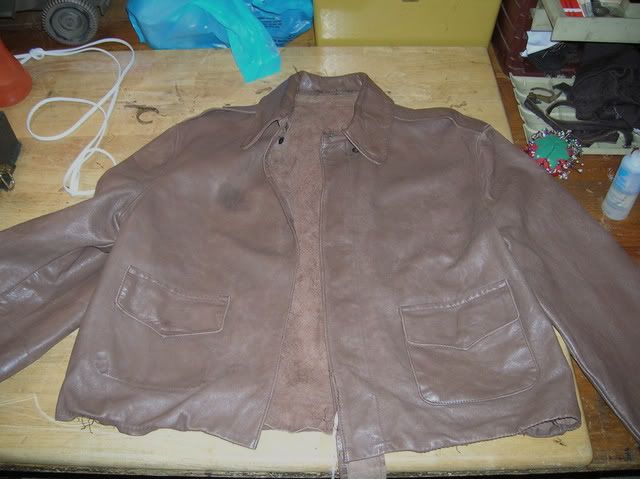
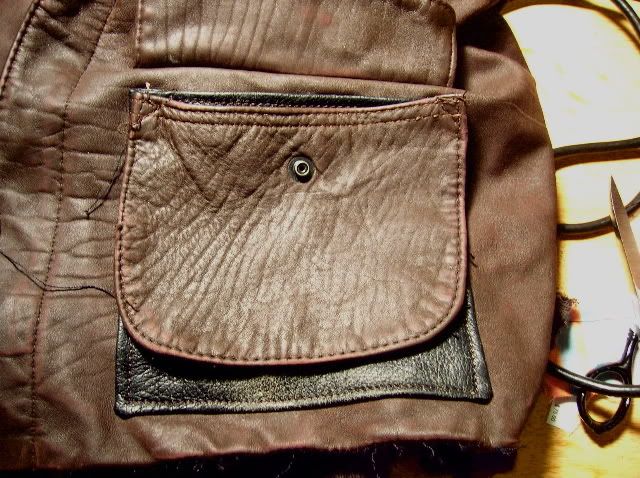
This is the horrible original pocket that Avirex had slapped on:

DSCN2736.jpg
 

thunderw21

I'll Lock Up
Messages
4,044
Location
Iowa
That's quite a project and I'm glad you are experimenting with it. It's good to see others getting involved and trying their hand at different things.

Like Jay, I too would like to know where you get the leather. It looks nice.
 

fishmeok

Vendor
Messages
759
Location
minneapolis
Thanks guys- I'm pretty happy with myself right now:rolleyes: - even if my wife is irritated that we went from no sewing machines to seven in a month...:eusa_doh:

The leather is from an old jacket the wife had- easier to just tear it up than go find a shop and buy new material. I think it's also cheaper to hit a thrift store and find some donor jackets to practice with.
Cheers
Mark
 

boyorastroboy

Familiar Face
Messages
58
Location
MN, USA
Wow, very inspiring! I consider myself reasonably handy, but I've never even considered building my own leather jacket... Until now! Please keep us posted!
 

fishmeok

Vendor
Messages
759
Location
minneapolis
So I'm calling it done- I had to re-do the bottom of the windflap zip three times and it's not by any means perfect, but I'm happy for now. I realized last night that part of my problem with dropped stitches was that I was threading the bobbin on my 80 year old sewing machine wrong. It still is not nearly as good as an industrial made for canvas/leather, but it got the job done.

My biggest problem was on the windflap side around where the wasitknit meets the zipper. I had a hell of a time getting everything to line up properly, as I mentioned above it took three tries just for the zipper in that area. I was also trying to match previous stitch holes which made things look pretty bad when I made mistakes. And I made plenty of mistakes. The pockets are too shiny- don't use black leather as material thinking you can re-dye it dark brown. The lining was much more difficult than I thought. Getting it positioned correctly along the zipper and on top of the collar in particular.

The Createx airbrush paint is very rugged, after heating it to set I can scratch it with my fingernail without removing paint. I still need to add a USAAF decal on the sleeve though.

Finished:
DSCN2877.jpg
DSCN2886.jpg


DSCN2898.jpg
DSCN2891.jpg


DSCN2874.jpg
DSCN2885.jpg


Trouble area...

DSCN2879.jpg
 

fishmeok

Vendor
Messages
759
Location
minneapolis
Thought some of you might find this interesting. I took some pics of the last practice piece as I made it. This is the bottom right corner, with the waistband and a shirt piece to represent the zipper.

First pic: The bottom of the right (non-windflap) side of the jacket is five pieces, the bottom leather piece, knit, liner, front panel, and zipper. This is the first step, sewing the knit to the bottom piece. Note that everything is constructed inside out, which is difficult to visualize until you do it several times. The knit is sewn onto the right side of the leather, with the wrong side up, and the presser foot set as light as it will go to prevent the knit riding up:
DSCN3127.jpg


This is what it looks like turned right side-out:
DSCN3128.jpg


Then the body to the bottom piece- again sewn right side to right side:
DSCN3130.jpg


Unfolded:
DSCN3131.jpg
DSCN3132.jpg


The liner is sewn on to the bottom piece in the same way- here shown wrong side up after completion. All the inside seam allowances are laid flat back against themselves, and I use a dab of glue to hold them in place. Note also the material removed from the seam allowance on top where the pieces join up. This area will fold back over itself, and if I don't trim them out it would be too bulky for my machine to handle.
DSCN3133.jpg


Next I fold the material face to face and place my fake zipper in- again since this is going to be turned rightside out the zipper has to be positioned so that the INNER edge is flush with the OUTER edge in the picture, or otherwise positioned as far as you want the zipper to stick out.
DSCN3135.jpg


The inner seam is sewn with the piece inside out, one stitch line from top to bottom. This is where the material pivots rightside out.
DSCN3136.jpg


(Continued)
 

fishmeok

Vendor
Messages
759
Location
minneapolis
(Continued)


And turned rightside out:
DSCN3138.jpg
DSCN3137.jpg


Last the top stitching. I sewed this with the leather side up- notice how it rolled under down by where all the pieces match up. Part of that is the light crappy leather I'm using, but most of it is a pure lack of skill. It's very difficult to keep the leather folded tight against the inside seam:
DSCN3147.jpg
DSCN3148.jpg

DSCN3142.jpg


Cheers
Mark
 

fishmeok

Vendor
Messages
759
Location
minneapolis
I recently picked up some nice and larger leather remnants to practice on. Also, some advice from John Chapman (Goodwear) about how to put an A-2 together, and a true industrial walking-needle sewing machine. As you can see I'm still having trouble with stitch length and sewing a straight friggin line, but it's coming together slowly...
Steps to put together the windflap side:
1) sew liner to the waist band, only 4 or 5 inches (the inside half of the waistband)
2) sew the zipper to the liner
3) Sew the zipper and liner to the windflap piece
4) Sew the windflap, liner, and knit piece to the outer jacket body- this is the hidden seam so the jacket is turned inside out
5) sew the outer topstitch
6) sew the inner topstitch line.

With the material cut out the above steps took me about an hour or so on my first try. The #@$%# pocket flap took me two days and about 8 practice pieces to get a decent one. I'm still having trouble with the outer topstitch seam (on the windflap) rolling under- it's difficult to keep the leather pulled tight while keeping both edges level. I also made the windflap too narrow, etc.

But that new leather sure smells good...

I kind of stumbled onto my new sewing machine, it's a 1923 Singer 78-3 industrial (originally meant for a treadle, it was made to sew medum weight car tops, tarps, awnings, etc.) that has been put into a modern table with a clutch motor. It's a walking needle machine- there are no feed dogs on the bottom, and the top presser foot is in two pieces, with walking and stationary parts. One half of the presser foot holds the material and the other has the needle hole. Both the walking foot and needle move together while the needle is through all layers of the material being sewed. It took some tuning but it is working well now, though I am still learning how to properly feed the material so I can keep the correct stitch length. I picked mine up for a song, but If I had about $600 I'd look for a singer 211G industrial. It's more modern, has top and bottom feeds, reverse, etc.

It makes a HUGE difference when you are trying to sew through several layers- the machine won't bog down trying to punch through the leather and the walking needle lets me concentrate more on making straight stitches and feeding the material instead of trying to force the machine to do something it isn't really made to do. Plus I can use the larger needles, etc. Though I was using a 16 size on the practice piece.


Cheers
Mark

DSCN3298.jpg
DSCN3296.jpg


DSCN3305.jpg
DSCN3301.jpg


DSCN3303.jpg
DSCN3300.jpg


DSCN3297.jpg
 

fishmeok

Vendor
Messages
759
Location
minneapolis
'm continuing my education with some old cheap jackets in the closet. This is a Willis & Geiger (the one in the post above is an Avirex) that I used to practice making and installing my first liner as well as the replacing knits and re-painting the jacket to resemble a depot re-spray. It turned out pretty well, but I had some serious problems getting the liner edges along the zipper correct because I had to use the original holes in the leather (plus I made the main body of the new liner too friggin short). I took pics during the process as will make a longer write up when I get the time...
Cheers
Mark

Before, with the crappy liner and knits removed.
DSCN3449.jpg


After: new liner, knits, and paint...

DSCN3552.jpg


DSCN3527.jpg


DSCN3530.jpg


DSCN3536.jpg
 

The Wingnut

One Too Many
Messages
1,711
Location
.
Mark, you're doing GREAT! Keep working at this...you'll know you've arrived when you can put together an A-2 from raw materials. In the meantime, take on some repair work once you're confident you can do it.
 

kampkatz

Practically Family
Messages
715
Location
Central Pennsylvania
Impressive. If you happen to attend the Reading Airshow WW2 Weekend, (this weekend)please bring your handiwork. It would be appreciated, surely by us jacket fans.
 

fishmeok

Vendor
Messages
759
Location
minneapolis
I'd love to go to Reading, but I'm in Minnesota...

I need to spend some more quality time on pocket flaps and epaulets, then I will try my hand at a complete jacket.

As far as hobbies go this is time consuming but rewarding- 'specially now that I'm a little burned out on cars and motorcycles and aircraft.
Cheers
Mark
 

fishmeok

Vendor
Messages
759
Location
minneapolis
This is kind of interesting- to see how the finish I airbrushed on the W&G would hold up under extreme conditions I threw it into my environmental test chamber, also known as the washer. I'm disappointed that so much of the finish came off, but it did turn out pretty nifty. I think a coat of something to tone down the differences and it will look fairly close to a very worn example of the genuine item.
Cheers
Mark

DSCN3556.jpg


DSCN3558.jpg


DSCN3561.jpg


DSCN3560.jpg
 

fishmeok

Vendor
Messages
759
Location
minneapolis
The Willis&Geiger is officially finished. I toned down the wear and re-stitched some. Also added the hanger (done with semi-original color leather as that part would probably not be spray-dyed) and re-sewed the label. I think it turned out pretty well, though I am still not satisfied with some of the liner stitching. This jacket is a modern 44, but it's a little tight in the shoulders and uncomfortable with anything other than a t-shirt or light shirt on underneath. When we get tired of wearing it it will probably go up on e-bay to fund still more projects. I like the cut, but it has a ridiculously big collar stand and kind of an Elvis Vegas jumpsuit collar thing going on if I don't wear it open and unsnapped.
Cheers
Mark

DSCN3608.jpg


DSCN3606.jpg


DSCN3642.jpg


DSCN3641.jpg


DSCN3616.jpg


DSCN3629.jpg


DSCN3651.jpg


DSCN3649.jpg


DSCN3631.jpg


DSCN3637.jpg
 

Forum statistics

Threads
107,561
Messages
3,040,396
Members
52,925
Latest member
shiny hats
Top