Want to buy or sell something? Check the classifieds
  • The Fedora Lounge is supported in part by commission earning affiliate links sitewide. Please support us by using them. You may learn more here.

Restoring my Grandmother's Singer Sewing Machine

59Lark

Practically Family
Messages
567
Location
Ontario, Canada
Jangas; I have about 80 years worth of manuals, parts chart and dating info in about two filing cabinets in my cellar. I have been fixing singer since I was 18 and now am 48. The charts are fairly acurate but the badge is a true teller, as every product that went out that year from commerical bag stitcher to home machines had that badge, that was big party for them and they were proud. They just celebrated again this year 160 with a anniversy machine made by jaguar internation corp made in hanio, VM. Not the same as Kilbowie. The company is a pale shadow today of what it was, ruined by corporate greed and corporate raiding and theives running the company. 59LARK
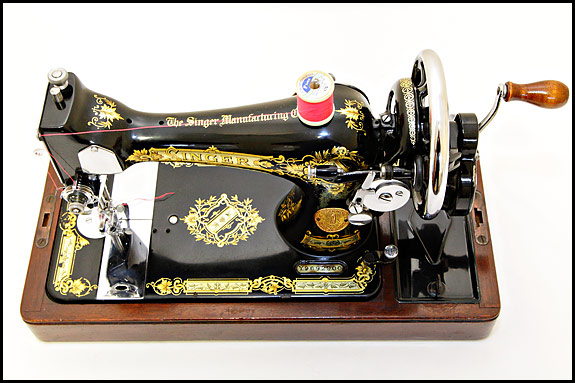
 

Shangas

I'll Lock Up
Messages
6,116
Location
Melbourne, Australia
Hi Lark,

Yes I've seen the "Singer 160" as it's called. I dunno...It has no...It looks like a paperweight, to be honest. It's all cheap plastic junk as far as I'm concerned. I'm used to handling things of substance (gran's Singer has about 31 pounds, 4oz of substance!), and the 160 looks cheap.

Thanks for your background with regards to Singers. It's nice to know that what you're telling me is from decades of experience.

STILL waiting for that plate to arrive. It'll be exactly two weeks, tomorrow, since it was ordered, and it still ain't here yet.

In the meantime, I'm fiddling around with the Singer, playing with it, using it, learning how to handle the beast and get the best out of it. Making a new backing for my old waistcoat was the first big, all machine-made project that I did for this machine. I finished it all today:

IMG_1054.jpg


It ain't perfect, and some of the stitches are a bit wonky, but everyone I've shown it to has been very impresed. It's important to keep the machine running to stop the oil from coagulating, so that's what I'm doing until I get the plate and the other accessories that I want. I expect all those things by the end of the week. With any luck.
 

Shangas

I'll Lock Up
Messages
6,116
Location
Melbourne, Australia
The plate arrived this afternoon!

Previously...

IMG_1029.jpg


...Now...

IMG_1058.jpg


Yes, it has a matte-finish instead of the traditional polished finish, as Lark said it would (and which I already knew when I purchased it), but with reproductions, you can't be picky. In most cases, you should be grateful that they exist at all!

The complete machine!

IMG_1064.jpg


It was a bit stiff in the sliding action, so I squirted some oil on it. It's moving nice and smoothly now.
 
Last edited:

Drappa

One Too Many
Messages
1,141
Location
Hampshire, UK
What a great story!
I got given a handcrank Singer by my husband's great aunt and it has been dated to 1903. It's currently sat in my sewing room and I have been too afraid to try and restore it myself, but you've inspired me.
I'm sure your grandmother would be very happy to know you value her trusty machine so much. My grandmother had a foot pedal Singer on a table, but living abroad I couldn't take it and my aunt has since gotten rid of it, which I really regret.
 

Shangas

I'll Lock Up
Messages
6,116
Location
Melbourne, Australia
Hi Drappa.

Restoring these old machines isn't that hard. They're quite tough and so long as you don't do anything abundantly stupid, they'll forgive you.

If you want to restore your machine to running order, you will need (this is what I used to restore my machine):

- Long, thin, needle-nosed tweezers/pliers. These are for picking out fluff and crud and dust and thread in hard-to-reach places.

- Tissues or toilet-paper. This is to wipe, clean and polish things.

- Water. To help in the above.

- A powerful torch/flashlight. Not everything is visible to the naked eye. Enhancement is useful.

- Patience.

- A copy of the original manual (or the original original manual!). Not necessary (I managed to fix the machine without it), but probably handy nonetheless.

- OIL. You'll need good-quality sewing-machine oil, not just any old crap. I used SuperLube oil, which has amany household applications (including sewing-machines, as was listed clearly on the label). But I believe you can also buy Singer-specific machine-oil.

To clean the machine, you need to pull apart everything that you can pull apart, and clean it, defluff it, clean it, oil it and put it back together. Best to do ONE part of the machine at a time. So perhaps one day, do the bobbin area, next day do the needle-bar area, the next day, do the handwheel area, and so-on. Don't rush and don't worry.

I'm not sure about your machine, but an important tip, if you see red felt anywhere...like in this photo, which I took:

IMG_0985.jpg


LEAVE IT ALONE!!!

The red felt is your friend. It's supposed to be there, to help lubricate the machine. So don't touch it, or horrible things will happen.

Once you've cleaned everything, you just need to oil it. Wisdom says - Oil everything that moves. Since your machine is over a hundred years old (yay!), it may need more oil than usual. Just keep squirting it on, and letting it settle in, and then working the crank slowly to encourage the machine to move.

If the machine doesn't move, then (provided it ain't actually broken...unlikely, these machines were built like tanks!) it just needs more oil. Don't worry about putting too much oil in - better too much than too little.

Also, it's advisable to give the machine a thorough polishing. This not only makes it look bloody awesome, but it also prevents rusting.

I'd hazard a guess that your Singer is an old Model 28 variety (also came in designations of 128, and 28k). It probably looks like this?

dpp_447.jpg


Those use an old revolving 'shuttle'-style bobbin. You fill the bobbin, load it into the shuttle, which looks like this:

127%252C%2B128%2Bshuttle%2Band%2Bbobbin%2B54504.jpg


And then you load the whole shuttle (with bobbin inside it), into the little revolving bracket inside the bobbin-area. When the machine's running, the whole thing spins around and around like one of those fairground rides. Every time it passes under the needleplate, the hook catches the thread and creates a lockstitch.

A note on oiling.

Sewing-machines have special oiling-holes. You can see two in that photo of the hand-cranked Model 28 (they're to the left of the "The Singer Manufacturing Co" lettering on the machine-head). These holes are there to distribute oil into the interior of the machine, to lubricate inaccessible places.

Squirt oil down those holes, where-ever you find them. But make sure you suck out any crud inside them, first, just in case. You don't want dead centipedes being crushed up by the crankshaft when it starts running...

If you decide to embark on this venture, let me know, and I'll try my best to help. Doubtless, the Lounge's resident Singer Man, 59Lark, will have a few things to say about this.

EDIT EDIT EDIT EDIT EDIT​

Now that the machine is essentially complete, here's some nice little arty photos to show it off:

IMG_1082.jpg


IMG_1085.jpg


IMG_1086.jpg


IMG_1088.jpg


IMG_1095.jpg


IMG_1094.jpg


IMG_1091.jpg
 
Last edited:

Shangas

I'll Lock Up
Messages
6,116
Location
Melbourne, Australia
Thanks. The last things I need are the attachments and accessories (a buttonholer might be nice), and then I'll be done. I wish I could find my grandmother's old cloth-shears, but they're long-gone. I remember that they were big, black, shiny steel, about a foot long, and they could chop your fingers off...
 

I Adore Film Noir

A-List Customer
Messages
480
Location
U.S.A.
Thanks. The last things I need are the attachments and accessories (a buttonholer might be nice), and then I'll be done. I wish I could find my grandmother's old cloth-shears, but they're long-gone. I remember that they were big, black, shiny steel, about a foot long, and they could chop your fingers off...

Did they look like this pair of Compton U Set? I have a pair inherited from Mama. Man, they'll cut through denim like a hot knife through butter.

images
 

Bluebird Marsha

A-List Customer
Messages
377
Location
Nashville- well, close enough
That's a beautiful machine, and you've done an inspirational job in restoring it. My Singer is, I believe, a Featherweight. It's very similar to yours, but I believe it's from the 40's. I can preach about the sturdiness of these machines all day. My Grandmother was great at sewing, but lousy at maintenance. One time we were making ruffles, and the machine started SMOKING! She said we should let it cool off for a few minutes, squirt some oil on it, and start up again. And we did with no problem. I can say that the ruffler attachment is a heck of a lot of fun.

I once sewed through two layers of canvass with that darling. I just had to slow down a bit. You couldn't pay me to get a new machine. And I really should do some maintenance myself.
 

Shangas

I'll Lock Up
Messages
6,116
Location
Melbourne, Australia
Hah. My grandmother wasn't much one for maintenance either. She was this machine's ONLY owner, and it was absolutely filthy when I was pulling it apart to clean it. I doubt she ever had it serviced or anything, in her life.

Sewing the manual together was probably the toughest thing that machine's ever done. I had to work the first stitch through by hand. But once the machine got a bite on it, it chomped through the rest. The foot-tension was a bit too light, but otherwise it made pretty light work of it. But I suspect that chewing through an instruction-manual was about the upper-limits of its operational use. I reckon it would've been easier to do heavier sewing like that with a hand-cranked machine, since it relies purely on muscles, which you can increase or decrease according to your own desire. Electrical machines will only go so far...
 

Bluebird Marsha

A-List Customer
Messages
377
Location
Nashville- well, close enough
Fortunately Granny had it serviced regularly over 50+ years. She was also the only owner. AND my granddad had great mechanical skills. So it has been fairly well maintained. Which is a good thing, because it was in constant use for clothes and household stuff (curtains, pillows, doll clothes :) ) Some of the gold paint is worn a bit.

Technically, there may still be a bit of her DNA in it. She ran her finger through TWICE getting in too big a hurry. Granddaddy was also handy with needle nosed pliers-pulling out the needles. It was a good warning for a ten year old. Get in a hurry, we'll pull the needle out with pliers. And they weren't joking. They were great!
 

Shangas

I'll Lock Up
Messages
6,116
Location
Melbourne, Australia
If anyone can help me, I'd appreciate it.

At the flea market today, I acquired this doohicky.

dpp_224.jpg


Not exactly THAT doohickey, but one identical to it.

I know this much about it:

It is a Singer buttonholer. Part No. 86718.

It came complete with the red box, the feed-dog plate, and the various nuts and doodads that hold it onto the machine.

It fits my machine (it took me a while to see how it all latches on, but I got it now).

The only thing I haven't figured out...

...is how it works. So far, all I'm getting is...crap, basically.

Do any of the vintage sewing/dressmaking/seamstresses/sewing-machine afficianadoes on the forum know how this thing works and how to make the best use of it?

Unfortunately, unlike the example in the photo, the one which I purchased doesn't come with a manual, and I don't know where I can find one online for free.

Fortunately, I haven't *purchased* this thing yet. The lady at the flea-market suggested that I take it home and see if I can use it first. If I can figure out how to use it, and if I decide I want it, then I can keep it, and pay her the money when I return to the market next week. Or if I don't want it, then I can just take the buttonholer back to her next week.

But I would like to know how this thing works...Help, please!
 

59Lark

Practically Family
Messages
567
Location
Ontario, Canada
Shangas; first the dating system has its flaws, and the people in tn, usa at the warehouse dont know anything? Low wages and cheap properties for leasing is why singer is there, not vast experience. The one lady that I spoke there held a full time job at singer and work two part time jobs too make a go of it. There were machine that sat in the warehouse for a long time, there charts that werent exactly correct and I was told anymade in 51 had the badge, I believe your machine was late enough to be in the 51 numbers but not quite to badge as a 51. Secondly the buttonholer is not exactly like the ones we sell used, IT looks like a cross between the really old ones that didnt take templates and the newer ones that did take lead and then later plastic templates, the long screw is for holding the gadget one where normally your foot attaches. The plate is for covering the feed dogs ie the teeth that move the fabric, the buttonholer will move the fabric only, swinging the fabric back and forth to zig zag a buttonhole. Instead of a template, it probably has width and bite adjustments, bite is wide and narrow, the part with the long adjust is probably for the length of the buttonhole and the fork to drive it attachments on the needle clamp. The big knob turns it to the starting point a red mark at the back. Make sure the fabric you are trying this one, has some stability fairly stiff or put interfacing inbetween for stability. 59LARK.
 

Shangas

I'll Lock Up
Messages
6,116
Location
Melbourne, Australia
Hi Lark, thanks for the reply.

It's a simple, zigzag-buttonholer, without any templates. It has two screw-knobs on it that say "BIGHT" and "SPACE".

It's setting these correctly that I'm trying to learn how to do...
 

59Lark

Practically Family
Messages
567
Location
Ontario, Canada
I would guess bite is the width how wide you the side stitches too be and space is the length of the buttonhole,but you know in 30 years and I Have had bushel baskets of buttoholes , none has looked like that. Different country different product, also check that the parts inside move freely and they might need a drop of singer oil , anything sits for 30 years can gum up and seize up. There were many such attachments such as zig zagger, blind stitcher, hemstitcher, picot edger, pinker attachment etc. IF get right into this you could go wild, depending on your budget 59Lark
 

Shangas

I'll Lock Up
Messages
6,116
Location
Melbourne, Australia
Hi Lark,

I've pulled the cover off it and cleaned it and dropped some oil into it. But I'm still trying to figure out how it works!

The needle-thread keeps snapping, and keeps bunching up on the underside of the buttonhole. I don't know why. I've tried setting the thread-tension to every conceivable level but it keeps snapping...
 

59Lark

Practically Family
Messages
567
Location
Ontario, Canada
When the pressure foot , the bar you attach your foot or the buttonholer too, is up the tension is released and will make a mess, make sure the lever at the back that raises the foot is down. make sure the feed cover plate is lined up with the needle to the hole for the needle to go through. make sure you starting at the back of the foot at the red line, make sure the driving fork in on the needle bar clamp. Try some of this and see. 59LARK. PS had a step brother that lived in kurrajohn new south wales , he was a textile expert that famous dingo trial they made into a movie, he proved it was dingo teeth that tore the fabric not scissors. He made up hundreds of bags with bait and drop them in the outback and came back and collected the samples and proved it. Small world isnt it. 59LARK.
 

Forum statistics

Threads
107,395
Messages
3,036,031
Members
52,813
Latest member
ThomW
Top