Want to buy or sell something? Check the classifieds
  • The Fedora Lounge is supported in part by commission earning affiliate links sitewide. Please support us by using them. You may learn more here.

Zipper repair of the thread behind the male insertion pin

Leather Walker

Practically Family
Messages
585
Location
Barcelona
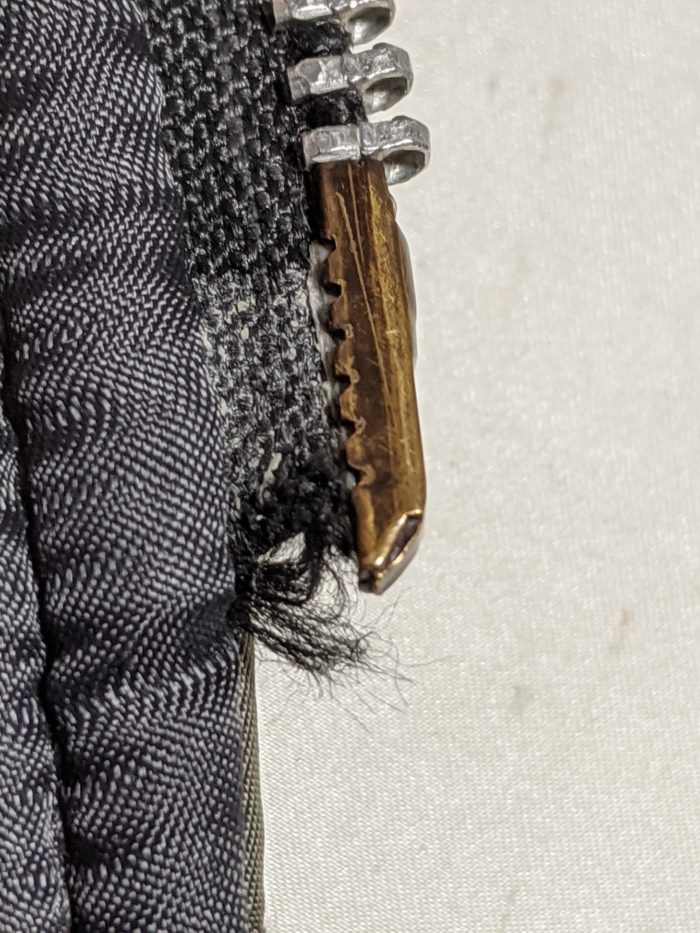
Well... I guess better late than never. I've been a little fixated these last two weeks on this common issue with zippers. After @Raul threat about his Grais jacket (he had to replace half Conmar), I was thinking how hard is to get a unique solution for this problem. For me, replacement is not an option (only in critical cases). I don't like the idea of sending a 50 or 60 yo jacket to someone who will remove a functional zipper and pierce the hide with new holes to install the new one. It's a shame throwing a vintage zipper away just because of a fraying part which is fixable.

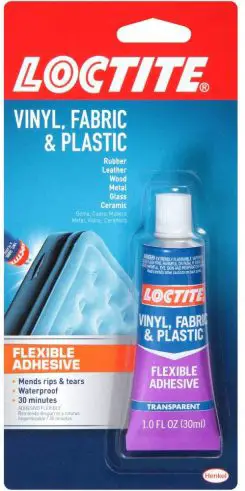
I've spent some time looking for "how to fix a zipper pin" or similar in English, Spanish, German, even in Chinese, Russian (1 and 2) and Japanese. I found hot glue/epoxy/bondic solutions too. IMO these wouldn't be the best, not only for the visual result but its texture: glue restrains the slider movement and makes it hard to zip up/down. This girl shows a different way: glue for fabric to repair the frayed tape and plastic from a blister pills as reinforced film. I think it's a clever idea but the plastic must be stiff and thin enough to fit into slider space with the restored fabric and the other side plastic. Opened zippers are protected with heat sealed tape in factories by ultrasonic machines, but for home options, a piece of stiff thin plastic film could avoid a whole replacement.

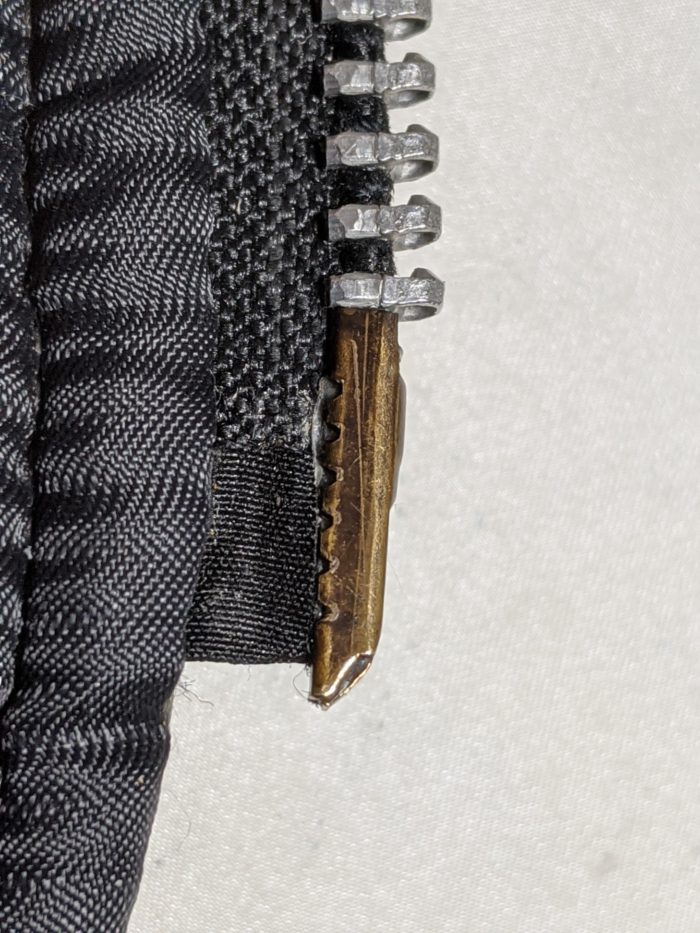
I fixed my jacket 4 years ago sewing frayed tape itself and using some nail lacquer to stiffen it. It worked, my jacket zips nowadays with no problem. I didn't think on gluing a thin plastic film around the tape to protect the fabric from a possible future damage, maybe I should have.

Anyway, I want to tell I purchased this sealant that prevents fraying, so I put some of this on the tape around zipper pins on my jackets. All I can say is the fabric has become solid and stiff, as a reinforced film. I'm not saying that's a definitive solution but a preventive one.
 

Leather Walker

Practically Family
Messages
585
Location
Barcelona
Spending a few time of my vacation, I've looked for more ideas to combat this problem. I found this Tokyo workshop site where the staff fixed this issue, apparently. They don't explain how to do it, but based on pictures, I'd say a little piece of self-adhesive nylon clothing was used around the problematic area. I wonder if it will resist for long in the place.

IMG_20200123_153406-1944x1458-1-700x933-1.jpg


IMG_20200123_153642-1458x1944-1-700x933-1.jpg
 
Last edited:

navetsea

I'll Lock Up
Messages
6,711
Location
East Java
61mw-DCBHzL._AC_SY741_.jpg


how about stay flexible superglue like loctite gel super glue,
download (2).jpg

I think I would prepare a half cut 3M scotch tape ready I like 3M magic tape since the surface is matte and it is thick like vellum paper ( I think the width of the affected area is roughly half the width of scotch tape, so I will cut probably 2,5cm or 1" long scotch tape, then cut in half, stick half the length from the back and arrange the fraying neatly with toothpick, press it to the glue of the scotch tape to set it, and then drop single drop of flexible quick glue over the fraying tape(the gel version to not getting messy) spread it evenly this gel version is more control able I think you can spread it neatly with toothpick , cover the glued part with the remaining of the scotch tape, then press it around with the blunt end of the toothpick or a thin jawed pliers to flatten them and to force the glue to penetrate deeper into the tape, all the way to the otherside to the scotch tape backing, weld them together with frayed tape sandwiched in the middle. flexible super glue will not crack with movement once dry unlike normal superglue that goes brittle.
 
Last edited:

Leather Walker

Practically Family
Messages
585
Location
Barcelona
Good idea! Despite I'm not familiar with superglue gel, I know the normal one tend to generate heat that may burn the fibers. Btw, Loctite has this flexible adhesive for vinyl, fabric & plastic but I'm not sure if this will stick scotch tape to fabric.
loctite-fabric-and-plastic-glue-e1597930300254.jpg


Anyway, before using any product on a functional valuable zipper, I do recommend testing it on something worthless to check the result.

The way that reinforcement film is set on zippers causes the fraying process through years of use. The film doesn't cover the underside of the tape, exposing it to constant friction with the retainer box. Setting it like an 'U' (covering the underside) would prevent fraying.
 
Messages
10,989
Location
SoCal
Good thinking, guys! I have recently received some “fray check” and I’ve been using it to repair some of my favorite old shirts that are coming undone. I also found this stuff at the fabric store:
E2A6EB60-FD6D-45A6-85C7-9F32EBA9CDD4.jpeg
you need to iron it on, but maybe one could use a soldering iron or something else for a heat source.
 

navetsea

I'll Lock Up
Messages
6,711
Location
East Java
The way that reinforcement film is set on zippers causes the fraying process through years of use. The film doesn't cover the underside of the tape, exposing it to constant friction with the retainer box. Setting it like an 'U' (covering the underside) would prevent fraying.
exactly, Thts what I mean, stick the back part first half the length, and glue, then fold the left over to the front
 

navetsea

I'll Lock Up
Messages
6,711
Location
East Java
Good thinking, guys! I have recently received some “fray check” and I’ve been using it to repair some of my favorite old shirts that are coming undone. I also found this stuff at the fabric store:
View attachment 353745
you need to iron it on, but maybe one could use a soldering iron or something else for a heat source.
I wonder if something like that available here, I have a grayish blue semi fraying zipper tape, already mended once few years back, before I knew about flexible glue, used normal superglue, and it cracked now, and soon need to be reapaired again
 

TooManyHatsOnlyOneHead

Call Me a Cab
Messages
2,273
the problem with adding anything to the fraying material is it increases the thickness. Just remember you still have to be able to insert the pin which actually includes some of that material outside the metal part. I discovered this the hard way when adding a big glob of glue as an experiment. Luckily I was able to sand down and get it to fit back in, but boy that was a lot of work.

Most zippers are going to be standard size (#5, #10, etc.). Your best bet is to match the male side and replace the whole thing. I've done it on 3 or 4 vintage jackets now. The only issue is you obviously can't match 40 years of patina with a new zipper. But since it's the male side and not the actually showpiece head, most of it is hidden in the welt best case.

It is crazy in this day and age where you can carry all the knowledge in the world literally in the palm of your hand, there doesn't seem a way to fix a zipper. Although that shot from @Leather Walker looks pretty damn good. It's probably a variation of that drawing, where the new material is being reinserted into the actual pin, so the thickness remains the same.
 

Leather Walker

Practically Family
Messages
585
Location
Barcelona
Yesterday I took this LL Bean flight jacket for a steal. Overall is nice, except for the Scovill zipper: lack of pull tab and ripped tape behind the insertion.

Ok, today I've decided to fix both problems at once, so I've removed a brass paper-clip puller from a zipper that I bought months ago in a flea market, and I've installed it to the Scovill slider.
1636317485344.jpeg


Let's focus on the frayed tape behind the insertion pin. You'll see the full repair here:
1636317302347.jpg


Material needed:
- Cloth tape.
- Glue for fabric.
- Screwdriver.
- Pliers.
- Fray check (sealant).
- Patience and time.

Everybody has his/her own method, mine has been cutting a piece of black cloth tape as long as the insertion pin in order to cover the frayed part around the pin. To attach the tape I've simply used a common fabric glue BUT one step at a time, gluing the new part in small portions of the frayed tape, using the tip of a screwdriver to tighten the new tape prevent it from wrinkling inside. Step by step, I've surrounded all the insertion pin with this new cloth tape. Once glued and dried, I've used little pliers to press this new part. One of the difficult moment trying to fix this problem is adding thickness on the repaired part, because we don't have to forget that the slider of the zipper has a thin separation, so this space is for the cloth tape. If we add too much tape, we won't be able to zip up. Of course, the final step is applying some fray check, it will harden the cloth tape.

I've been about 2.5-3 hours doing it (leaving the glue dry up as I went along), so patience if you want to try this. Maybe I should have used brown cloth tape... but well, now this Scovill has risen!
 

TooManyHatsOnlyOneHead

Call Me a Cab
Messages
2,273
Yesterday I took this LL Bean flight jacket for a steal. Overall is nice, except for the Scovill zipper: lack of pull tab and ripped tape behind the insertion.

Ok, today I've decided to fix both problems at once, so I've removed a brass paper-clip puller from a zipper that I bought months ago in a flea market, and I've installed it to the Scovill slider.
View attachment 376696

Let's focus on the frayed tape behind the insertion pin. You'll see the full repair here:
View attachment 376697

Material needed:
- Cloth tape.
- Glue for fabric.
- Screwdriver.
- Pliers.
- Fray check (sealant).
- Patience and time.

Everybody has his/her own method, mine has been cutting a piece of black cloth tape as long as the insertion pin in order to cover the frayed part around the pin. To attach the tape I've simply used a common fabric glue BUT one step at a time, gluing the new part in small portions of the frayed tape, using the tip of a screwdriver to tighten the new tape prevent it from wrinkling inside. Step by step, I've surrounded all the insertion pin with this new cloth tape. Once glued and dried, I've used little pliers to press this new part. One of the difficult moment trying to fix this problem is adding thickness on the repaired part, because we don't have to forget that the slider of the zipper has a thin separation, so this space is for the cloth tape. If we add too much tape, we won't be able to zip up. Of course, the final step is applying some fray check, it will harden the cloth tape.

I've been about 2.5-3 hours doing it (leaving the glue dry up as I went along), so patience if you want to try this. Maybe I should have used brown cloth tape... but well, now this Scovill has risen!
Genius. So on the cloth tape, are you cramming that into the gap of the actual pin as well, or just by the shear amount of tape going up and down the whole length, it's staying put?

I've tried cleaning out the pin part to create that gap so you can slip something in (basically what that drawing suggested and then you would clamp shut), but jeez it was tedious. I felt like I was doing more damage by making the rip go further up since I had to put a lot of pressure on the pin to clean out.

I think your method is great if the separation hasn't gone too far up yet, maybe less than half to be safe or if the tear isn't right up against the pin, i.e. the cloth tape has something on both sides of it to grip. Certainly will stop it from getting worse. But like you said, you have to be careful the total depth doesn't exceed the receptor. With crazy glue I end up sanding down. With this cloth, if you go too far, how can you fix that?

Edit: The other thing I was thinking about, but it cant be this easy otherwise it would be done: is why can't you just cut off the pin, unstitch that part, and replace with a new pin and piece of tape for just that small section. There's a gap in between the pin and the 1st tooth, so I don't see why it has to be one continuous piece of tape that runs the whole line. I guess the tricky part is matching the pin maybe? Or maybe there won't be enough tape to provide enough strength to hold in over time? Or if it's not continuous, bigger chance of separation?
 
Last edited:
Messages
10,291
Yesterday I took this LL Bean flight jacket for a steal. Overall is nice, except for the Scovill zipper: lack of pull tab and ripped tape behind the insertion.

Ok, today I've decided to fix both problems at once, so I've removed a brass paper-clip puller from a zipper that I bought months ago in a flea market, and I've installed it to the Scovill slider.
View attachment 376696

Let's focus on the frayed tape behind the insertion pin. You'll see the full repair here:
View attachment 376697

Material needed:
- Cloth tape.
- Glue for fabric.
- Screwdriver.
- Pliers.
- Fray check (sealant).
- Patience and time.

Everybody has his/her own method, mine has been cutting a piece of black cloth tape as long as the insertion pin in order to cover the frayed part around the pin. To attach the tape I've simply used a common fabric glue BUT one step at a time, gluing the new part in small portions of the frayed tape, using the tip of a screwdriver to tighten the new tape prevent it from wrinkling inside. Step by step, I've surrounded all the insertion pin with this new cloth tape. Once glued and dried, I've used little pliers to press this new part. One of the difficult moment trying to fix this problem is adding thickness on the repaired part, because we don't have to forget that the slider of the zipper has a thin separation, so this space is for the cloth tape. If we add too much tape, we won't be able to zip up. Of course, the final step is applying some fray check, it will harden the cloth tape.

I've been about 2.5-3 hours doing it (leaving the glue dry up as I went along), so patience if you want to try this. Maybe I should have used brown cloth tape... but well, now this Scovill has risen!

Awesome. I’ve found Ripstop sail tape (for sails and kites) to work quite well too.
 

Leather Walker

Practically Family
Messages
585
Location
Barcelona
Now I realize that I didn't show the jacket. Is this one what was called "Flying Tiger"? Without L.L. Bean label. Brown goatskin, nylon lining and lambskin mouton collar. Cuffs and waistbands are intact. There are buttons behind the collar, and it comes with a strip of leather with 2 eyelets (to attach at the neck when it's zipped up?). Taken for almost nothing!

1636361646206.jpg
 

Leather Walker

Practically Family
Messages
585
Location
Barcelona
Genius. So on the cloth tape, are you cramming that into the gap of the actual pin as well, or just by the shear amount of tape going up and down the whole length, it's staying put?
Thank you! Before getting to work, I considered taking the pin out. As well as to unstitch the final part of the zipper from the jacket, but both options were too much laborious for me. Of course, if I had, I'd get a better result. Nevertheless, the glue used is hard, so the new tape stays in place firmly.

if the separation hasn't gone too far up yet, maybe less than half to be safe or if the tear isn't right up against the pin, i.e. the cloth tape has something on both sides of it to grip.
Exact, cloth tape on both sides, specially on the pin. If it wasn't, I'd had surely taken the pin out. I did that in my first repair 4 years ago.

why can't you just cut off the pin, unstitch that part, and replace with a new pin and piece of tape for just that small section. There's a gap in between the pin and the 1st tooth, so I don't see why it has to be one continuous piece of tape that runs the whole line.
I've seen videos on YT where people do that successfully on cheap overcoats, hoodies, jackets... They cut the messy section and stitch a clean part (pin included). I suppose if you put a layer of fabric glue along the replaced tape and the original, must be enough to provide strength.
 

Leather Walker

Practically Family
Messages
585
Location
Barcelona
Awesome. I’ve found Ripstop sail tape (for sails and kites) to work quite well too.
Amazing work by all nimble fingers.
Thank you! I considered to use iron-on adhesive tape, but there's no space there to iron without the risk of burning the leather. As it's said, if I'd have removed the zipper, just the final area, I'd have done better, because I'd use iron-on adhesive instead of fabric glue.
 

jonbuilder

My Mail is Forwarded Here
Messages
3,561
Location
Grass Valley CA Foothills
Edit: The other thing I was thinking about, but it cant be this easy otherwise it would be done: is why can't you just cut off the pin, unstitch that part, and replace with a new pin and piece of tape for just that small section. There's a gap in between the pin and the 1st tooth, so I don't see why it has to be one continuous piece of tape that runs the whole line. I guess the tricky part is matching the pin maybe? Or maybe there won't be enough tape to provide enough strength to hold in over time? Or if it's not continuous, bigger chance of separation?
I have his discussion with myself. i did not attempt this menthod. I tried a quick supper glue to the frayed section of tape. I got on glue onthe pin and the pin would not fit in the slider. The tape broke right where it insects into the pin and the pin is short. The break area entended about 2/3 of the pin length. I throw up my hand and send the jacket to Dena to see if she can source a male zip half for replacement. The zip is WWII and the jacket has a wonderful goatskin
 

TartuWolf

Practically Family
Messages
939
Location
Tartu, Estonia
Reviving an old but important thread!
Any ideas how much difference does it make whether you use the Prym fray check (or something similar) or super glue?
Some info online that I've found:

Fray Check vs Super Glue​

Superglue has a very strong adhesive hold on just about everything it touches. But one of the drawbacks to using this product on fabrics is that it tends to discolor the material and make it look like you used super glue instead of some other fray prevention technique.

From what we have read, fray Check does not do that and when it is dry it should remain clear so that no one will know that you used a glue product to hold your threads in place.

Also, both products can be hard to use as the bottles are so small and inevitably you will get some on your fingers. When that happens you have to stop what you are doing and clean your hands.

Both may have a strong odor to contend with as well. If you have a sensitive nose, super glue may not smell as bad as some sewers have claimed Fray Check has. Super glue won’t wash out nor will Fray Check so this will be a toss-up with the discoloration factor the deciding element.
If discoloration is the main drawback then it doesn't matter much as the area is black anyway.
1684761818866.png

1684761829626.png
 
Messages
17,153
Location
Chicago
Reviving an old but important thread!
Any ideas how much difference does it make whether you use the Prym fray check (or something similar) or super glue?
Some info online that I've found:

If discoloration is the main drawback then it doesn't matter much as the area is black anyway.
View attachment 519351
View attachment 519352
I wouldn't use super glue. If the fabric gets any fatter, it won't fit inside the pull. The zipper you have pictured looks pretty chewed up and also cheap, looks like a plastic male pin? In this case I would want to replace the entire male side and get rid of the cheapo plastic pin.
 

Leather Walker

Practically Family
Messages
585
Location
Barcelona
Reviving an old but important thread!
Any ideas how much difference does it make whether you use the Prym fray check (or something similar) or super glue?
Some info online that I've found:

If discoloration is the main drawback then it doesn't matter much as the area is black anyway.
View attachment 519351
View attachment 519352
In my early attempts to fix frayed zips, I used superglue. DON'T do it. The glue crystallize, no matter the quantity you put, and this makes the fibers break. And, as @ton312 says, the tape won't fit inside the slider.

I also added this repair of a Talon that may help you. Anyway, in your case, I'd remove this plastic pin, fix the frayed part with a piece of black fabric and would install a new metal pin from a donor zipper.
 

TartuWolf

Practically Family
Messages
939
Location
Tartu, Estonia
It's the infamous Vanson plastic zipper insert pin and zipper stop at the bottom..
Shame the seller did not disclose this information, but the price was good enough to be fair even with this issue.
Will see how I go about this..
Ideally, like you guys suggested, will replace the pin, fix the tape and install a new brass pin.
Although I would prefer to keep it simple and just fix the tape without replacing the pin for now.
Thank you @ton312 and @Leather Walker !
 

Forum statistics

Threads
107,269
Messages
3,032,658
Members
52,727
Latest member
j2points
Top