Want to buy or sell something? Check the classifieds
  • The Fedora Lounge is supported in part by commission earning affiliate links sitewide. Please support us by using them. You may learn more here.

My First Trouser Project

Annixter

Practically Family
Messages
783
Location
Up Yonder
I've been slowly progressing as a hobbyist "tailor" (the title used loosely here) for about three years now. I started off hand stitching to mend clothing, progressed to hemming trousers and sleeves by hand, and finally made my way to taking in shirt sides and letting out waistbands/seats on my first basic sewing machine about 8 months ago. I've been wanting to try my hand at actually constructing garments, but I haven't found the time to really dive into a project. Nick D's most recent suit project has inspired me to finally push ahead, so I figured I'd share my progress with you all, and I'm sure I'll need input from more experienced members once I get into the assembly and adjustment. I can only focus an hour or two a week on the project right now, so it will be slow going. Owning a pattern and David Coffin's book Making Trousers, I'm ready to have a go.

The Pattern:
It's an EvaDress 1940's trouser pattern no. 3988:
3988t.jpg

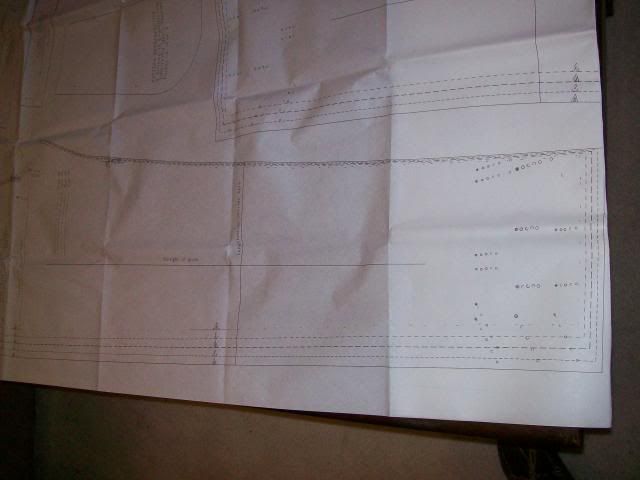
I pattern covers 32" to 38" but I'm a 30", so my first step was to grade it. I've never used a pattern let alone modified one. The cut-and-overlap method suggested by many online sources seemed pretty time-consuming for this pattern, and the vertical cut lines threatened to destroy some of the tailor's tack marks. I decided to rescale the pattern--I believe this process is called pattern shifting? I was able to get all the cut lines reduced, all the tack marks moved, and the pieces cut out in about 1.5 hours. I like the fact that I don't have vertical tape lines all over the place. I haven't adjusted the pattern for rise and inseam height yet because I'd like to make a muslin test piece first and then adjust from there. I haven't pressed the patter yet, so the pictures below make some of the straight cuts look wobbly.

Shifted hash marks and tack marks:
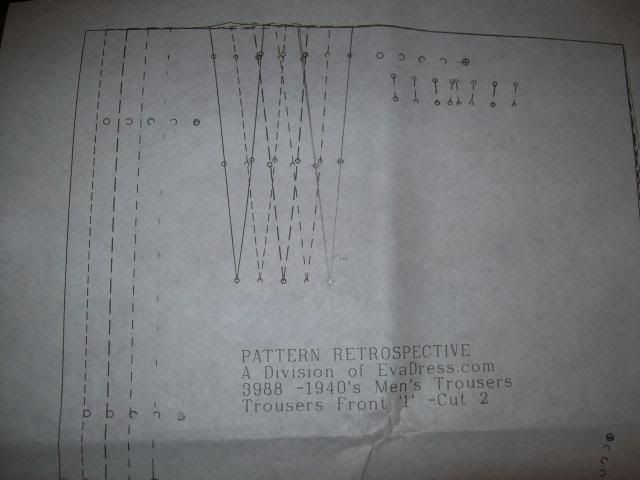
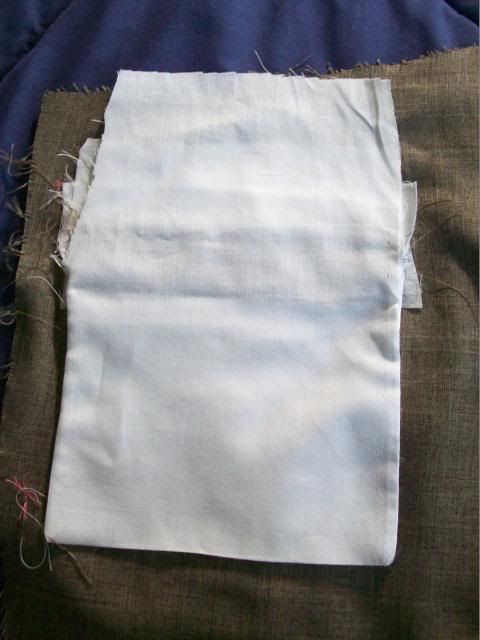
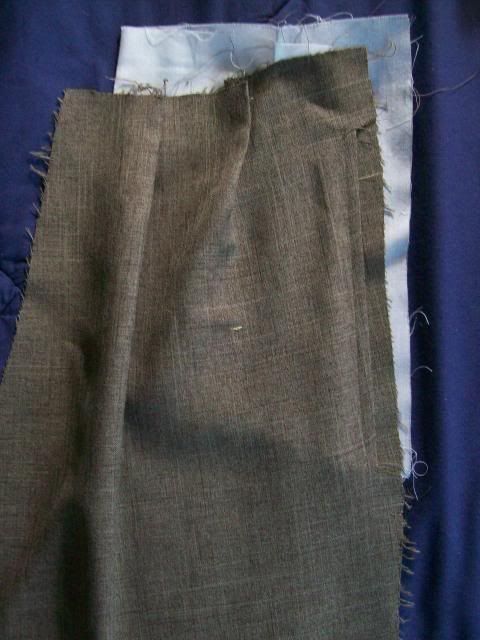


Finished patterns:


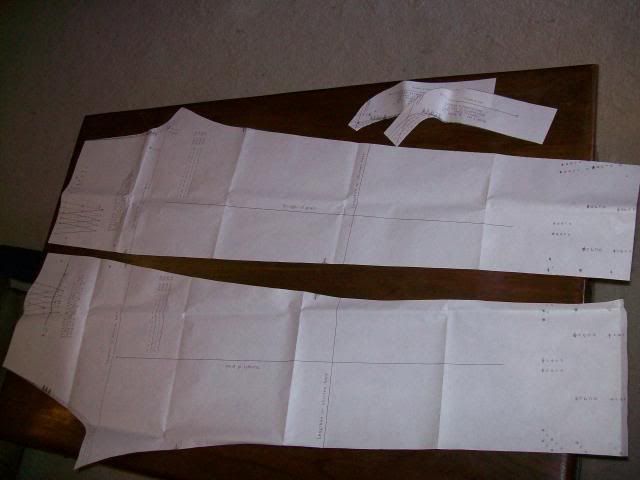
The next step will be getting some cheap muslin and cutting out the front and rears.
 

GBR

One of the Regulars
Messages
288
Location
UK
yeah, I mean 2 days is plenty long enough to make your first pair of trousers.:mmph: Give him some time, man.

Ah the American way of setting out dates back to front is unfortunate. 12/09/2013 means 12th September in English.
 

Annixter

Practically Family
Messages
783
Location
Up Yonder
No, far from finished. I've been adjusting the pattern a little, adding some outlets; I'm going to go with cut-on on-seam front pockets as opposed to the pattern's seamed-on. I'm going to go with a button fly as opposed to a zipper, so I'm reviewing that section of Making Trousers and its DVD as well. In general, I've been rereading before I cut anything to make sure I haven't missed something.

I did get around to purchasing the fabric this past week. The cheapest fabric I found in the discount section was this polyester suiting at $4 a yard along with some cheap cotton-poly blend for lining--I only need 1-5/8 yard of suiting, but I got 2 to be safe. I can always use the scraps for future pocket linings and fork stays. With my time so limited to work on the project, I've decided to forgo a muslin trial and simply learn on the suiting fabric--it's cheap enough, and I can use it to adjust the pattern.


Edward

Bartender
Messages
24,802
Location
London, UK
yes, I also prefer our ascending day/month/year system over the rather jumbled month/day/year. Aren't there also places that put the year first?

The Chinese do. If memory serves (it's been six months since I last filled in their immigration forms) they go year, month, day.
 

Annixter

Practically Family
Messages
783
Location
Up Yonder
In the past week, I've made good progress on the trousers. I have the fronts and backs cut out and the tailor's tacks in place. I have the cut-on side-seam pockets assembled and the four front pleats sewed up although not yet pressed. I'll post pictures this evening.

The first pocket took time, but the second went slightly quicker. I am not sure how the sandwiched seam allowances of the two layers of pocket lining and two layers of facing will finish in the seam at the pocket opening ends, but I'll deal with this when I get to that step. For future trouser projects, I need to lengthen the pocket vertically. I combined the original pattern and Coffin's pattern, but the pocket lining came up to short once I leave enough seam allowance to catch it in the waistband. As of now, it doesn't have much of a bag dipping under the bottom opening, so I have a feeling items will easily roll out when sitting.

I'm planning on tackling the back darts and one back pocket next. Overall, it's a pleasant experience.
 

Annixter

Practically Family
Messages
783
Location
Up Yonder
Here is one of the finished side-seam pockets (both are complete).


Today, I darted both back sections and completed the rear pocket. This turned out to be the most complicated part of the project so far. Having now gone through the process, I need to make a number of adjustments: I want to make the welt thinner; I need to do a better job keeping the welt taught when I baste the sides closed because it wrinkled on me; I need to slant the pocket sides inward at the bottom to where the bar tacks don't show with this flap; I need to widen the flap at the top and lengthen the upper seam allowance to better catch it in the top-stitching; and I need to keep the upper liner very taught while sewing shut the top of the pocket opening because the white liner peeks through on the outside. I've never done much top-stitching by hand before and never on a machine, so I felt like I was on a roll top-stitching the upper opening using the machine until the needle fell off the flap seam allowance on the right side, creating a bulge in my line. I suppose practice will help.


Nick, BK, or anyone else experienced in trouser making,
I'm not certain how the inside seam-allowance mess will finish since I'm not planning on lining the trousers aside from the waistband. Coffin doesn't really explain this from what I've found. Do you have advice for finishing the inside of the pocket around the opening if I'm not lining? Would shorter seam allowances to clean up the inside mess do the trick? Also, I only ran the outer pocket lining (the layer against the trouser fabric) an inch above the pocket opening. Would continuing that up into the waistband like the inner pocket lining help clean up things, or would that add too much bulk to the waistband?


Last edited:

Nick D

Call Me a Cab
Messages
2,166
Location
Upper Michigan
Nick, BK, or anyone else experienced in trouser making,
I'm not certain how the inside seam-allowance mess will finish since I'm not planning on lining the trousers aside from the waistband. Coffin doesn't really explain this from what I've found. Do you have advice for finishing the inside of the pocket around the opening if I'm not lining? Would shorter seam allowances to clean up the inside mess do the trick? Also, I only ran the outer pocket lining (the layer against the trouser fabric) an inch above the pocket opening. Would continuing that up into the waistband like the inner pocket lining help clean up things, or would that add too much bulk to the waistband?

Make the pocket bag wider, so that it covers the ends of the opening when finished. The inner part of the bag, against the back, only has to go to the opening, it's the outer part that you see that carries up to the waist, as you have it here. Widening the pocket bag will also give you more fabric to hem to finish the edge of the bag above the opening.
 

Nick D

Call Me a Cab
Messages
2,166
Location
Upper Michigan
The first pocket took time, but the second went slightly quicker. I am not sure how the sandwiched seam allowances of the two layers of pocket lining and two layers of facing will finish in the seam at the pocket opening ends, but I'll deal with this when I get to that step. For future trouser projects, I need to lengthen the pocket vertically. I combined the original pattern and Coffin's pattern, but the pocket lining came up to short once I leave enough seam allowance to catch it in the waistband. As of now, it doesn't have much of a bag dipping under the bottom opening, so I have a feeling items will easily roll out when sitting.

I always lengthen side pockets vertically, just because I like literally deep pockets. Finishing the edge of the pockets using Coffin's method is a little tricky but not as difficult as some vintage directions I've read. When joining the side seam, make sure the pocket bag doesn't get caught in the seam, by leaving the bag's bottom seam open a little below the facing so it can be folded out of the way, and then laid flat on the seam once it's pressed open. It can then be closed with a top stitch and the tack. Clear as mud ;) The edge of your pocket mouth looks good, I find this method of making pockets gives a better finish than most of the vintage bespoke trousers I've had.
 
You mean the mess at the top of this pocketbag? I would aim not to have the mess to begin with. Taller and wider pocketbags next time. Then the only messy bit is caught up in the waistband when you're finishing that up. For pockets, Poulin's is the best description/method I've seen. Very succinct, and successful results.

100_4012_zps33e3d55e.jpg


First things first, do something to stop the unraveling at the edges of your panels. Overcasting, by hand or machine is traditional. By hand takes a while, but the finish is worth it.
 

Annixter

Practically Family
Messages
783
Location
Up Yonder
BK, thanks for the input as well.

I will add that I've never before seen a trousers rear pocket made with a welt and flap. This above looks like a flapped jacket breast pocket whereas most flapped trousers pockets resemble more the "double jetted" and flapped jacket hip pockets..

The single welt and flap pocket I've made comes straight from Coffin's directions/photos. Because it was my first attempt at a pocket, I decided to 1. follow Coffin verbatim and 2. kill two birds with one stone, as in experiment with both a single welt and a flap. That being said, I don't particularly like the look I've created. I think a welt atop the flap, like Nick's below, looks better, and the flap and welt need to be shorter. I had to sneak down the flap because I messed up and didn't taper the pocket sides. Here's Nick's for example of what I'm going to try next time, which is what I believe you are suggesting:

tumblr_inline_mx7a8rx1jk1s1ca7u.jpg

For pockets, Poulin's is the best description/method I've seen. Very succinct, and successful results. . . .
First things first, do something to stop the unraveling at the edges of your panels. Overcasting, by hand or machine is traditional. By hand takes a while, but the finish is worth it.

Is Poulin's description in Tailoring Suits (1973), or is there an online scan of which you know?

Regarding the unraveling, it does annoy me because I'm more detail-oriented than the photos suggest, but I don't want to worry about it this time around because I'm not concerned with the longevity or inside finish of the trousers with them being my first attempt. I don't have much time to dedicate to the project, and I'd hate to produce mediocre pants with excellent overcasting. This time, I'd rather tackle the more difficult tasks of construction, like messing up pockets:D
 

Nick D

Call Me a Cab
Messages
2,166
Location
Upper Michigan
For the welts, either double or single, the distance from the slash of the opening to the seam is about 3/16" to 1/8". You can make the double welts according to Coffin and then slide the pocket flap in, which is what I do.

A tip for making the flap, make a paper mockup of the finished flap, no seam allowances, and slide it into the opening after the welts are sewn to check the fit. Then trace it on another piece of paper and add the seam allowances.
 

Annixter

Practically Family
Messages
783
Location
Up Yonder
Thanks. That's a good idea for the flap. I drew the pattern with seam allowances, which obviously didn't turn out as I had hoped.
 
When was the Coffin book produced? Nick, you make your back pockets with the big welt too?

The Poulin I have is the '52 edition which might have been updated for the '73. Cabrera is also quite good, I think. I had a copy from a library once and it seemed to be quite succinct. I think hbk uses Cabrera as his basic go-to book.

One thing I've noticed is that you don't seem to have much basting going on in your pictures. (To hold the pocketmouths shut, for example when moving on to the next step.) I've never measured it out, but I always end up with a huge pile of basting thread that's removed as the final step.

100_4006_zps3b5d1d96.jpg


Could you show a pic of the inside of the side pocket? I don't think you need to deepen the pocket, just alter how much allowance you're leaving at the top. I make the side pockets poke above the waist seam just 1/4-1/3". This is sufficient to secure in the waistband, the lingin of which will project approx 1/8" below this waist seam. What size is the pocketing you cut before starting to assemble? Poulin advises starting with a 14" square.
 
Last edited:

Forum statistics

Threads
107,342
Messages
3,034,470
Members
52,781
Latest member
DapperBran
Top